Cooler Master Maker 5 Chassis Review
Peter Donnell / 8 years ago
Introduction
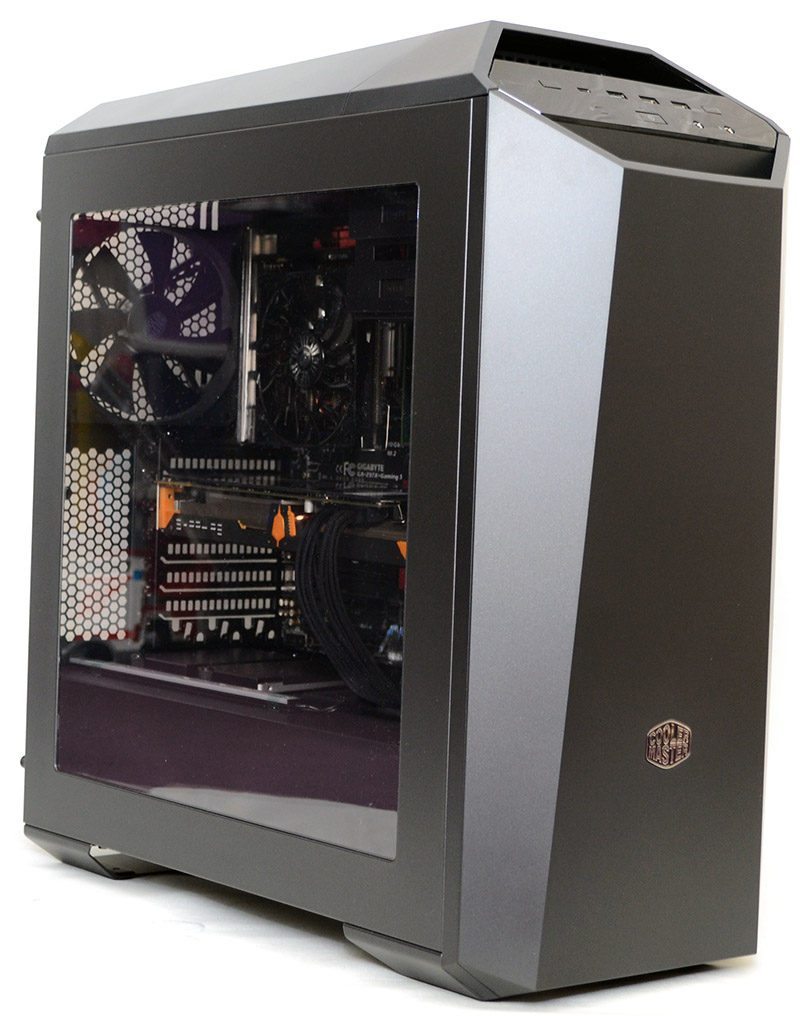
Today is a very special day here at eTeknix, not only for us but also for Cooler Master, who just revealed their new flagship chassis, the Cooler Master Maker 5, the latest and hopefully greatest incarnation of their reimagined “maker” series of products. Following on from the massively successful Master Case 5 and Master Case Pro 5, the latter of which we use for our own eTeknix office rig! The Maker series looks set to dial-up every aspect we loved about this chassis to 11; bigger, better, more features, and beyond!

“The external modularity allows easy expansion. MasterCase Maker 5 reveals a simple yet modern style with customization options such as a magnetic top cover with plate, a padded front door for sound suppression and an illuminated glossy I/O panel. The MasterCase Maker 5 advances beyond the concept of a standard build by offering the option to completely swap and readjust the case’s form and functionality with multiple interior and exterior outlooks, ample space and customized accessories.” – Cooler Master
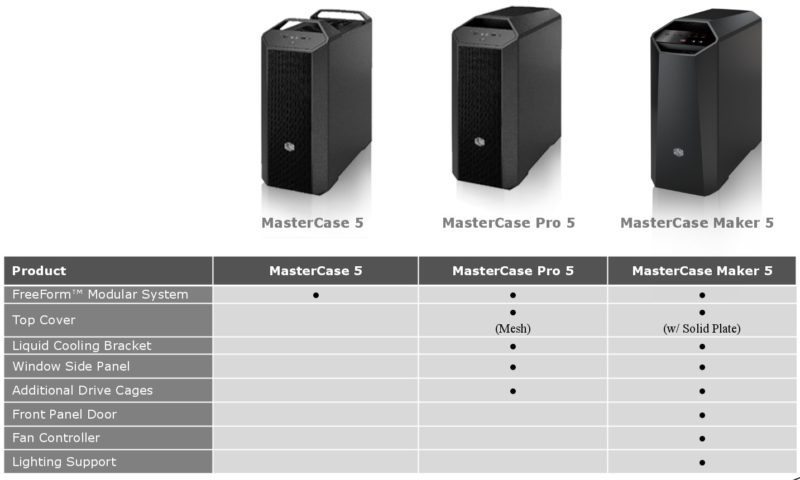
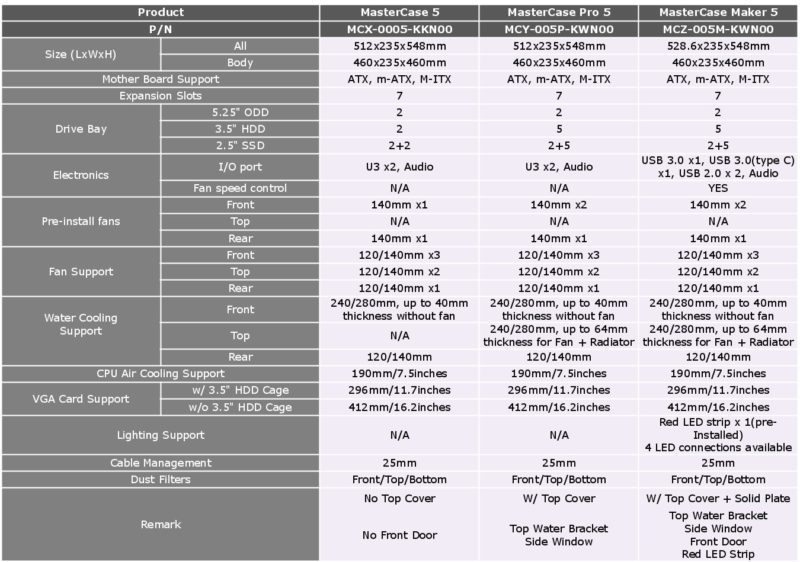
- Upgraded I/O – Four USB ports, including USB 3.0 Type C
- LED & Fan Control – Equipped with controller board supporting up to 6 fans and 4 LED strips
- Magnetic paneling – Front and top panels fit snugly with a magnetic grip
- Sound suppression – Padded front and top panels (with added plate) lower noise and balance airflow
The Maker is very well equipped, building upon what made the MasterCase and MasterCase Pro 5 so great, you’ll find extensive and highly modular support for air and water cooling, storage bays, cable management, air filtering, magnetic panel covers, side panel windows (including a glass window option) and so much more. With all that in mind, let’s open the box and take a closer look at what it has to offer!
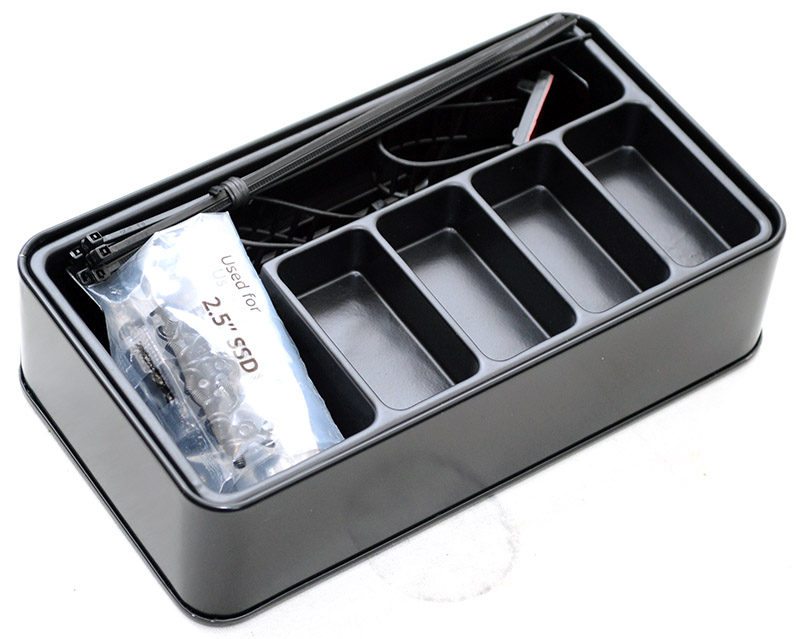
In the box, you’ll find a lovely component tin with a magnetic grip that allows you to fix it to a metal surface, keeping it in easy reach on your workbench. There’s a very nice Silencio FP 140mm PWM Red LED fan in the box too, which is cool, as well as all the usual documentation.
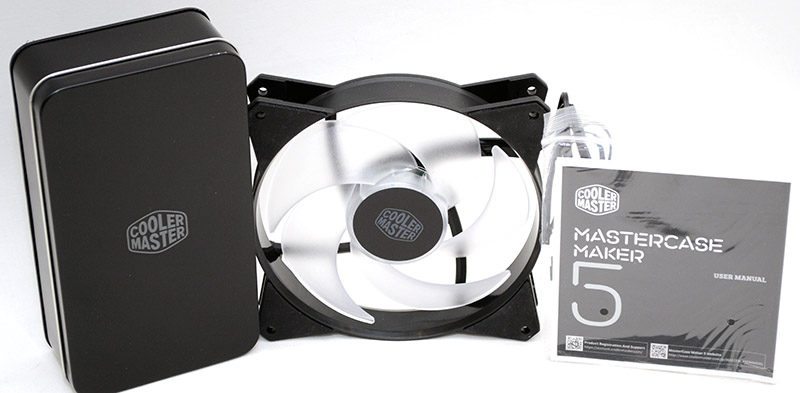
The little tin comes with all the cable ties and other accessories such as screws neatly packed away, and there are some trays for you to store excess screws as you work on your system build.
Exterior
The chassis is only just out of the box and we’re already really impressed with the design! It stands a little taller and a little longer than the stock Master Case, but fool thee not, as at its very heart, this is the same chassis! The base model of the Master Case 5 and the Pro version can be upgraded to the Maker via add-on parts, and this means that you can customise as much as you want, changing only the parts you want to make your own hybrid of the Master Case and the Maker!
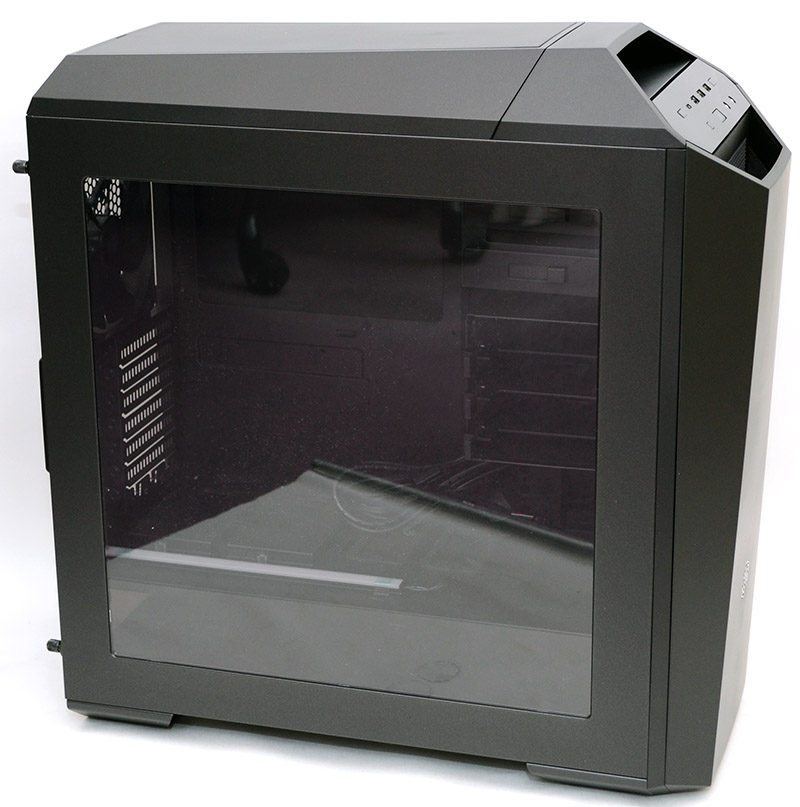
Down the left side, a huge side panel window with a mild tint, giving you a great way to show off your hardware and LED lighting.
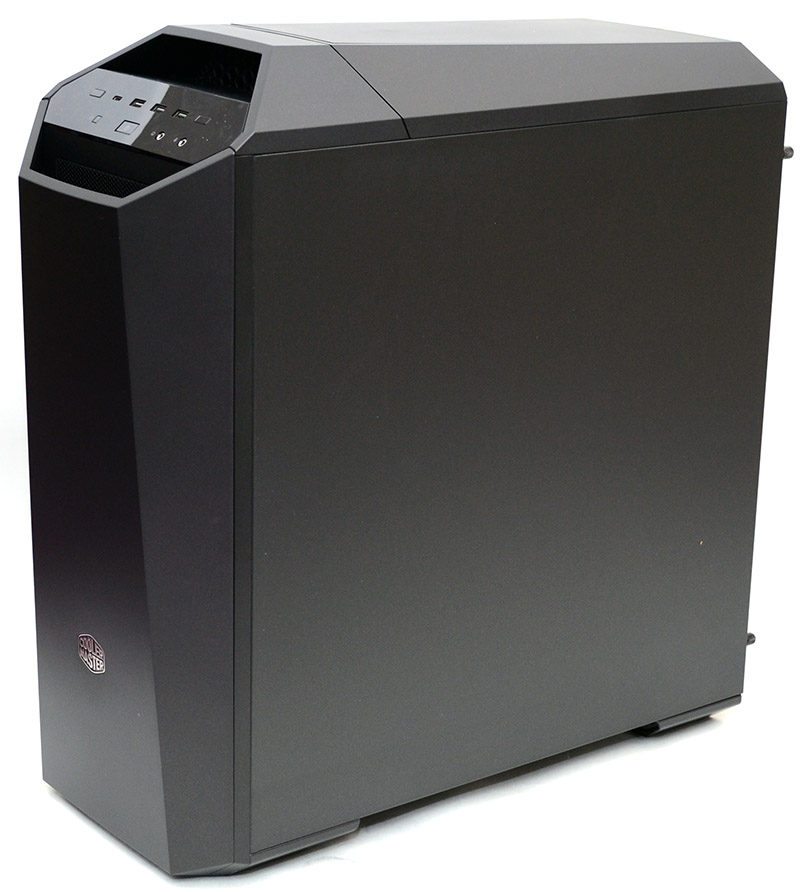
A thick and durable black panel on the right; both side panels are held in place by easily accessed thumb screws at the back of the chassis.
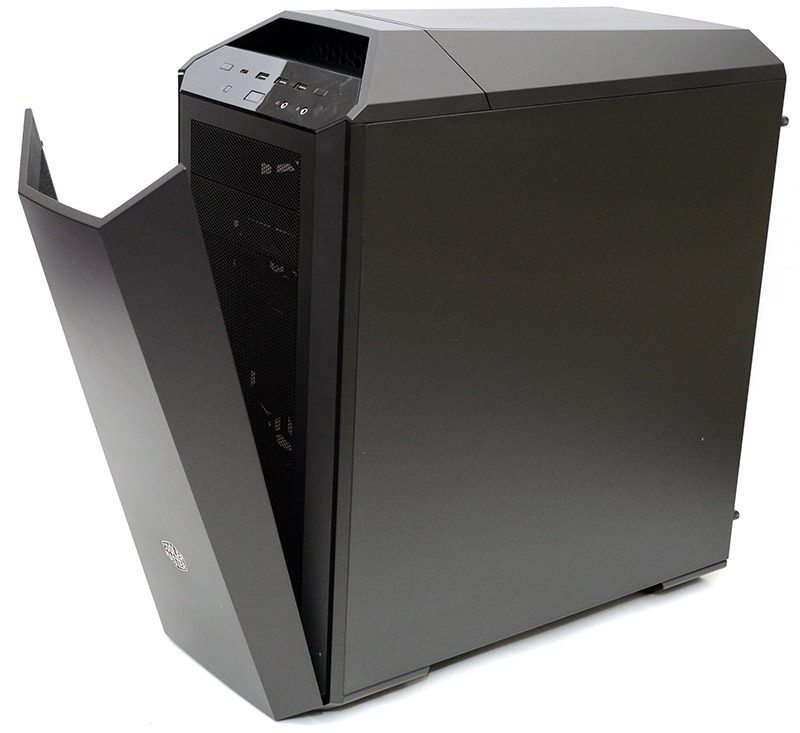
The front panel has been completely changed here, with a pull-down front cover that makes the chassis a little longer, but also giving it a focus on silence vs the open mesh of the previous models; it’s certainly stylish and gives it a very professional appearance.
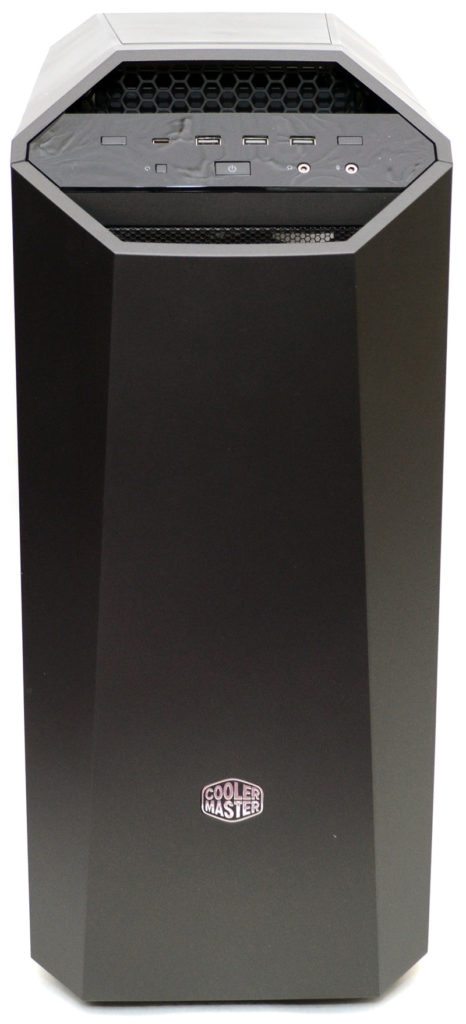
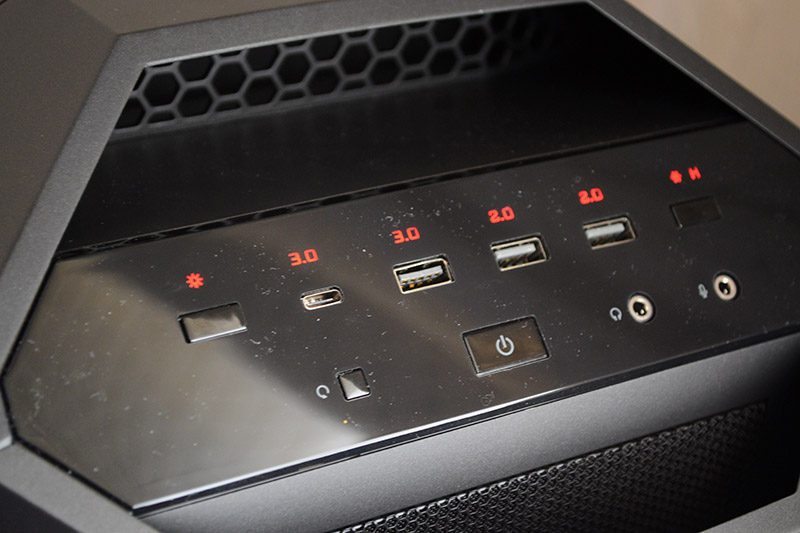
There’s a new I/O panel, as well as a taller and reshaped top section, helping further match the design of the new front panel. There are all the usual USB ports here, but one worth note is the Type-C connector, as well as a button on the left and right, which will be for fan speed and LED lighting control. There’s another trick to the front panel too, but we’ll be showing you that later in the review!
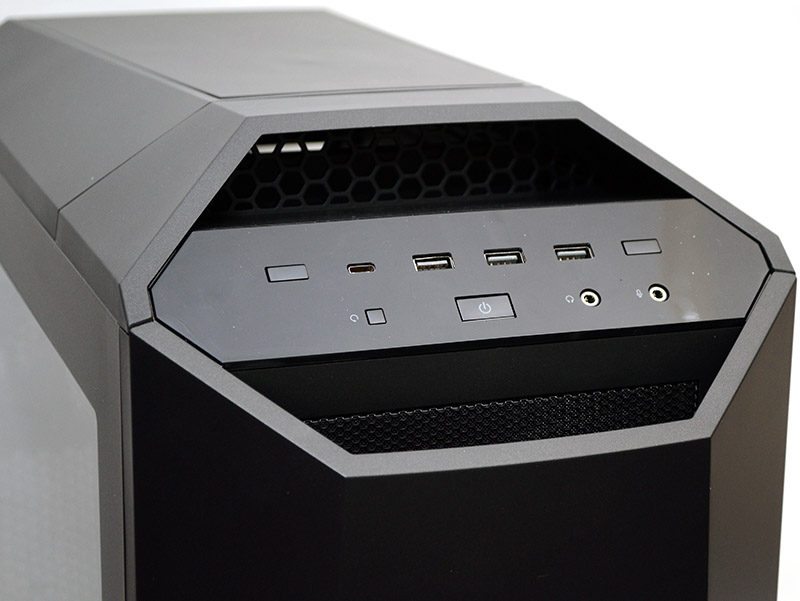
Back to the main section of the front panel, we can see that it pulls forwards on a hinge, allowing you easier access to the dust filters. The top section snaps shut with magnets too, so it’s nice and each to open/close.
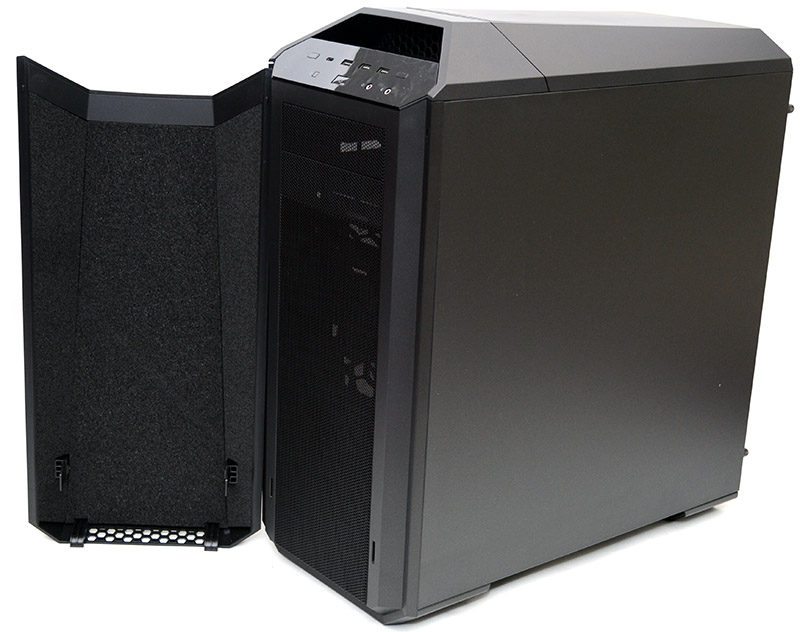
 Simply lift the panel out if you need to, and as you can see, there’s a thick layer of sound dampening material on the back of it, helping soak up sound from the front panel fans.
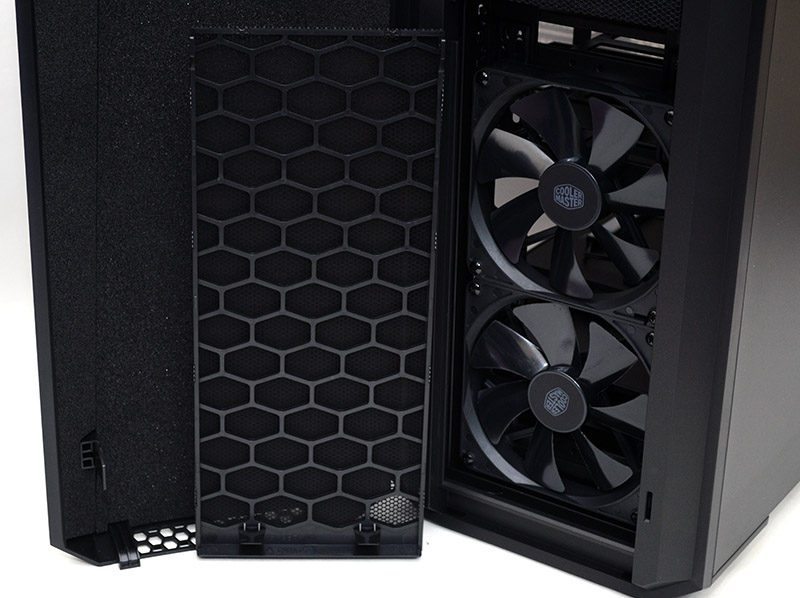
The next layer is a filtered mesh, and behind that, you’ll find a pair of excellent quality 140mm CM fans.
Around the back, you can see this is a fairly wide chassis, which should mean lots of room for water cooling runs, wide expansion cards, cable routing and more.
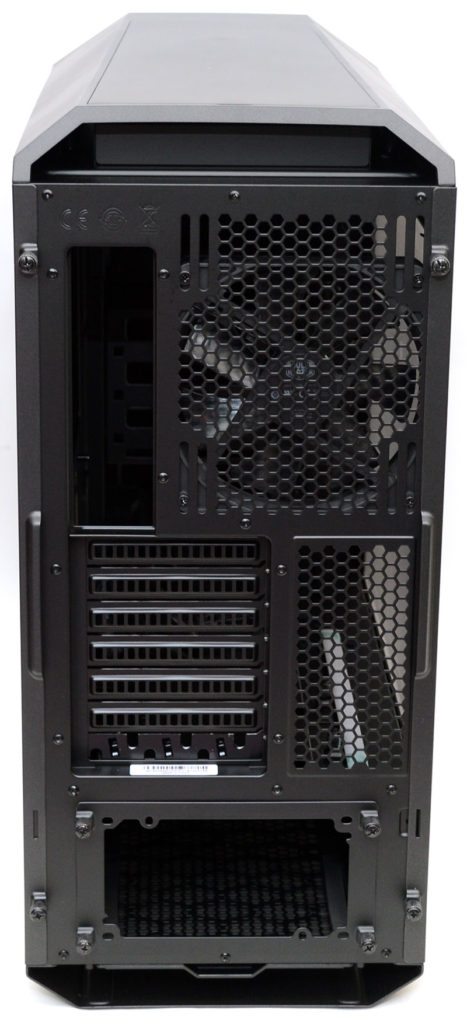
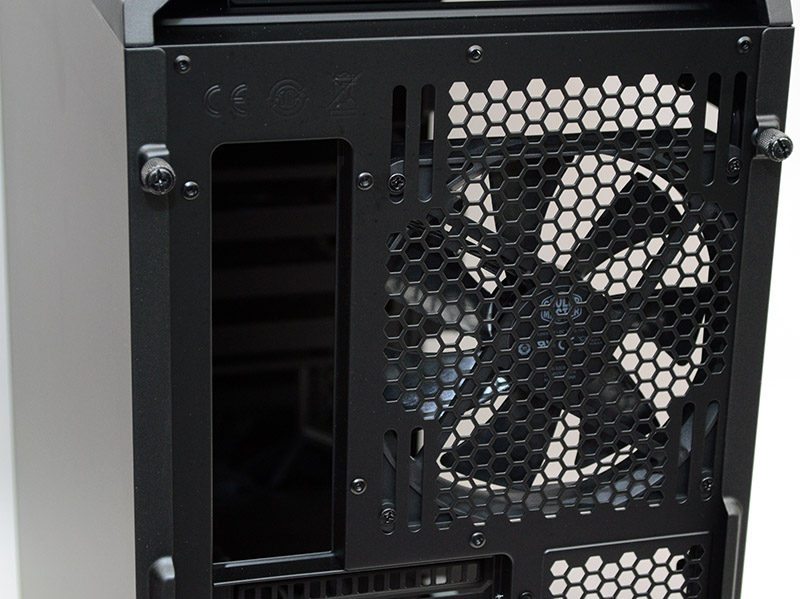
There’s a 120/140mm mount at the top with a pre-installed 140mm fan, but there are also elongated screw holes, allowing a large amount of height adjustment; handy for those installing radiators.
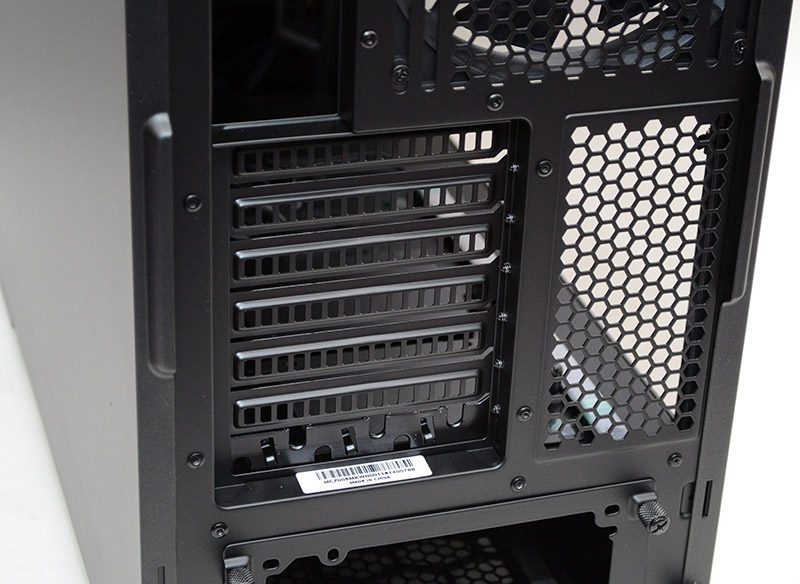
Seven ventilated and reusable expansion slot covers, as well as extra ventilation to the side of them.
The PSU needs to be mounted from the rear of the chassis, and you’ll find an installer bracket with four thumb screws, making it pretty easy to opened up and installed without too much fuss.
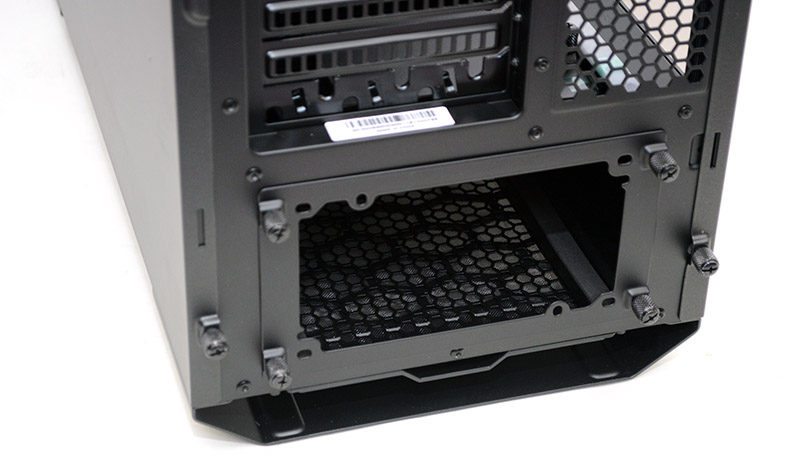
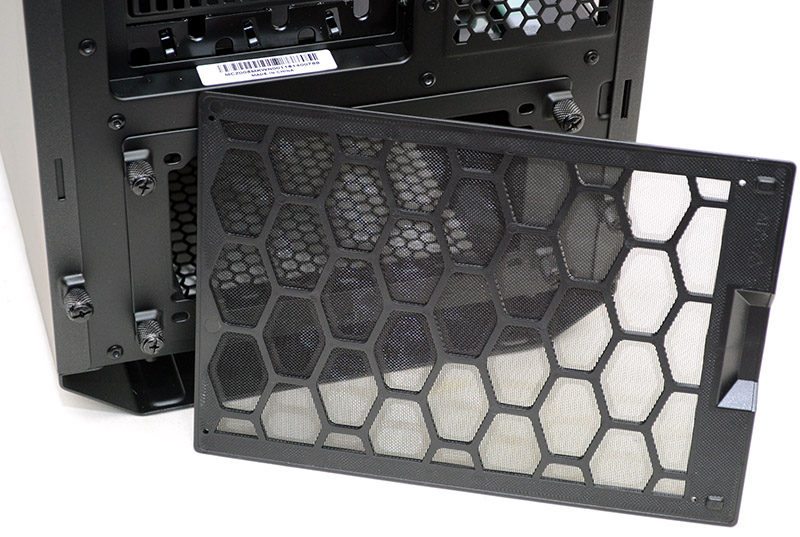
Just below the PSU, a slide-out and washable dust filter for quick and easy maintenance.
The top panel isn’t lacking in tricks and surprises either, in fact, it may be one of the best top panel designs we’ve seen! Here you can see it fully closed up, looking nice and sleek and maximizing the noise suppression of the chassis.
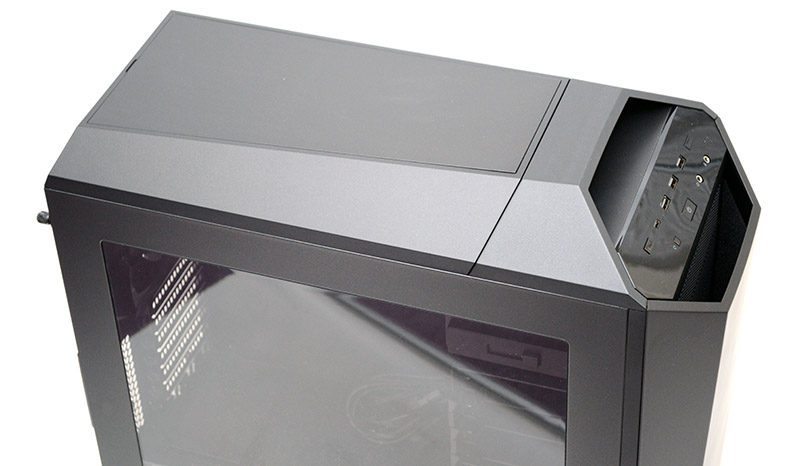
The magnetic top cover lifts off with ease.
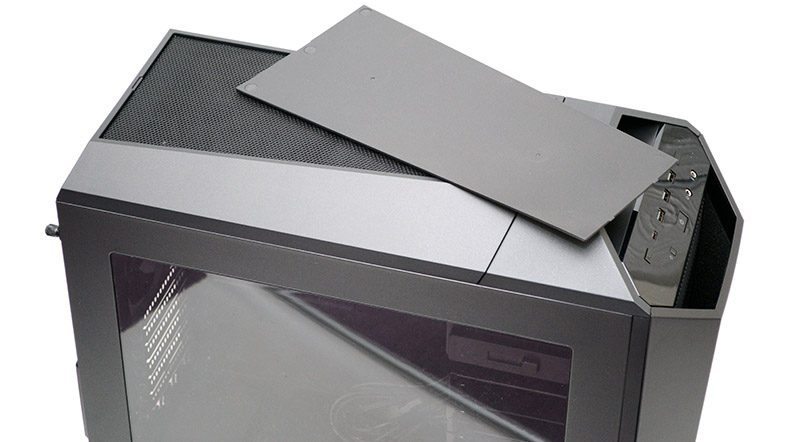
This gives you a huge ventilated and nicely filtered top section for extra airflow.
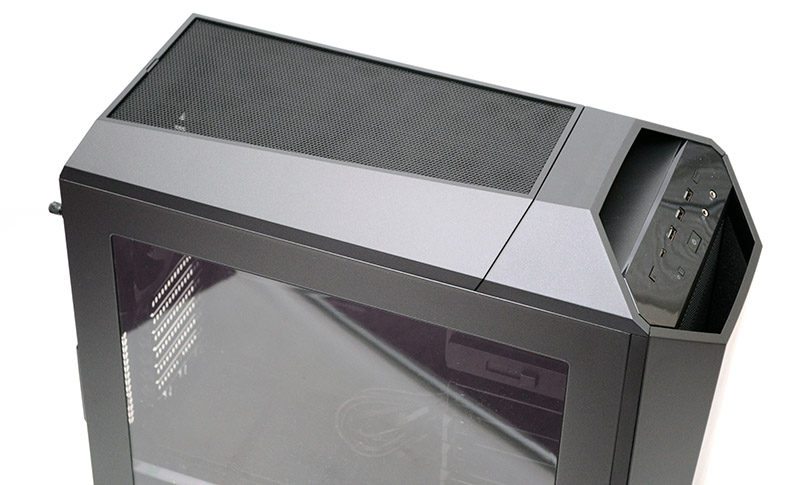
Slide that panel back to unlock it.
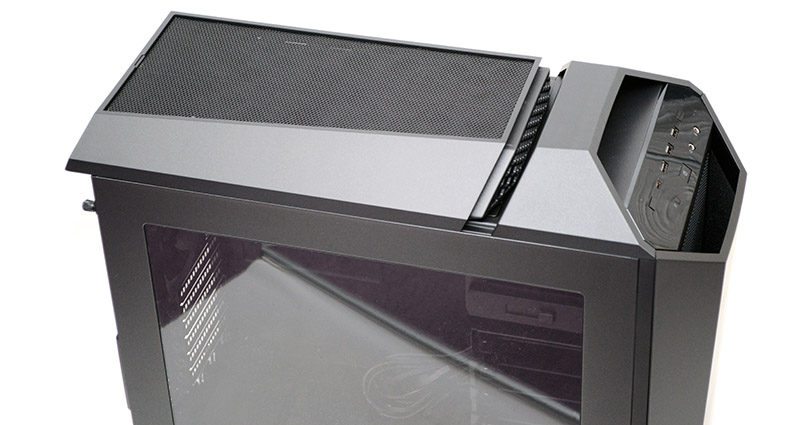
Then you can lift it off and easily clean the debris filter on it.
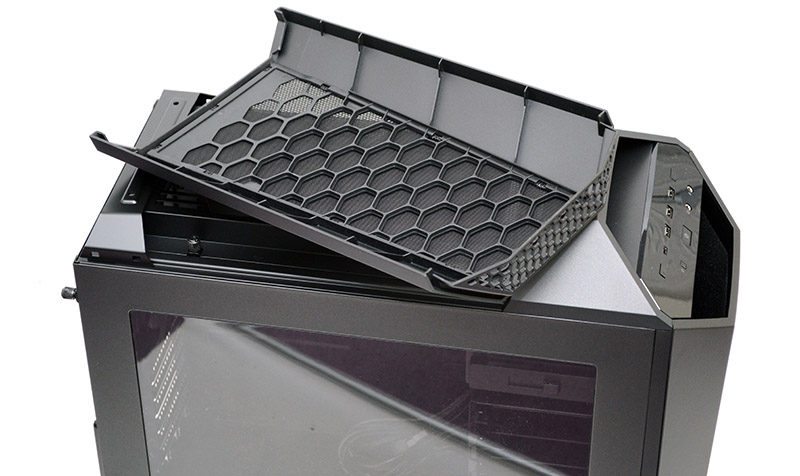
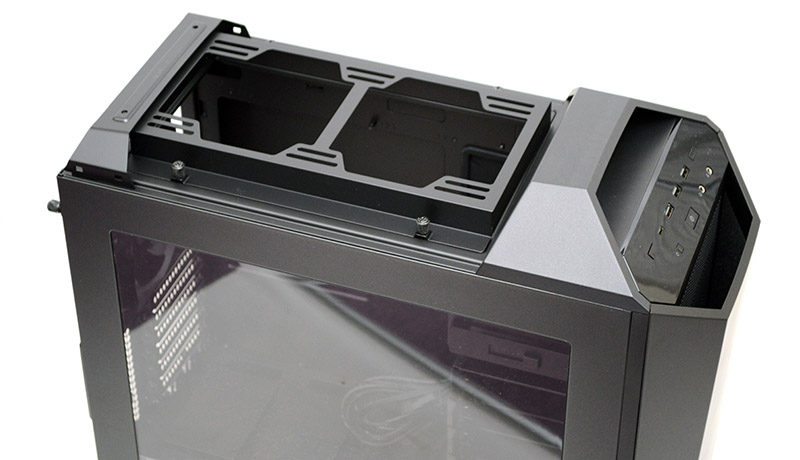
With that removed you can easily access the top panel fan and radiator mount, which comes with 120/140mm spacings and is raised above the interior of the chassis to increase radiator/fan support. Even better, this whole bracket can be undone with a pair of thumb screws, lifted out of the chassis and that makes it even easier to install your cooling hardware.
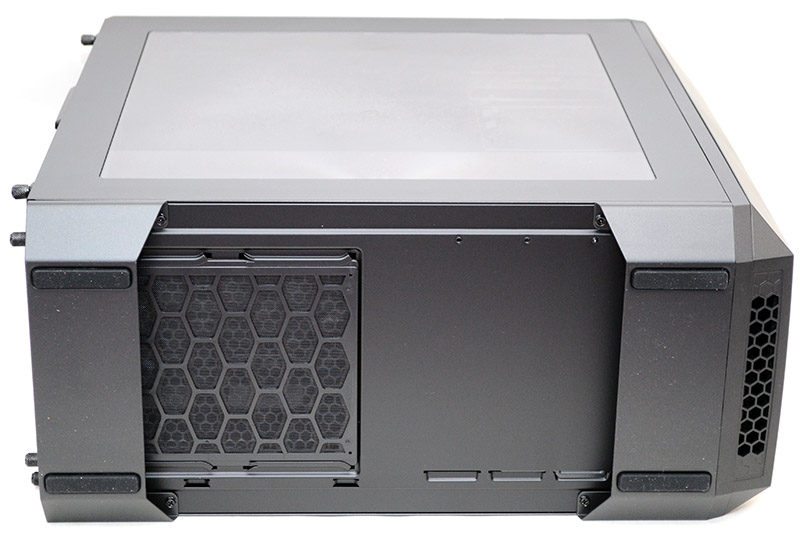
On the base of the chassis, two full-width metal feet, each fitted with durable rubber grips and giving excellent ground clearance to the PSU dust filter.
Interior
With the side panel removed, we can see there is plenty going on within this chassis. First of all, there is a super-wide CPU cooler mounting cut-out, which is certainly going to help with the installation process.
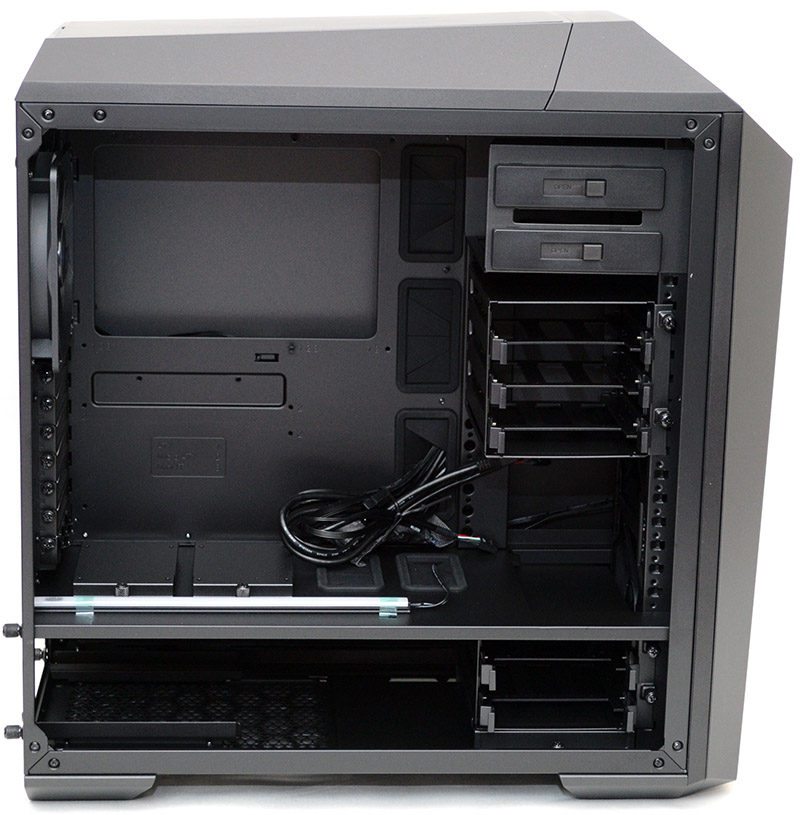
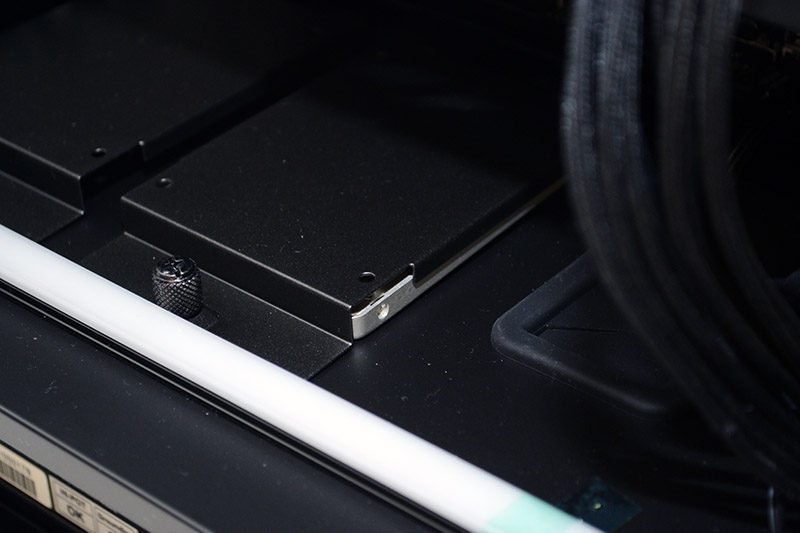
Two dedicated 2.5″ mounts in the base, with quick-release metal covers, as well as an LED magnetic strip that can be easily moved around the chassis thanks to its magnetic design.
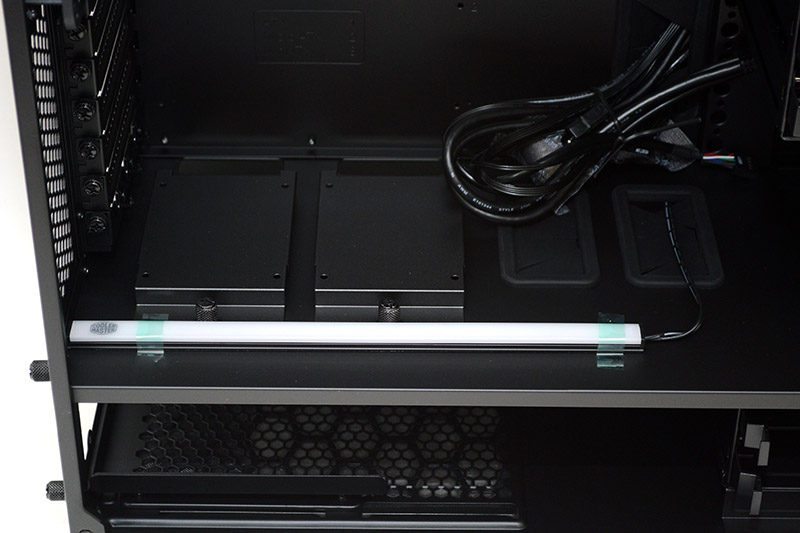
Two large cable routing grommets in the base for passing cables up from the PSU to your expansion cards and motherboard.
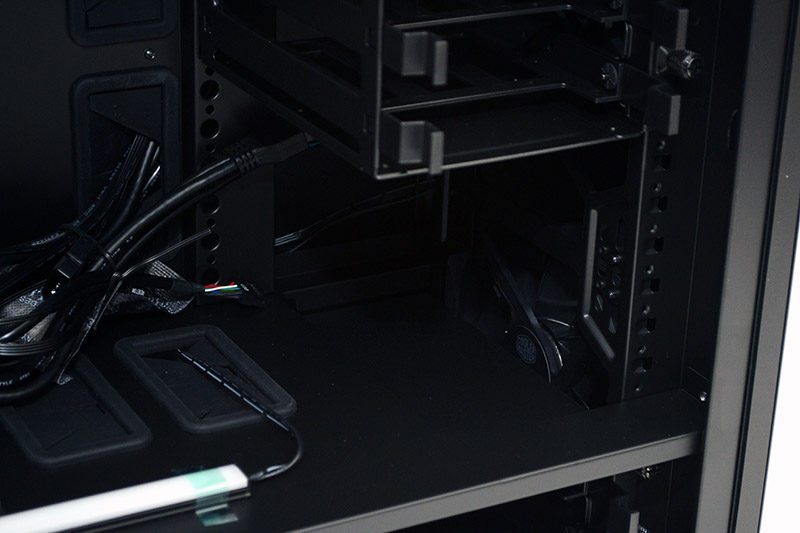
A fully removable set of 5.25″ bays, as well as removable/height adjustable 3.5″/2.5″ hard drive trays, as well as three large cable routing grommets to the right edge of the motherboard area.
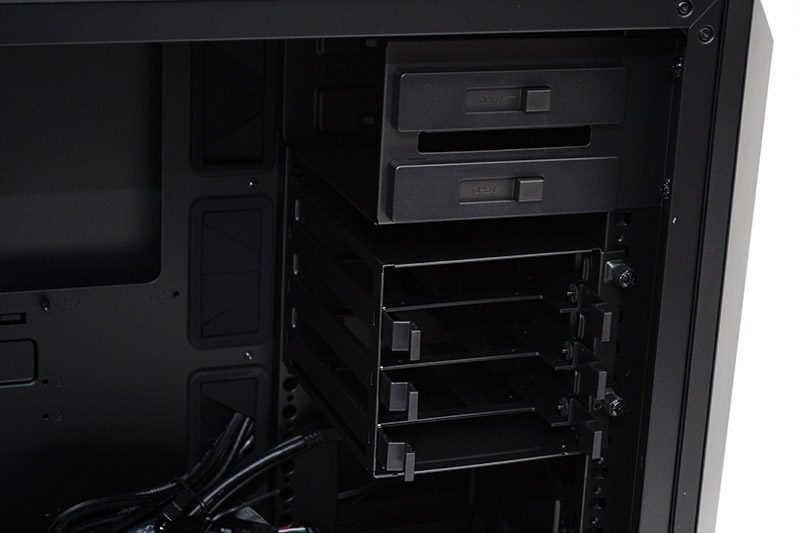
Two move removable drive bays hiding below the PSU area cover.
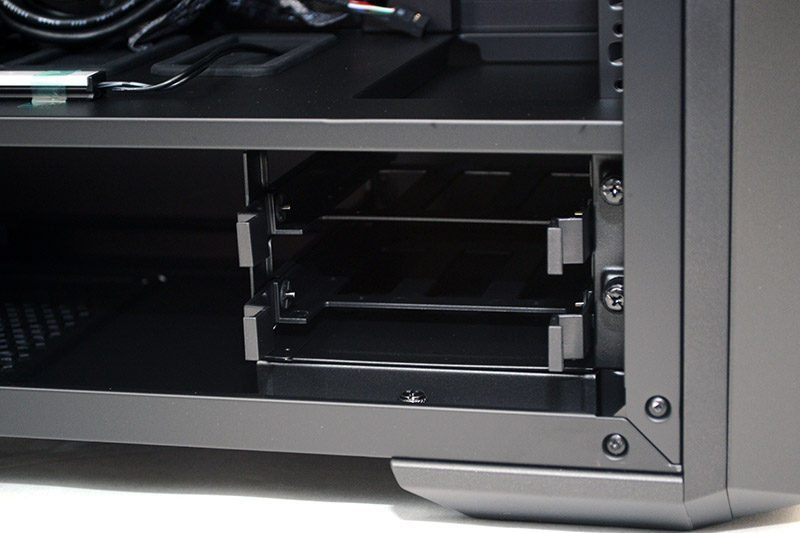
It’s worth pointing out that you can take the hard drive bays out using the two thumb screws on each and put the drive bays at any height thanks to the stepped mounting holes, as they’re completely modular in design and you can even buy more bays to add to the available space in the front of the chassis.
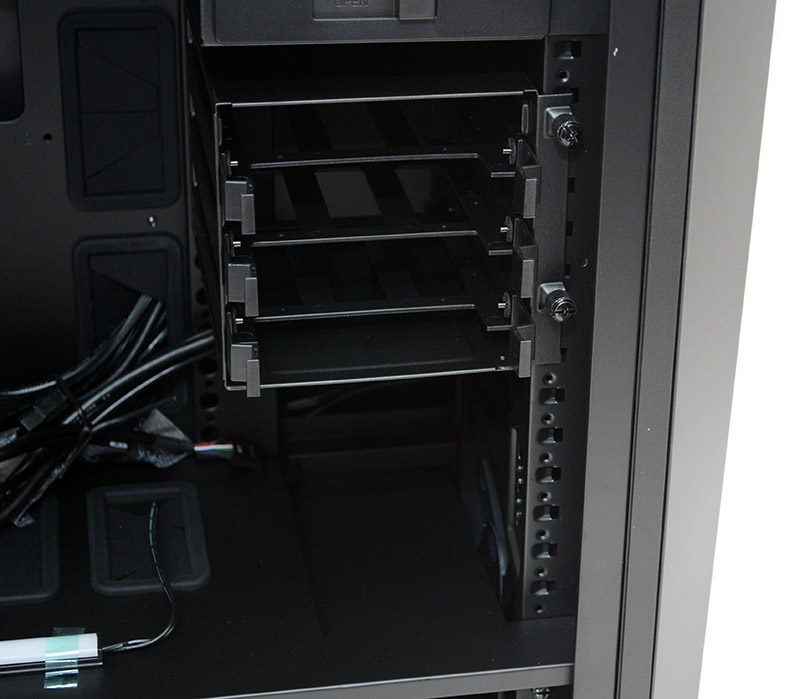
Remove all the bays here and in the base of the chassis, and you’ll free up the full height of the chassis, giving you room for a sizable water cooling radiator.
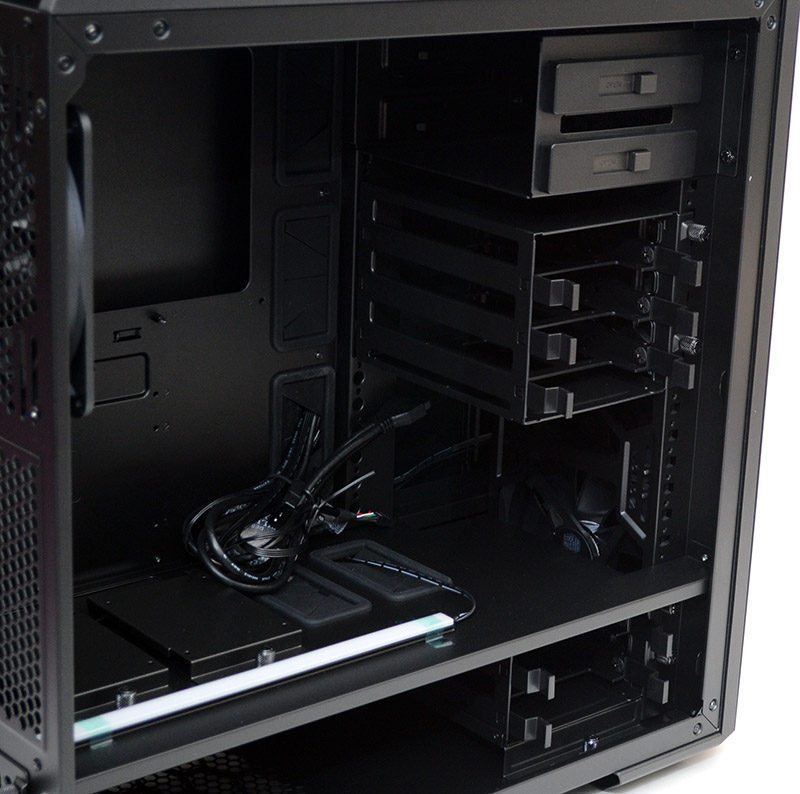
The PSU mounting area, with two durable mounting rails, dust filter, and plentiful cable storage space.
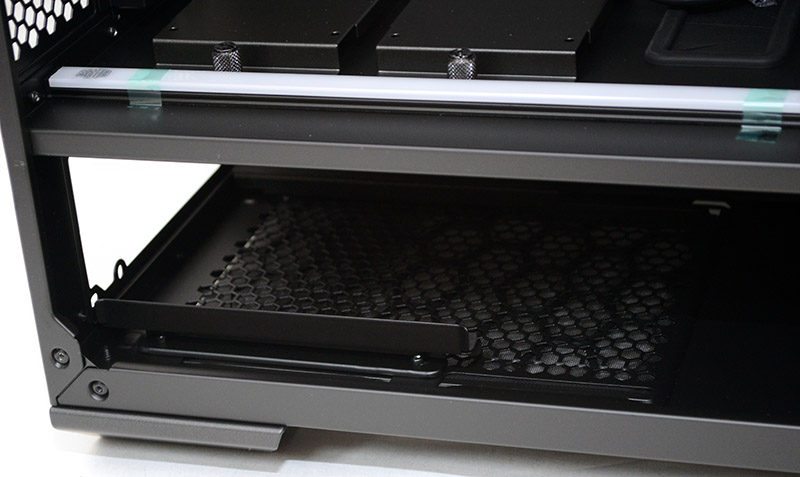
Some smaller cable routing holes are hidden at the top, handy for your motherboard and fan cables.
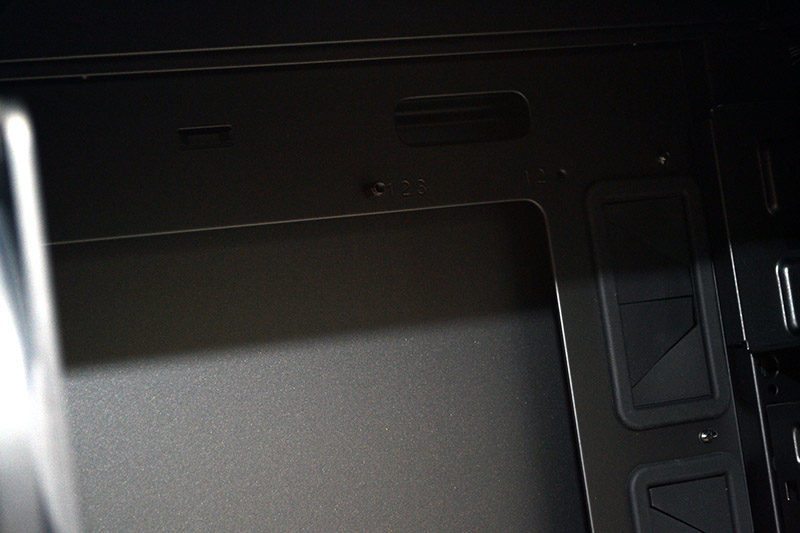
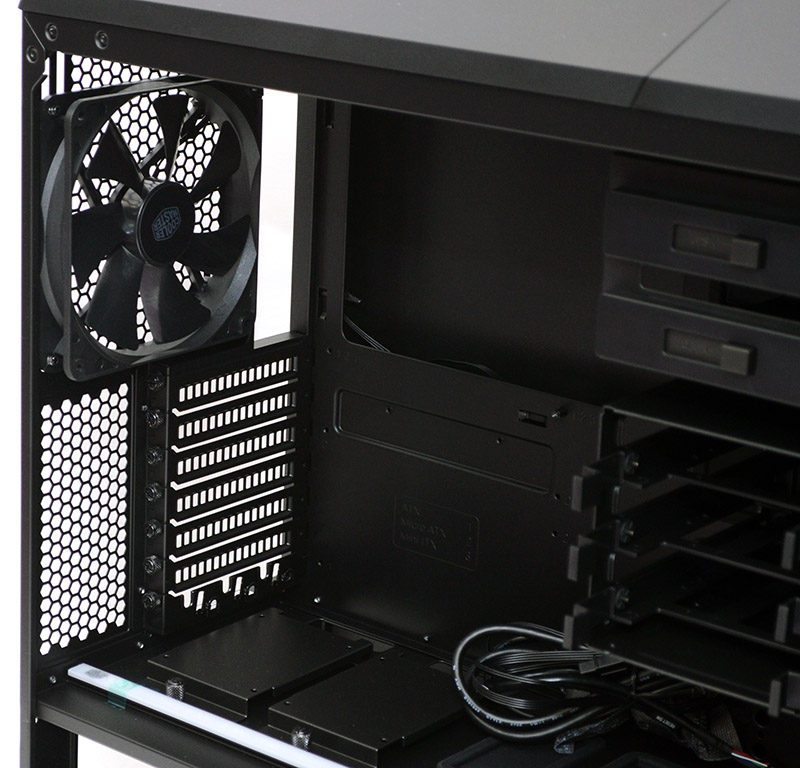
Lots of room in the back for a good size 120/140mm radiator, although the stock 140mm fan is of a good quality and I suspect many people will be happy to leave it there.
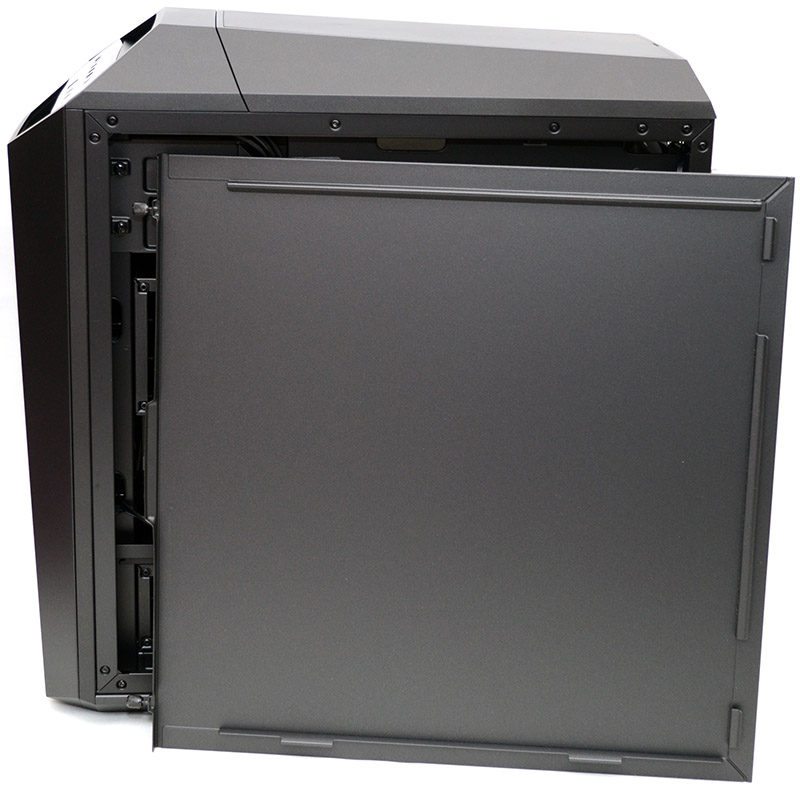
Around the back, we can see that the right side panel is a thick steel panel with no flex to it.
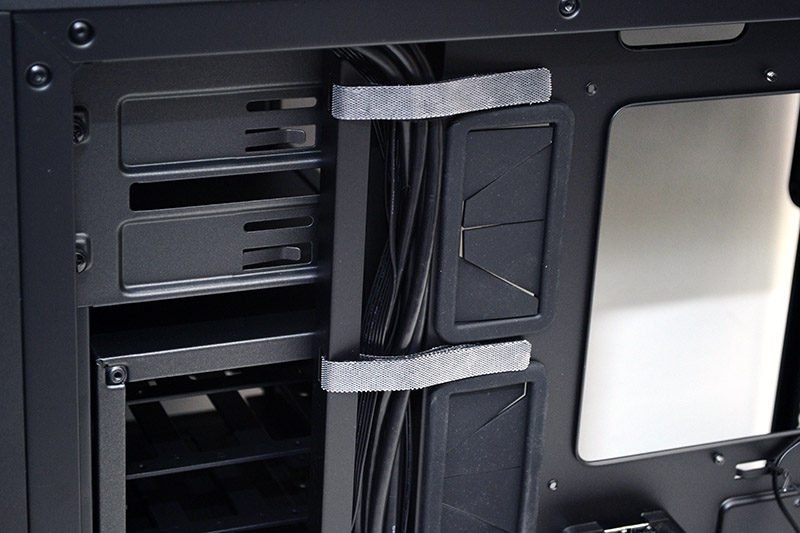
There’s a lot going on here, but everything is incredibly neat and tidy. There’s a good amount of cable routing space behind the motherboard, but even more so behind the PSU as there’s a huge hidden section for cramming excess cables out of the way.
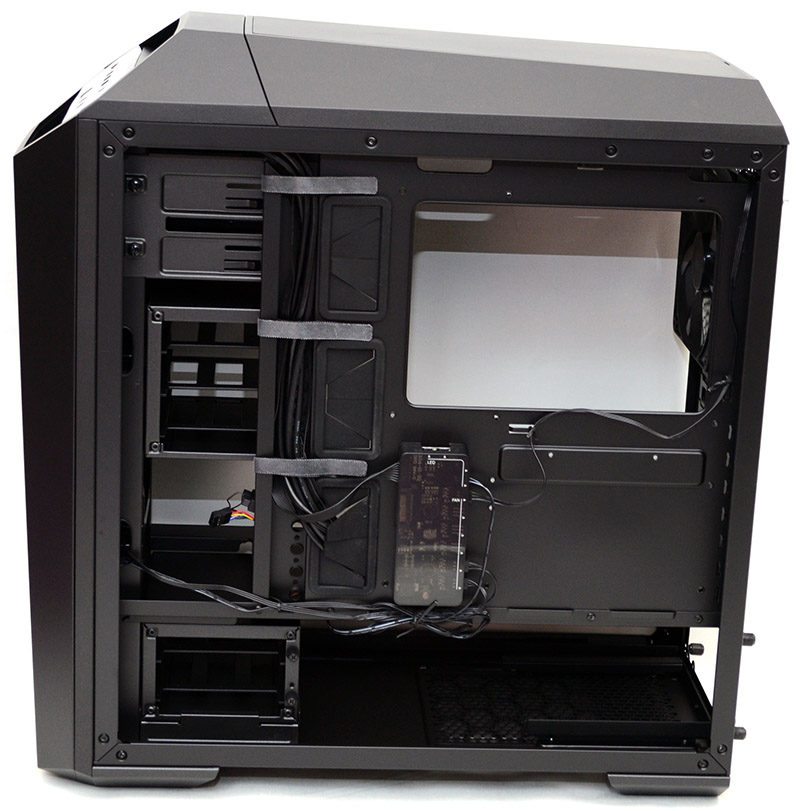
There are a lot of pre-installed cables, but they’re all neatly routed through a dedicated channel and locked down with Velcro straps.
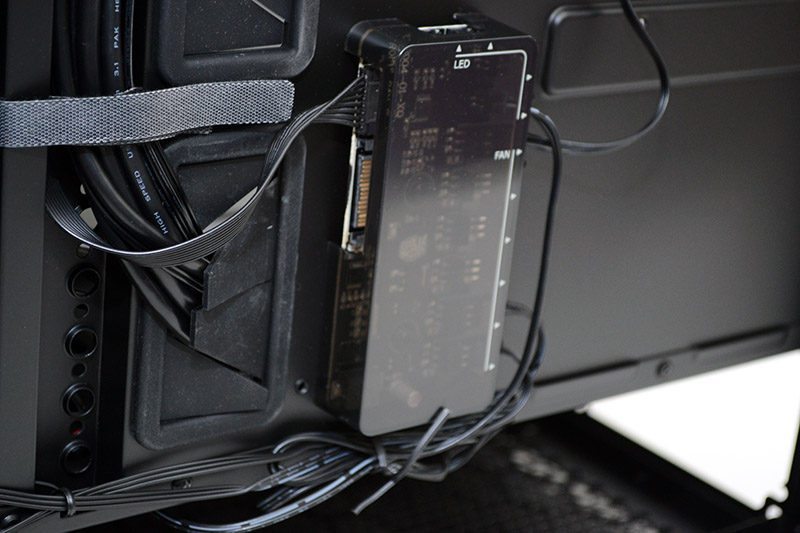
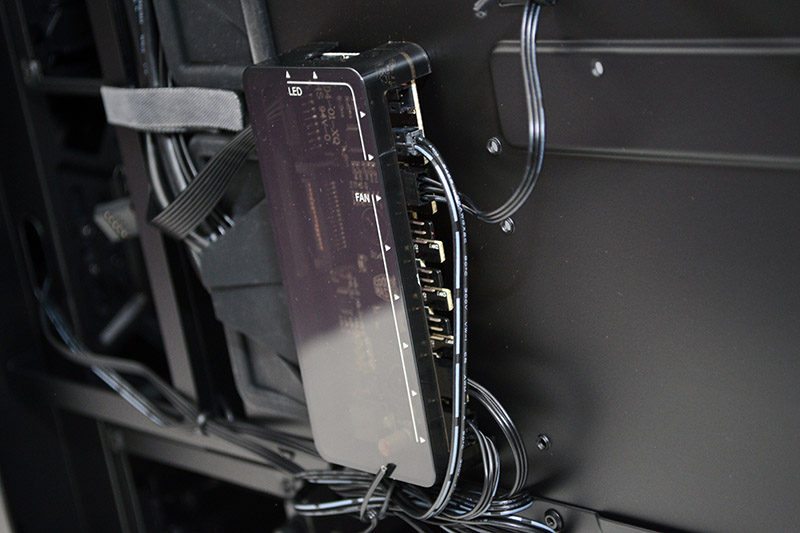
Here you’ll find a comprehensive fan hub, with all pre-installed fans already hooked up, and two extra channels for two-pin LED lighting hardware.
Complete System
Building a system inside this chassis couldn’t be much easier, as the extensively modular design lends its self well to the hardware you desire the most.
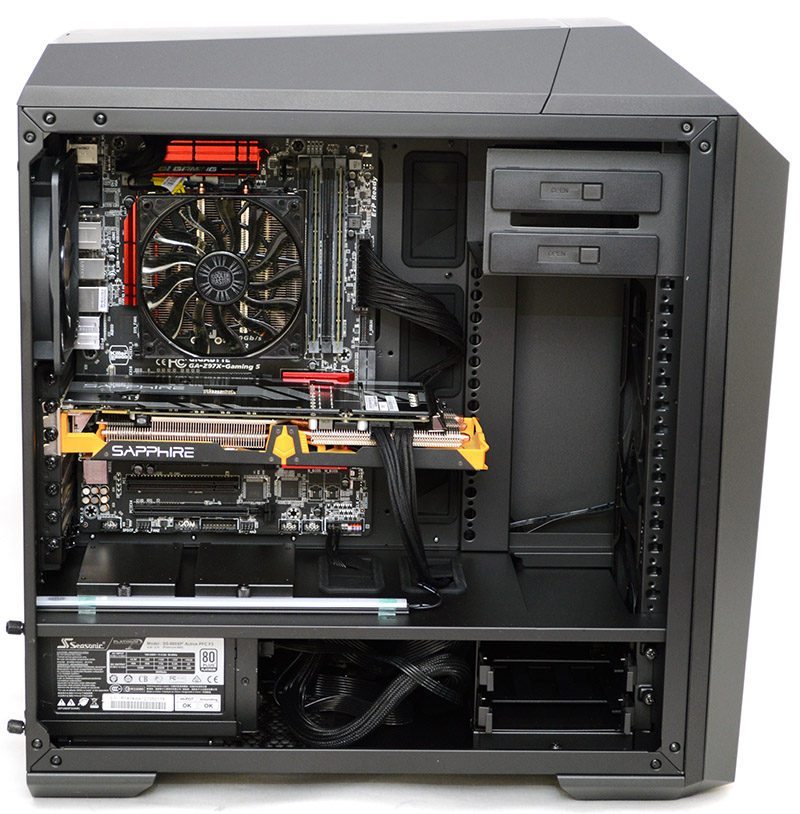
As you can see, I’ve fully removed the upper hard drive bays, as I didn’t need them, and this frees up a lot more space for the long graphics card, as well as more airflow from the front fans.
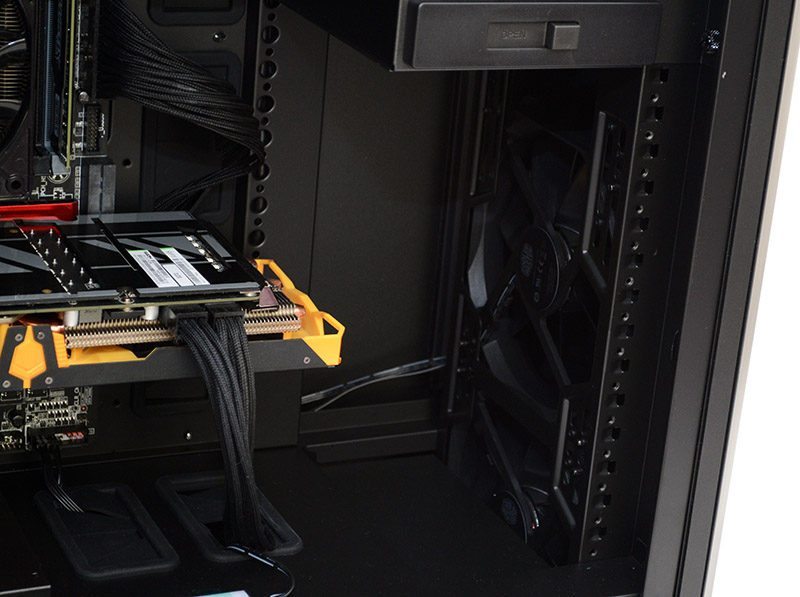
The cable routing is excellent, with large grommets that make it easy to get your cables out of the way, keeping the build looking neat and tidy.
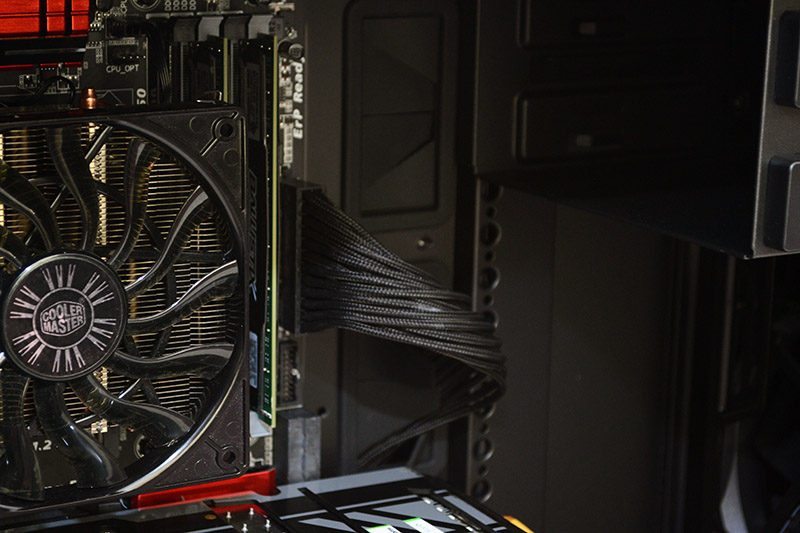
The same at the top of the motherboard, where you’ll notice a huge amount of clearance from the top radiator/fan mounts.
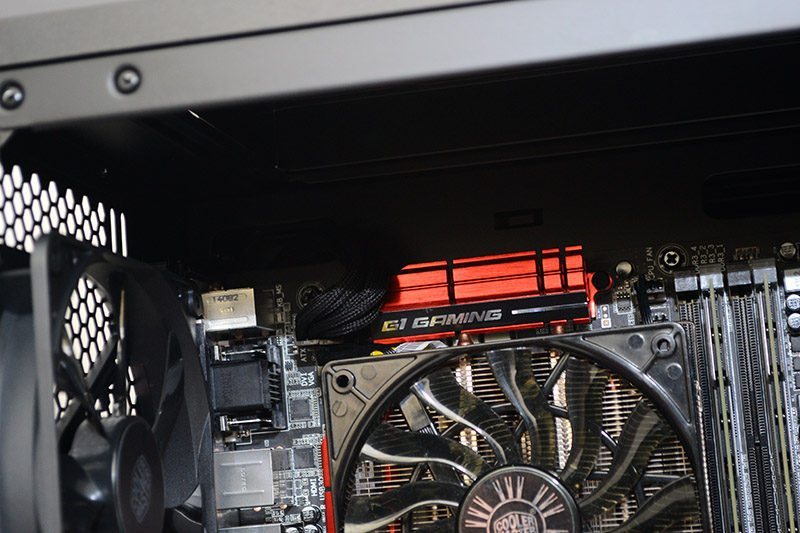
Large expansion cards obviously aren’t a problem here and you’ll easily find room for a multi-GPU configuration. The bottom cable routing grommets help a lot too, especially given how many GPUs have their power connectors on the side these days. CPU clearance is excellent, and those wanting to invest in large tower coolers are unlikely to find anything that doesn’t fit.
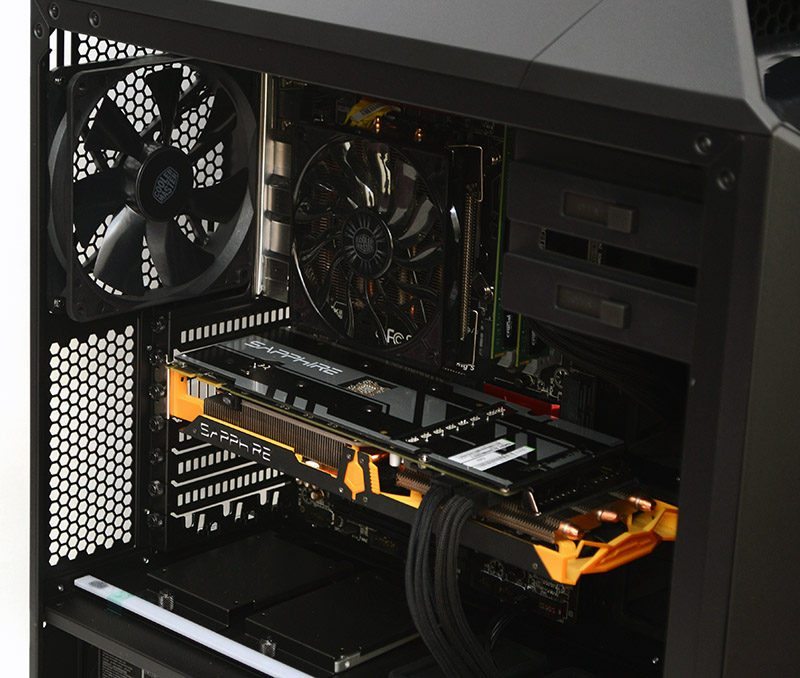
The 2.5″ bays are nice, and while I know some like to show off the SSD, this approach is very clean and keeps the interior looking clutter free.
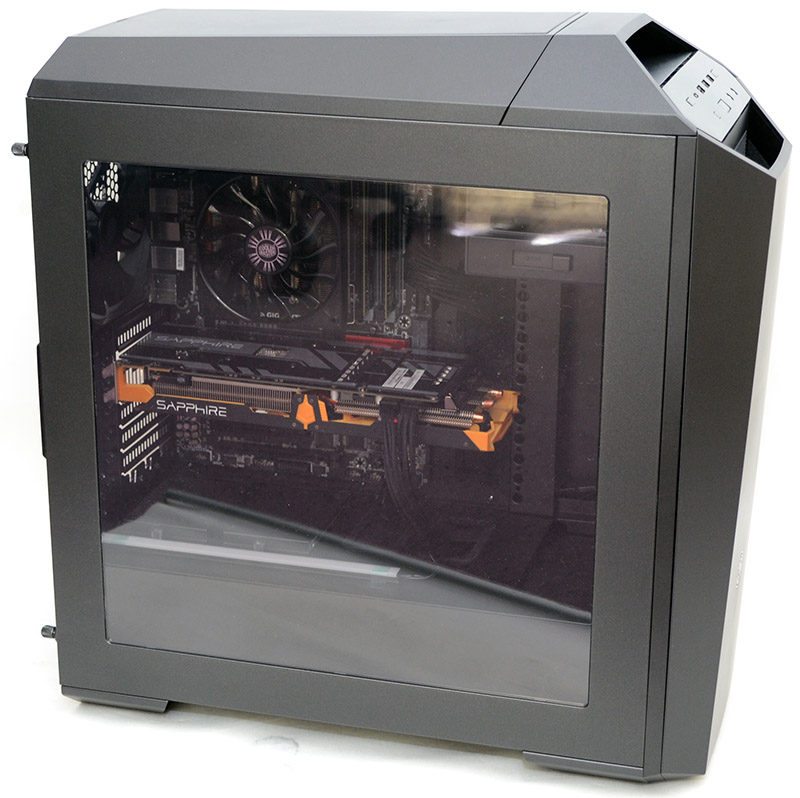
All panels back in place, and we can see the importance of having good cable management, as the interior of the chassis is very exposed through that huge side panel window. The window is coated black near the bottom though, helping hide anything below the PSU cover with ease.
Overall, a great looking build, no doubt about that, but we can go one better as we have the optional tempered glass side panel window at our disposal, so let’s whip this plastic window off and kick things up a notch.

I was looking through the box for a set of fittings to attach this panel, but fool on me, you don’t need any! This huge glass panel has catches on the bottom that allow you to simply drop the bottom edge onto the bottom of the chassis, locking it in place. You then simply push the top flush and it has a precision fit that holds it snug in place. If you want it even more secure, there’s a small key lock at the top, simply give that a turn and that glass panel is going nowhere!
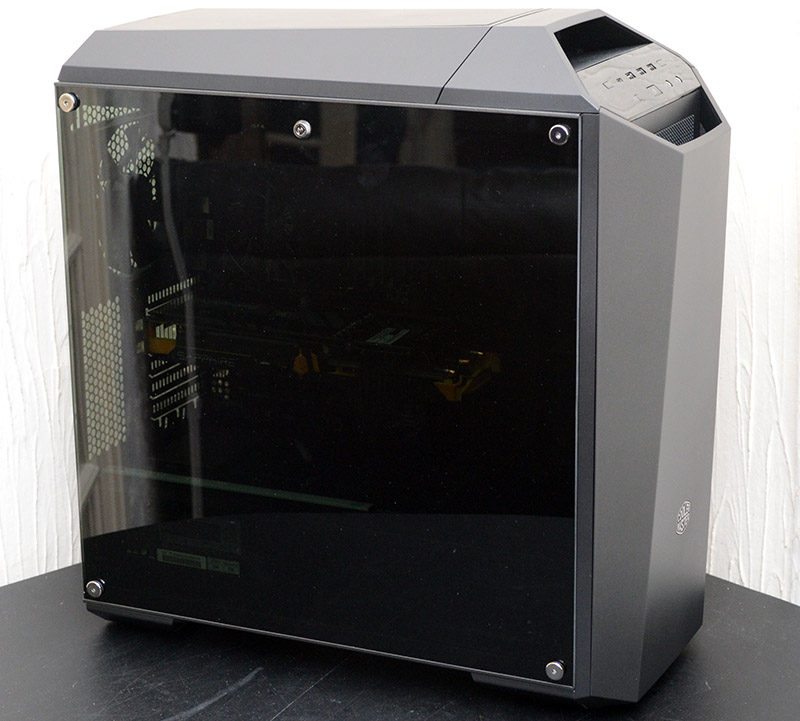
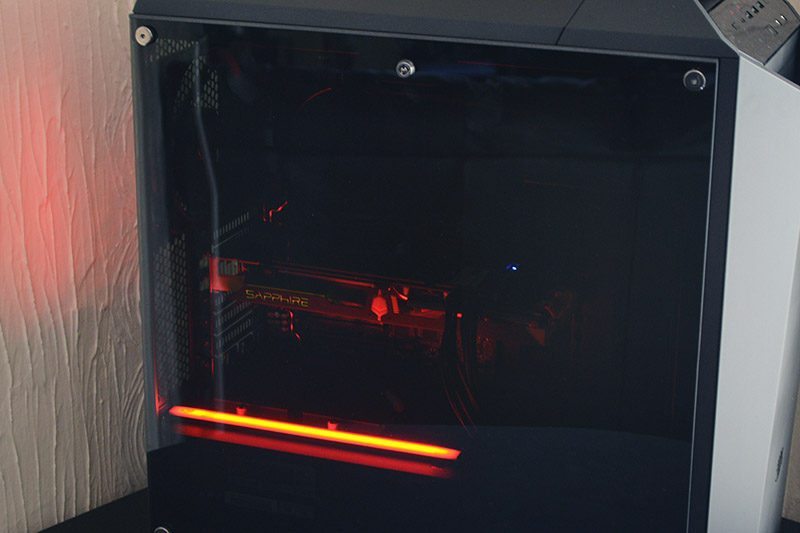
The glass has a much darker tint to it than the plastic window panel, making it quite hard to see what is going on within the chassis, at least until you turn on the system and fire up any lighting you have installed.
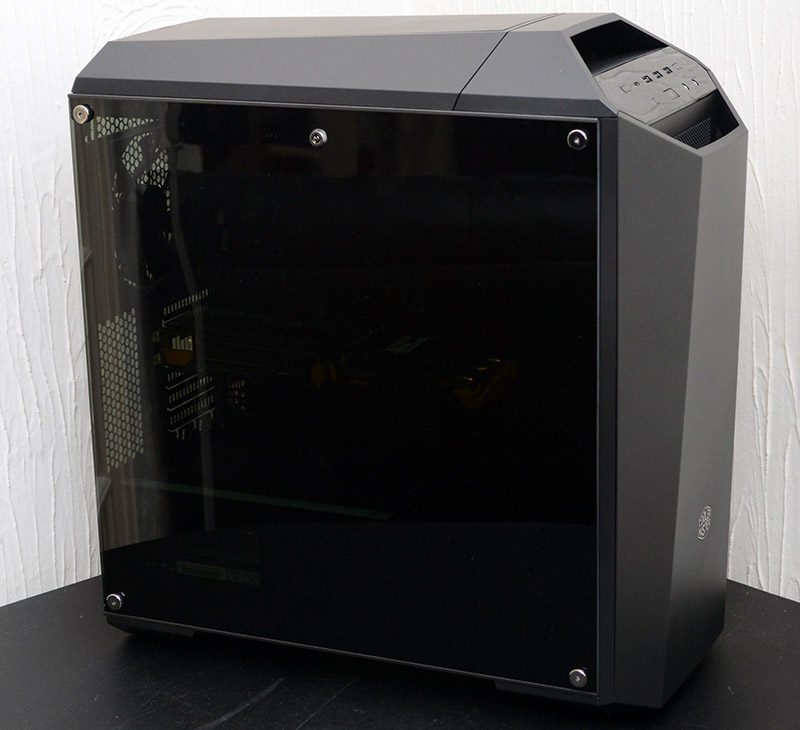
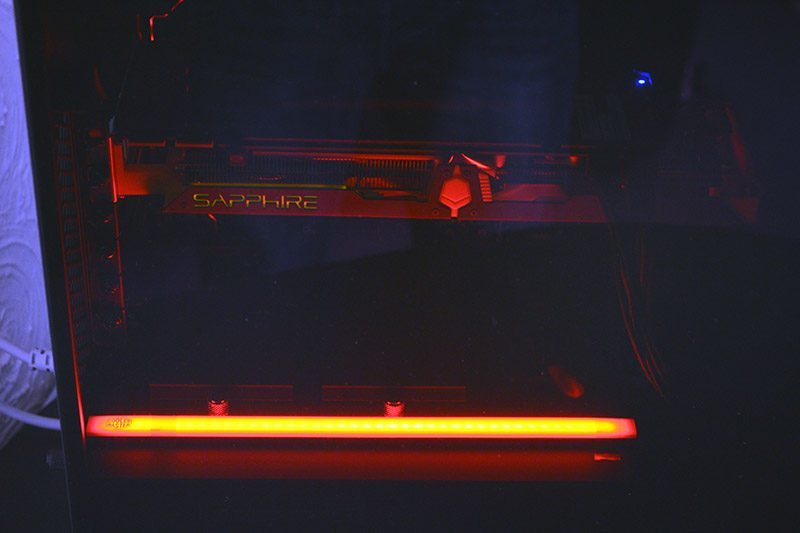
The red LED strip looks awesome, giving off a firey glow on the bottom of the chassis and giving a warm uplight to any components you have installed.
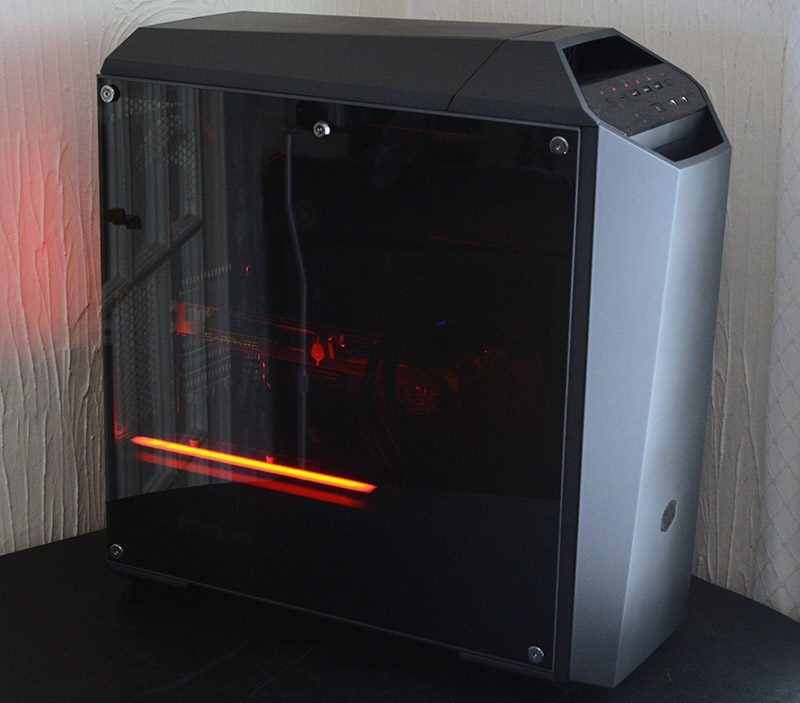
It can be turned on or off from the front panel, or you can enable a pulse mode where it slowly brightens to 100%, holds for a few seconds, then fades down to about 10% brightness and so on, it’s a nice tough and it’s a smooth transition that gives it a nice touch of class.
As for that other surprise I mentioned about the front I/O panel, it has built-in LED lighting too! There labels on the buttons and the USB ports are completely hidden when the power is off, and light up with a lovely and rich red lighting when the system is powered; a nice extra touch.
Final Thoughts
Price
The Cooler Master Maker 5 will be available at major retailers very soon, and since this is the flagship of the series, it’s obviously a little more expensive than the other two. Please keep in mind that the 5 and Pro 5 prices are slightly lower than their launch price now, as this is current market prices vs Maker 5 launch price.
- Master Case 5 – £89.99 @ OCUK
- Master Case Pro 5 – £114.95 @ OCUK
- Master Case Maker 5 – £179.99 (MSRP)
Additional accessories to upgrade the 5 or the Pro 5 to the Maker, or to create your own hybrid version, as well as the price for the tempered glass window, are below and we expect more will follow soon enough; all prices as MSRP.
- Tempered Glass Side Panel – £34.99
- Top Cover Kit with Magnetic Grip – £17.99*
- Cooling Bracket – £6.99*
- Silencio FP 140 PWM with Red LED – £13.99
- Universal VGA Holder – £9.99
*Included in MasterCase Maker 5
Overview
The original Master Case was and still is a real winner, one of the best made and designed products in its class and one of my all time favorite chassis overall. The Master Case Pro 5 made things even better, offering more features, even greater component support, and a moderately improved design, and I obviously enjoyed it enough as I picked one of them up for my own personal system build in the eTeknix office. This brings us onto the Master Case Maker 5, the latest and undoubtedly greatest entry in the series so far, and for those who want all of the features Cooler Master currently offer in one neat and tidy package, it’s the perfect chassis for virtually any kind of system build.
What I really love about this is how modder friendly it is, it doesn’t matter if you’re not ready to get a Dremel out and make something unique, but the extremely modular nature means that you can build a system layout that’s overall quite unique to your build. The hard drive bays can be removed, moved, added to and more. This gives you room for a lot more storage, room for more radiators, fans, longer expansion cards and much more, it’s really up to you.
The revised top panel is certainly a welcome update, as it looks just as great with the cover on as it does with it removed. This is great for those who want a silent build, or reap the benefits of having thick radiators mounted in the top of their chassis; at least you can upgrade the chassis configuration as you upgrade your components over time, rather than simply going out to buy a new chassis to fit your needs. Extra additions certainly sweeten the deal too, such as the comprehensive fan hub configuration, with front panel lighting and fan speed controls built in, complimented further by the included red LED lighting strip, the new LED lit I/O panel and the inclusion of a very nice Silencio 140mm LED fan.
I loved how easy it is to tweak and maintain the front panel of the previous models, and while that is still the case here, the addition of the pull down and sound dampened front panel cover really pushes the design to the next level, giving the Maker a more professional look while also providing acoustic benefits to your system build; never a bad thing.
I’m really happy to see how CM are managing this new series, as the base model is a great case, make no mistake about that, but the fact that you can buy any of the parts of the premium Maker model, clip them onto your stock one and reap the benefits in impressive. Want the normal chassis with the fan controller and LED lighting features? No problem, want the Pro 5, but really dig that tempered glass window add on? Go buy it, or… OK, you get the idea here and while doing it that way isn’t going to be the best value for money, it’s the ideal that I like the most. It’s this modular and upgradable, moddable and interchangeable nature that I look forward to seeing developed further, and it’s something CM are actively putting into all their product ranges so I’m sure we’re going to be seeing a lot more exciting chassis, coolers, peripherals and much more over the coming months.
Pros
- Exceptional functionality
- Very modular design
- Master Case 5 and Master Case Pro 5 can be upgraded to Maker
- Tempered glass side panel add-on looks stunning
- Built-in lighting and fan hub
- Excellent air/water cooling support
- Additional 140mm fan included in box
- Good cable management space
- Support for long GPUs and tall CPU coolers
- Magnetic attached top panel cover and pull-down front panel door
- Noise dampening materials
Cons
- A SKU with tempered glass pre-fitted could be more cost-effective for consumers
Neutral
- More LED colours would be great
- Upgrading the previous models to Maker could prove expensive, but it’s still cheaper than buying another complete chassis
“Packed with features, extensive customisation and flawless build quality, the Maker 5 is the jewel in Cooler Masters crown. If you’re looking for a truly versatile chassis with a professional aesthetic, the Maker 5 will make a great base for your next system build.”

Cooler Master Maker 5 Chassis Review


