Corsair Graphite Series 730T & 760T Chassis Review
Peter Donnell / 11 years ago
Introduction
Corsair have gone from strength to strength over the last few years, releasing premium grade chassis products that have proven extremely popular with system builders around the world. Their Graphite series is one of the hottest ranges on the market and has already been very successful for Corsair, so we were very excited to hear that not one, but two new entries for the Graphite series are being released and even more excited when I found out I would be able to put them both to the test.
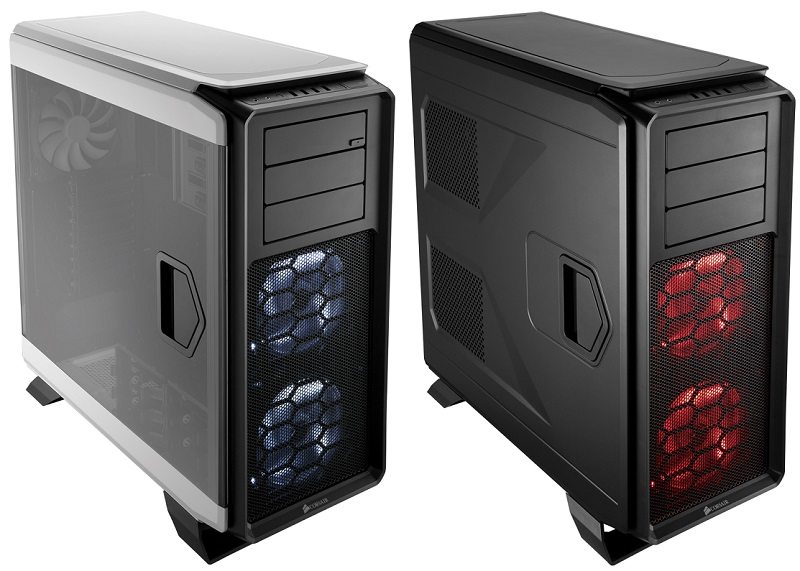
The Graphite 600T, the previous top dog of the range, is still one of the best chassis on the market, it features sleek looks, an easy access side panel and high component compatibility, all of which make it a premium choice for those looking to build a high-end gaming rig. The new Graphite 760T looks set to top it in almost every way and the clue to that is that its product name features a bigger number, usually a good indication of an upgrade. In addition to this we also have the Graphite 730T, which is a slightly cheaper edition of the 760T that is pretty much identical in terms of specifications, but lacks the side panel window and fan controller, a mild downgrade which will save you around £30 overall.
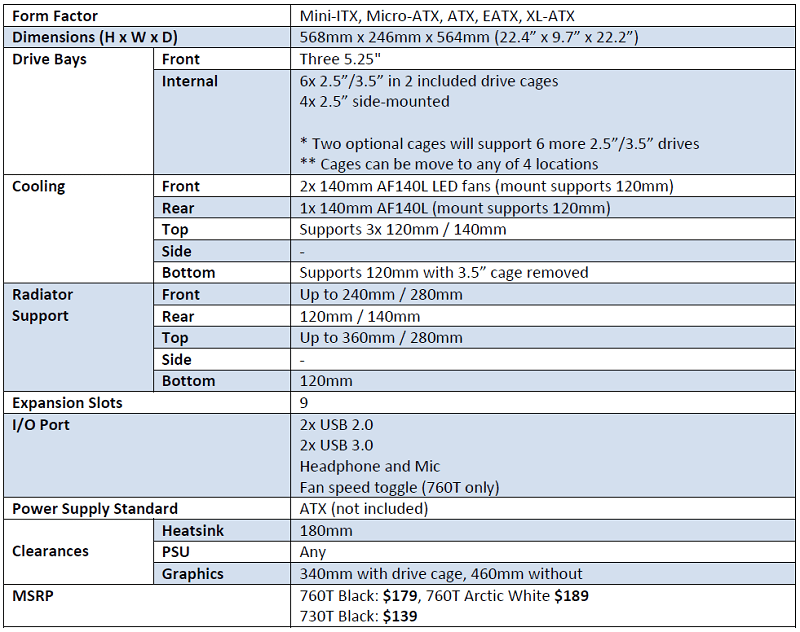
We have both the 730T and the 760T at our disposal today and while they share a pretty similar design and feature set, we thought it would be great to see them alongside each other and figure out which one is better value for money. As you can see from the specifications below, both cases are packed with features that make them ideal for any high-end gaming rig, you’ll find room for several large graphics cards, loads of storage, extensive cooling options and a whole lot more.
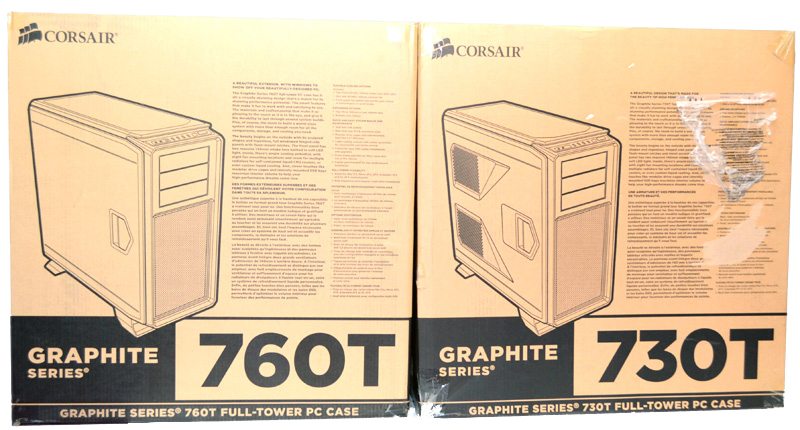
Both cases come packaged with the usual Corsair markings on the box, as well as a bit of information about the cases design and features, but we’ll be taking a much closer look at all of this ourselves in a moment.
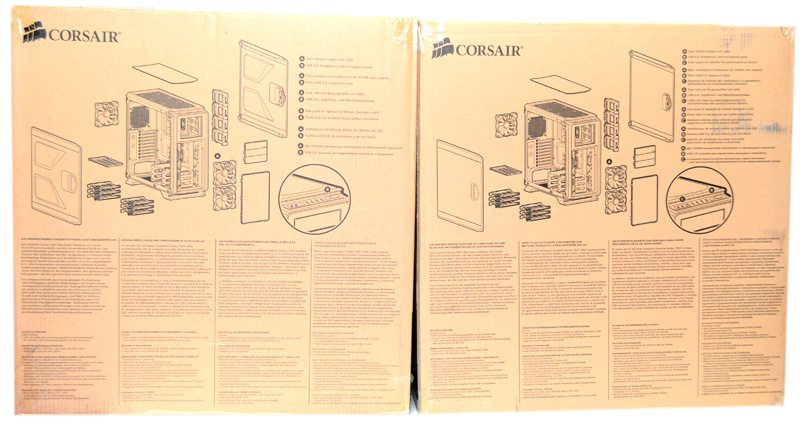
Around the back of each you’ll find a detailed diagram of all major components and fittings.
Both cases came packed with a soft cloth cover over the case and thick foam padding, none of that cheap Styrofoam rubbish.

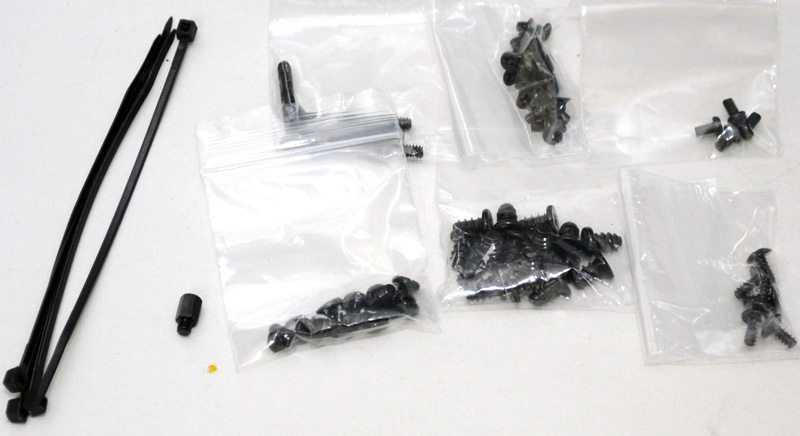
Each case came with identical extras; a few cable ties and a collection of high quality screws and bolts, more than enough to get all major components installed.
Exterior
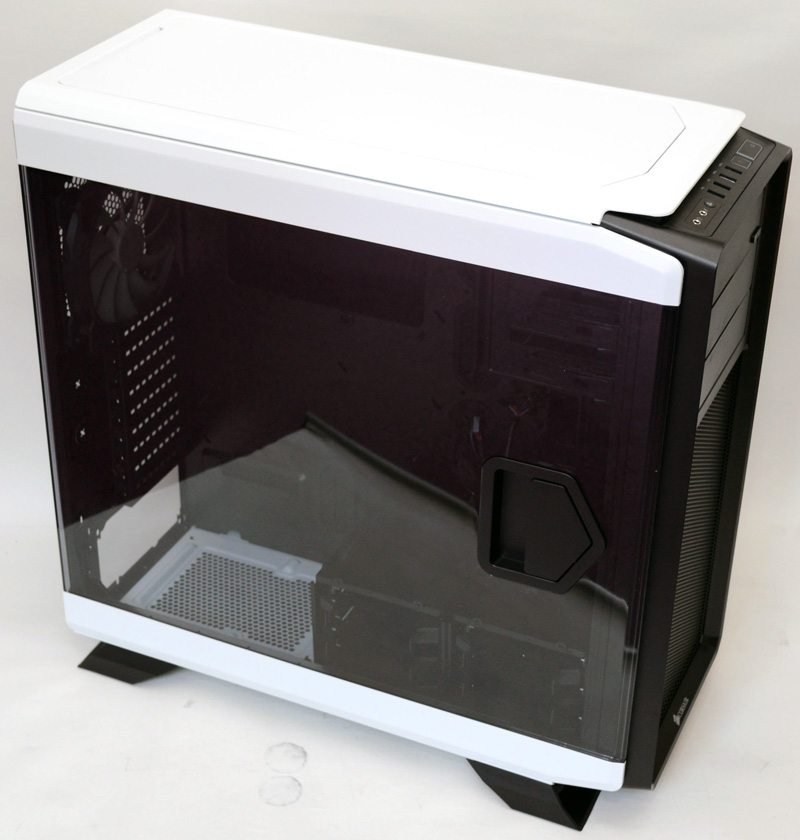
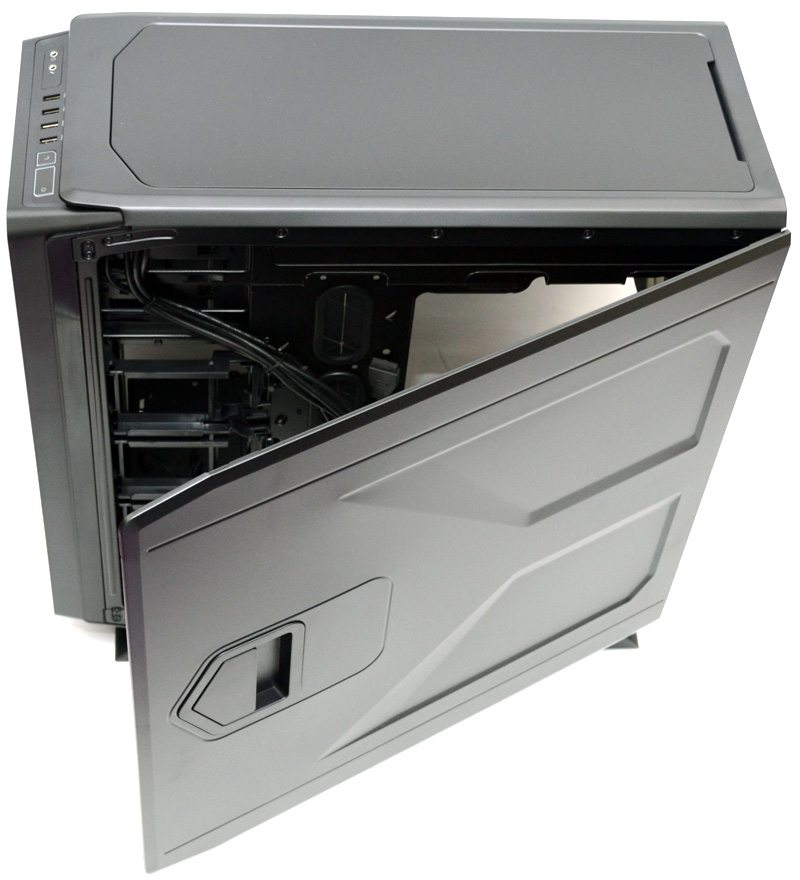
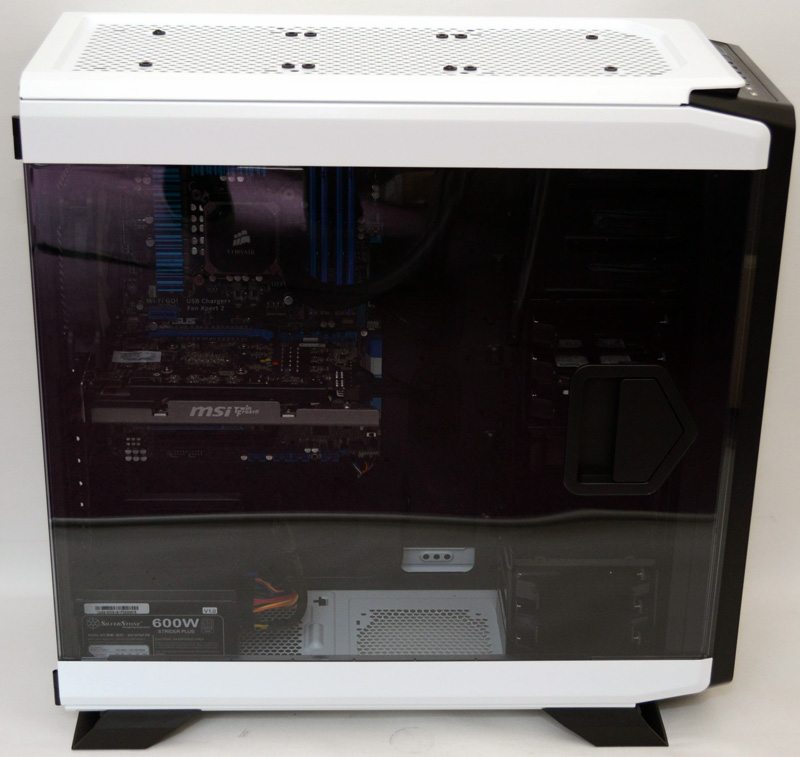
First up we have the 760T and as you can see it features a full width tinted side panel window that gives an awesome view of the chassis interior (and the reflection of my white screen). The panel throws out the idea of thumb screws and is mounted on a hinge at the back with an in-set release handle near the front, lightly pull the handle and the whole door swings open with ease.
Around the back we have yet another easy open door panel and handle, only this time it’s finished in glossy none-transparent black.
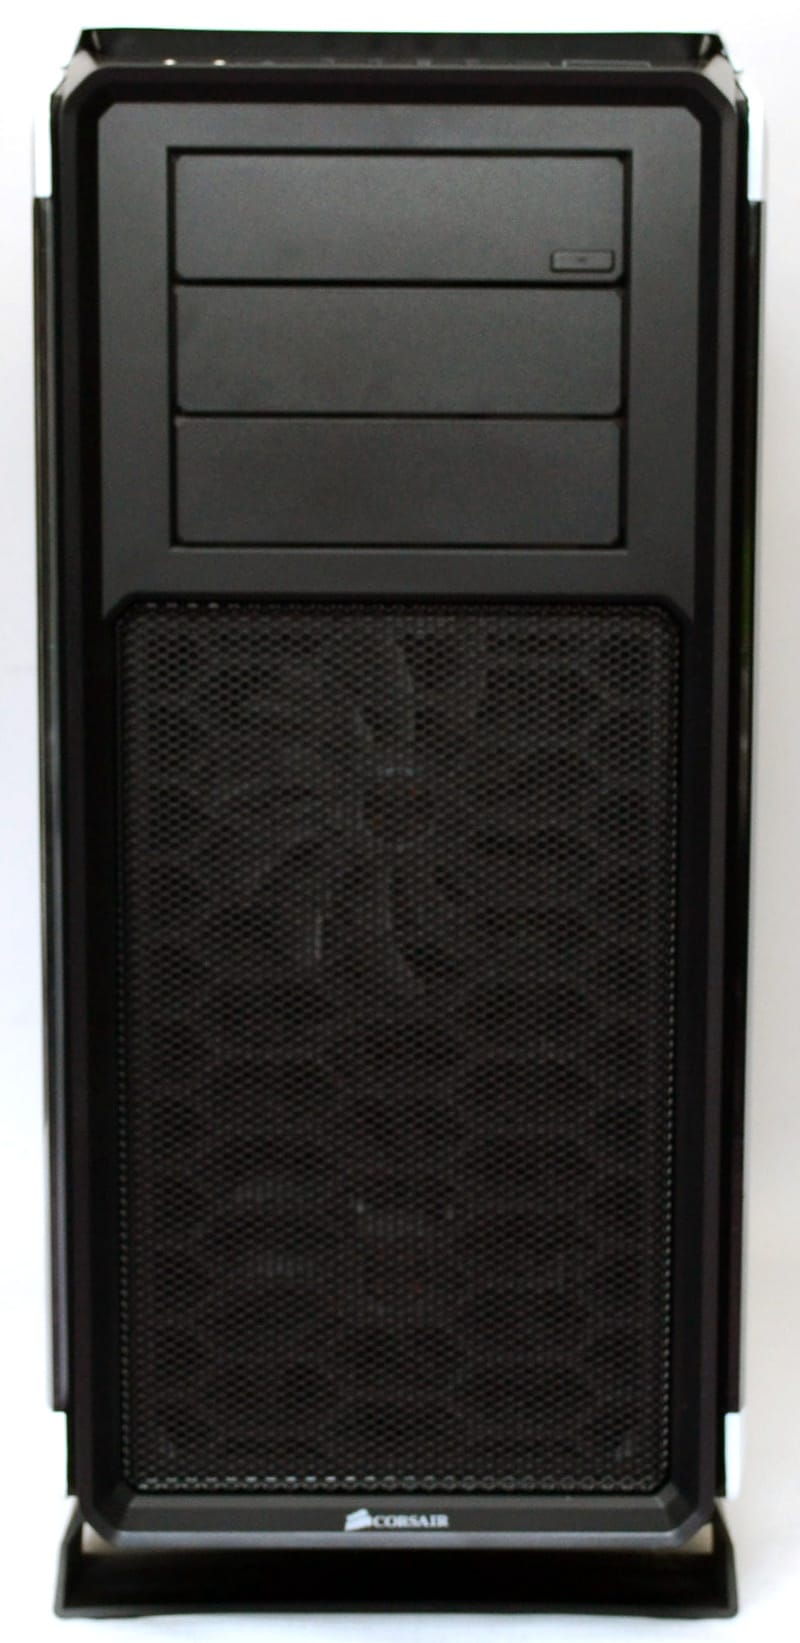
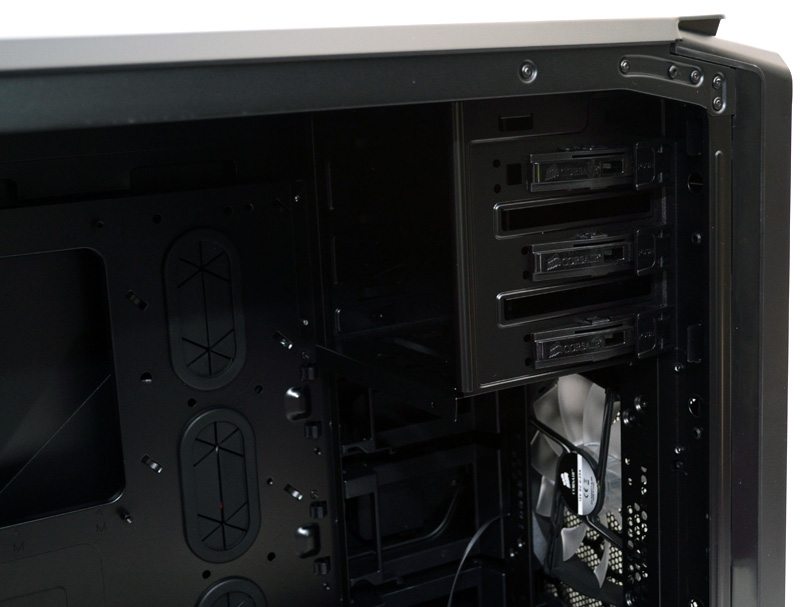
The front panel features a flip-down cover for the top 5.25″ bay, perfect for keeping the clean looks when you mount your optical drive, then you’ll also find two more 5.25″ drive bay covers below that which can be removed from the chassis interior.
At the top you’ll find HD Audio ports, a two-speed fan control button, two USB 2.0 ports, two USB 3.0 ports and nicely designed reset and power buttons.
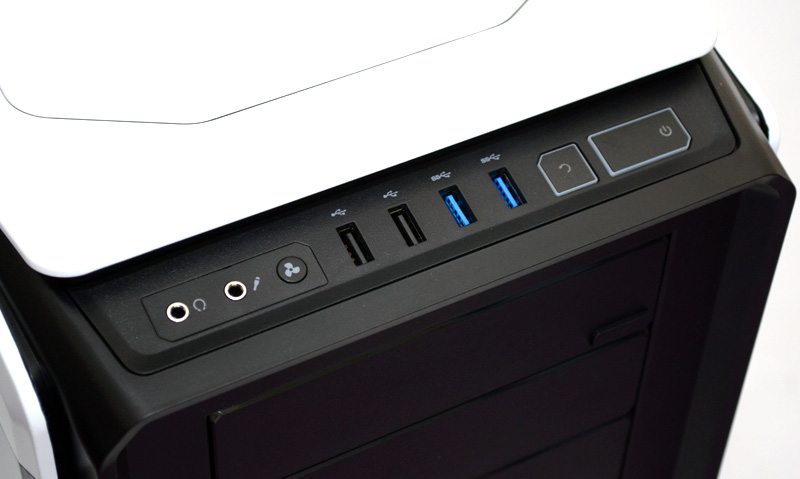
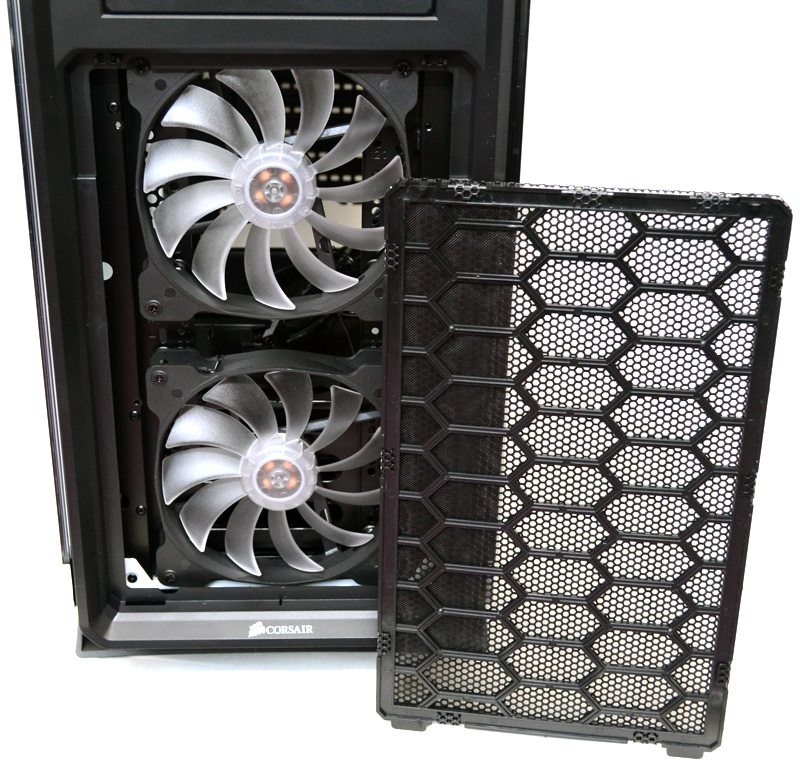
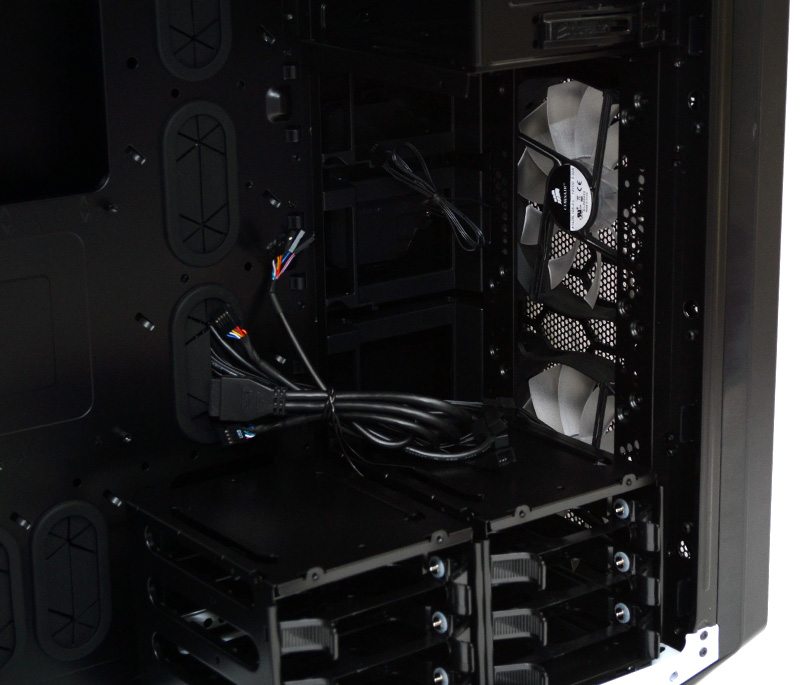
At the bottom is a huge clip-in dust cover, behind which you’ll find two high quality 140mm LED fans.
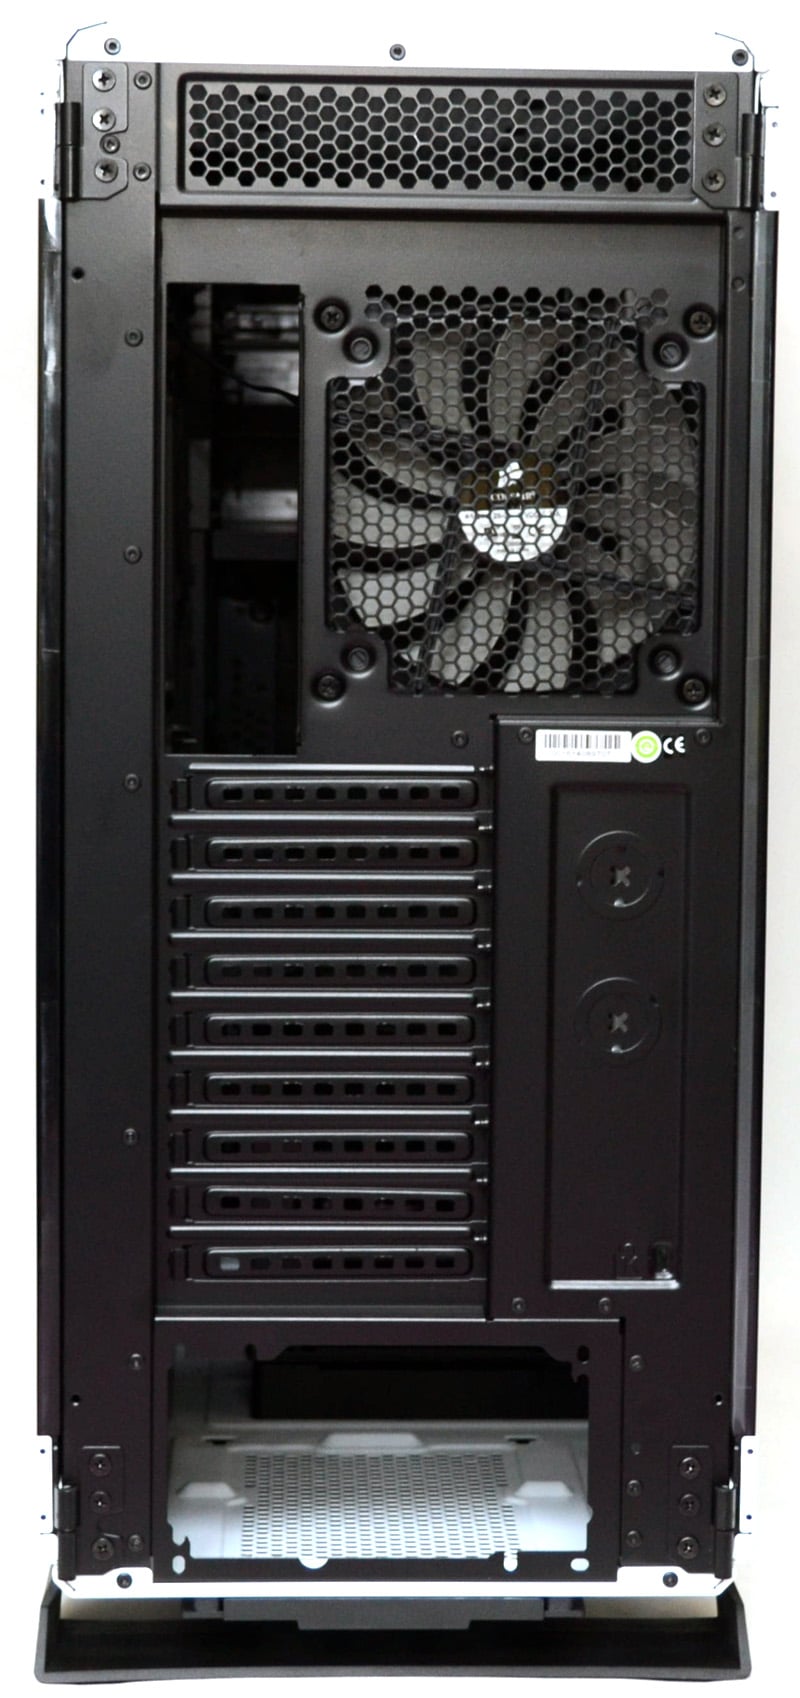
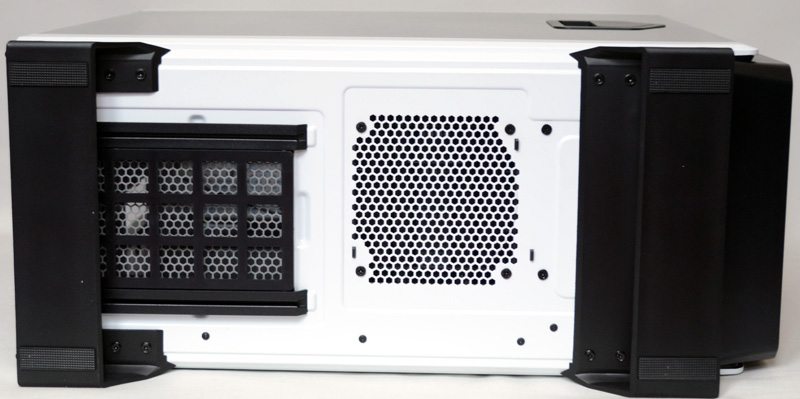
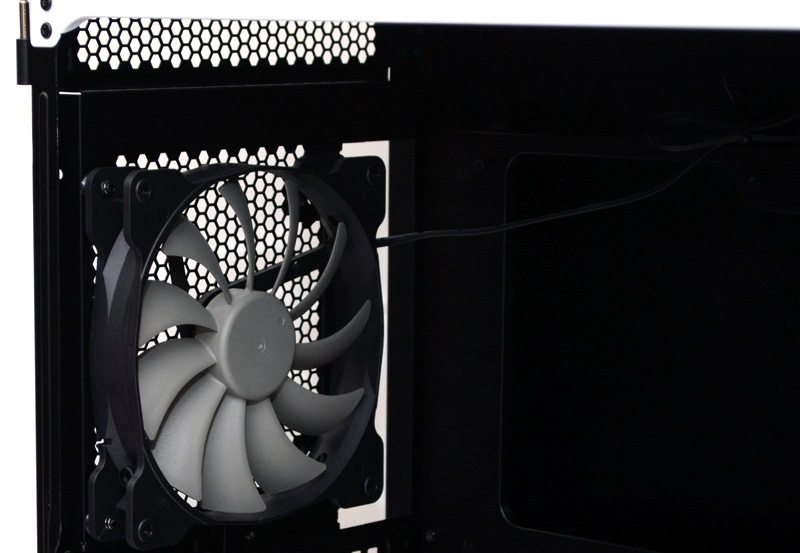
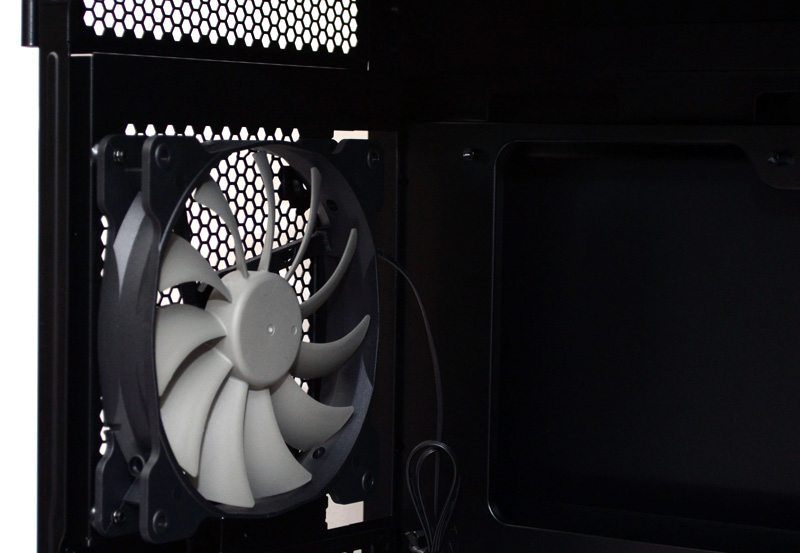
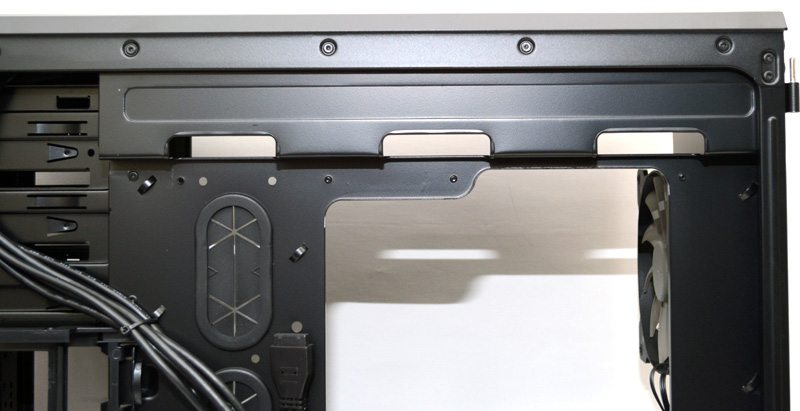
Around the back there is plenty of extra ventilation at the top to allow excess heat to escape, a pre-installed 140mm fan (although you can always install a 120mm if you wish), nine expansion slots and some pop-out metal caps to the right of those for extra cable / water routing options. Finally you’ll also find a bottom mounted PSU cut-out which supports regular and inverted mounting of the power supply. The PSU cut-out is also a good indication of how wide this case is, using none technical terms “it’s very wide”.
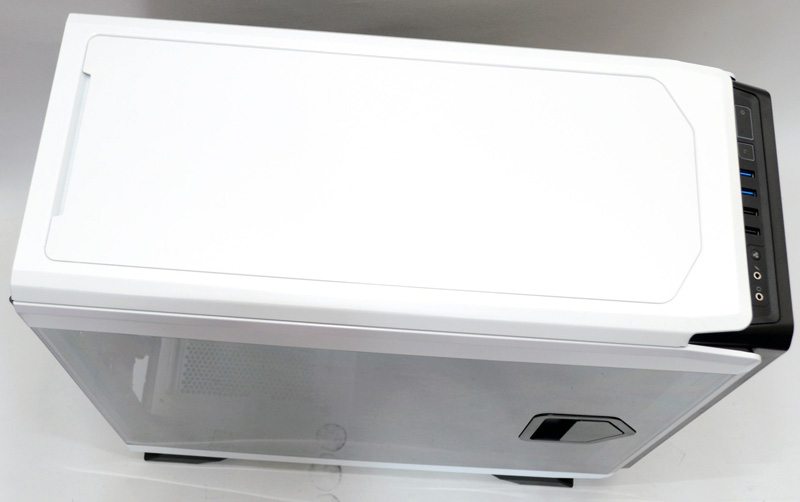
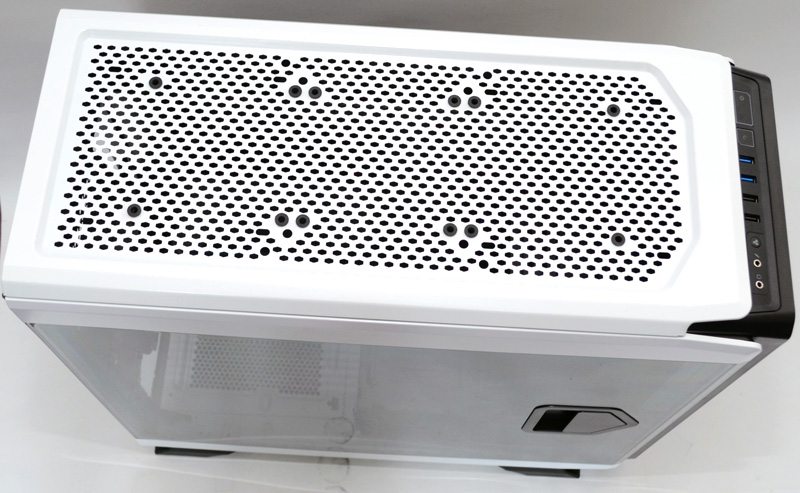
The top panel features a clean look and this is thanks to a magnetic mounted top cover, perfect if you’re not planning on using any top mounted cooling as it’ll help reduce noise from your system and prevent dust and other debris from finding its way inside.
Should you need the extra cooling space you’ll be happy to find extensive mounting options; there is room for 3 x 120mm fans, 2 x 140mm fans, or of course you can install a radiator of up to 360mm / 280mm depending on the width / fan size you use.
There are two large feet that give the chassis great ground clearance, perfect for providing plenty of airflow to the PSU, which comes fitted with a slide out and washable dust filter. There is an additional 120mm fan mount in the base, which doesn’t come with a filter, but due to the current hard drive configuration it is blocked off on the chassis interior anyway.
Interior
A quick pull on the handle and the side panel comes gliding open, giving me immediate access to the interior when I need it, just keep in mind that you do need a fair amount of space to open the door this way as they’re pretty wide.
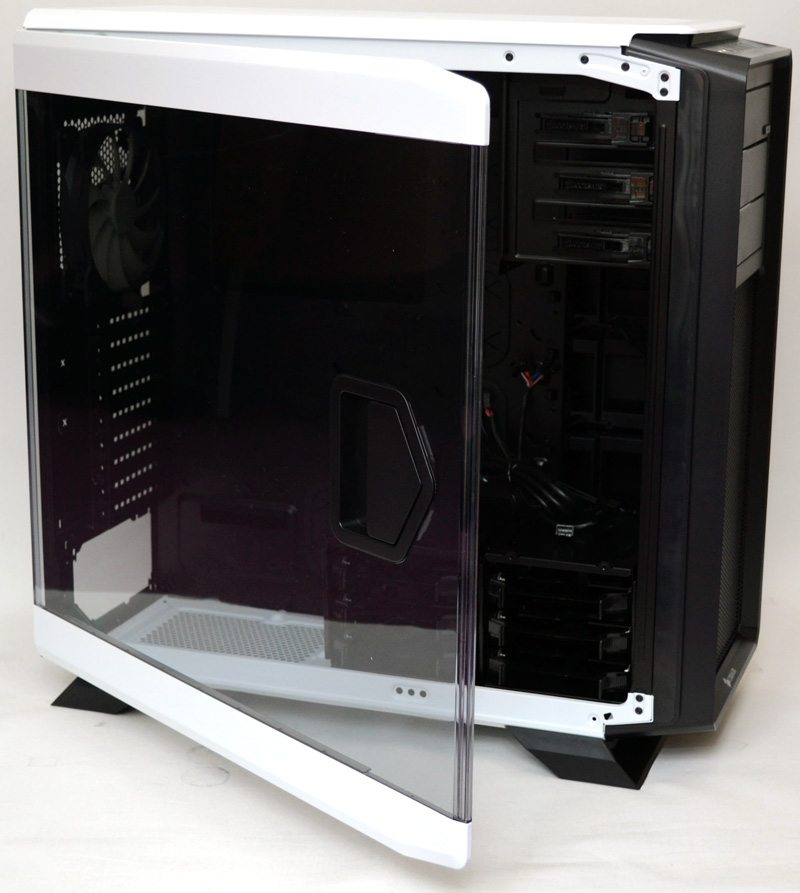
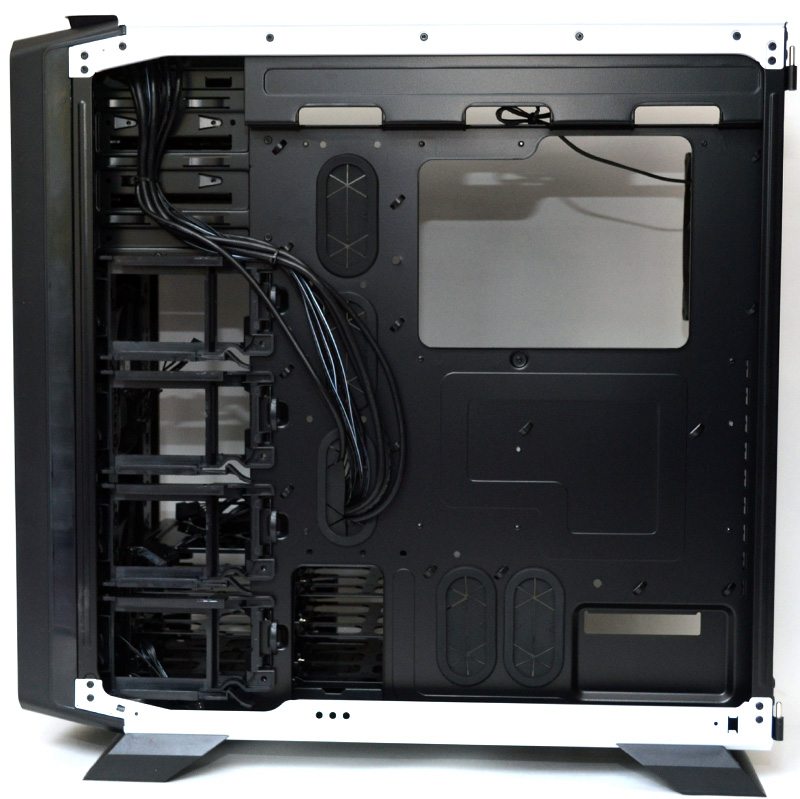
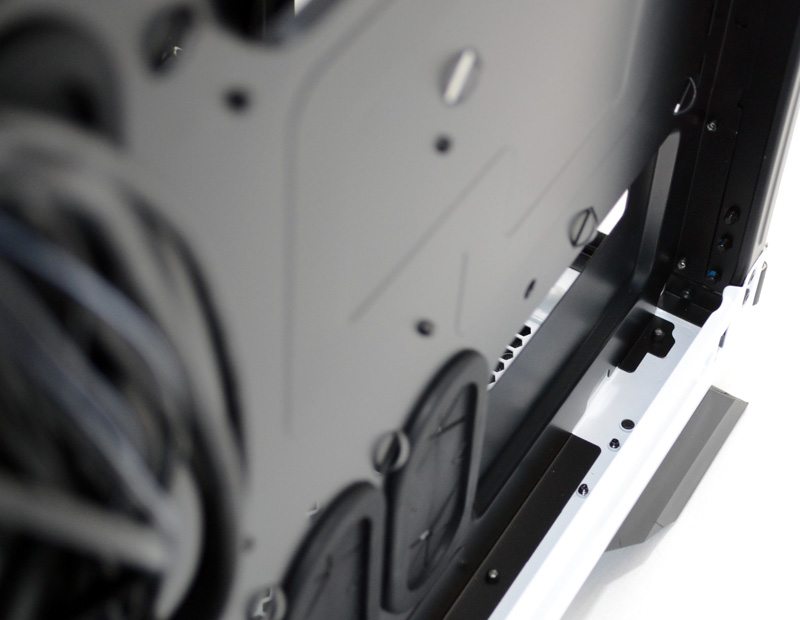
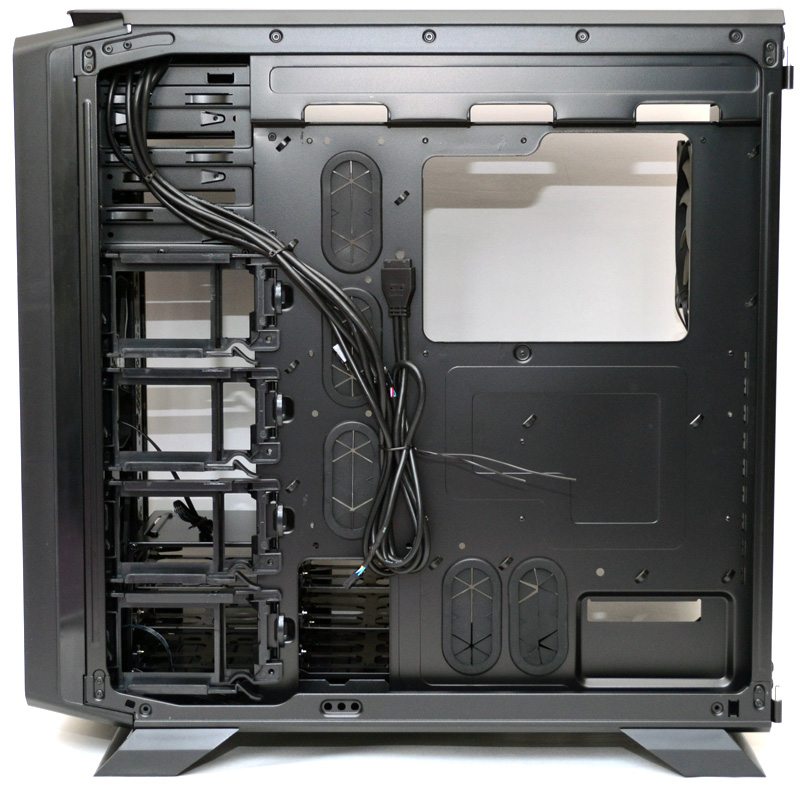
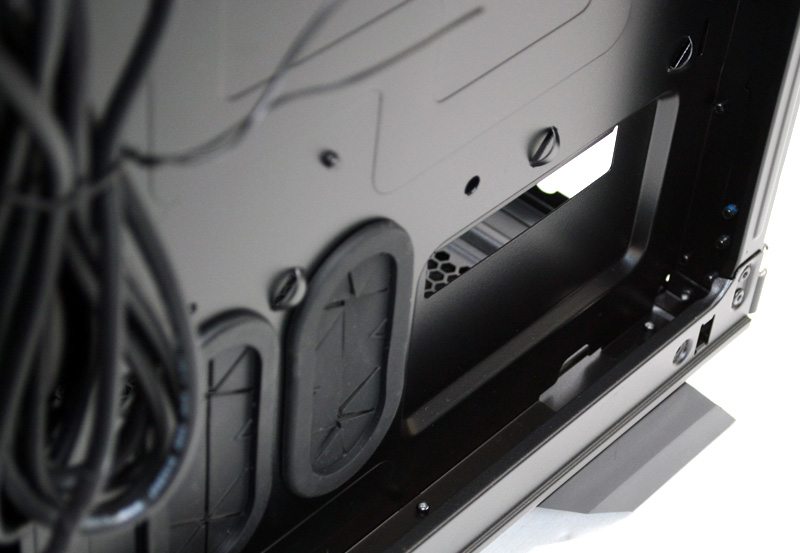
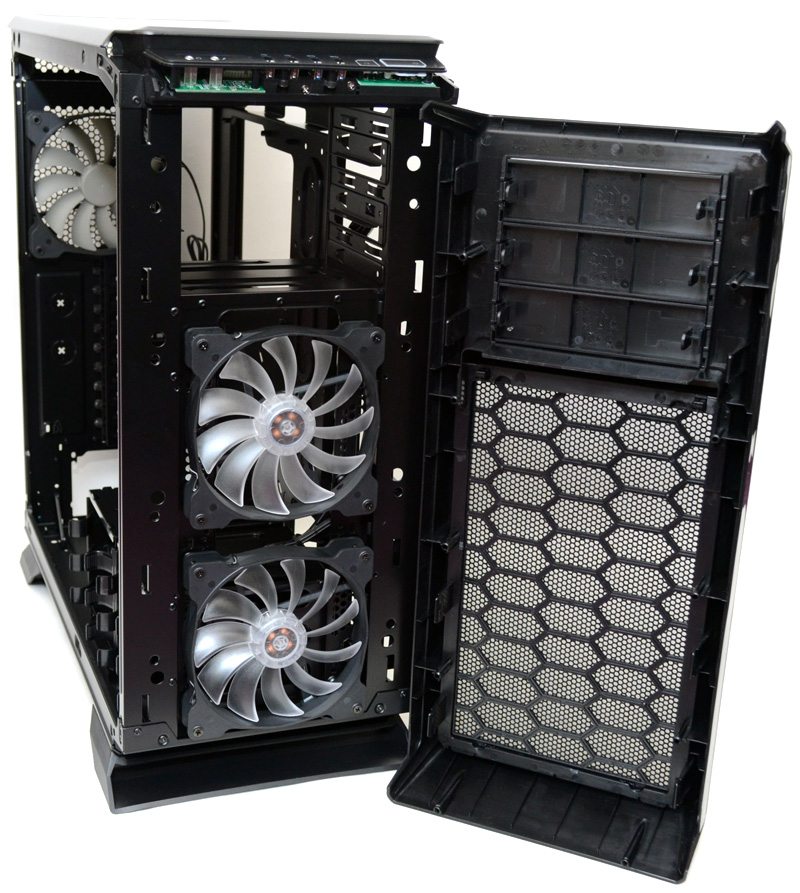
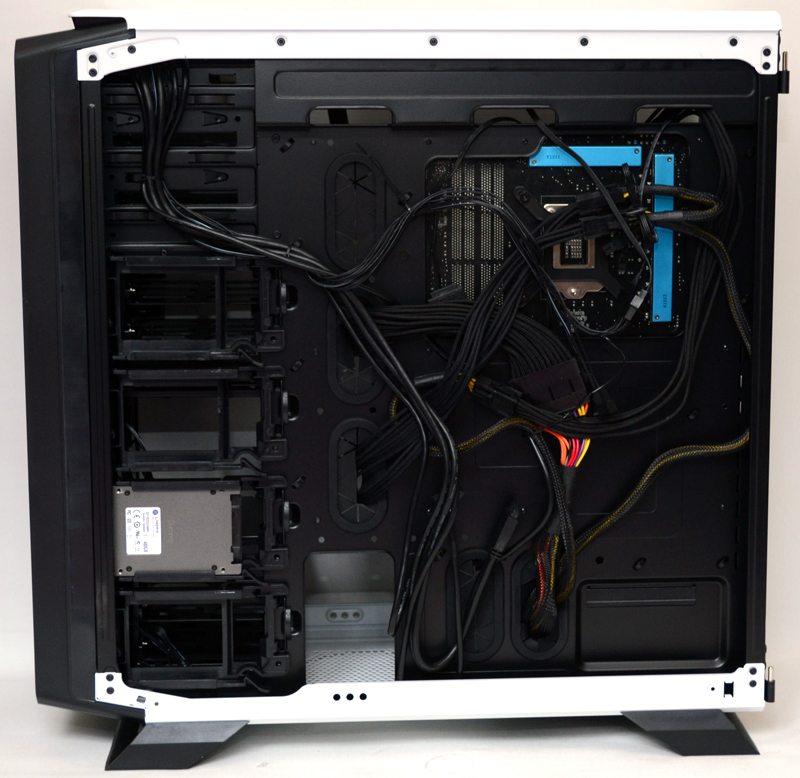
With the door open a little bit you can lift it right off the hinges, this isn’t hard to do and it also means we know have unimpeded access to the interior of the chassis. As you can see, the interior is finished in black, giving a very strong contrast against the mostly white exterior. The motherboard backplate features a large CPU cut-out, as well as five large rubber grommets for cable routing.

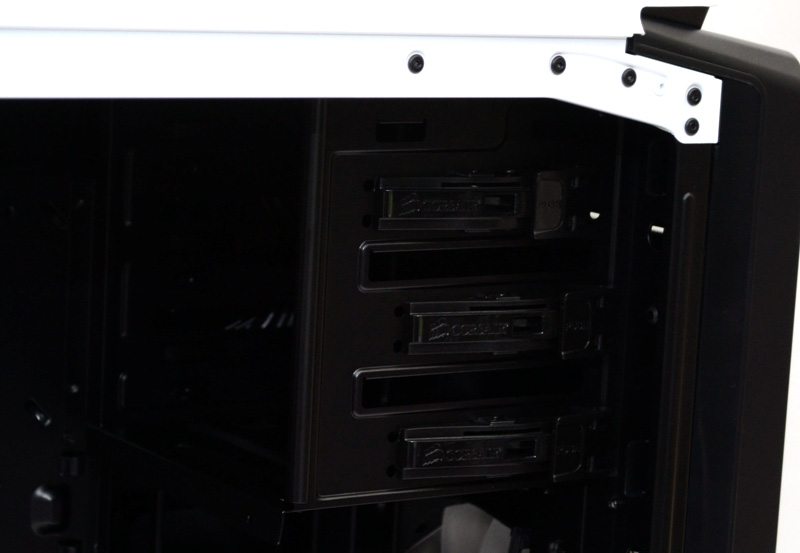
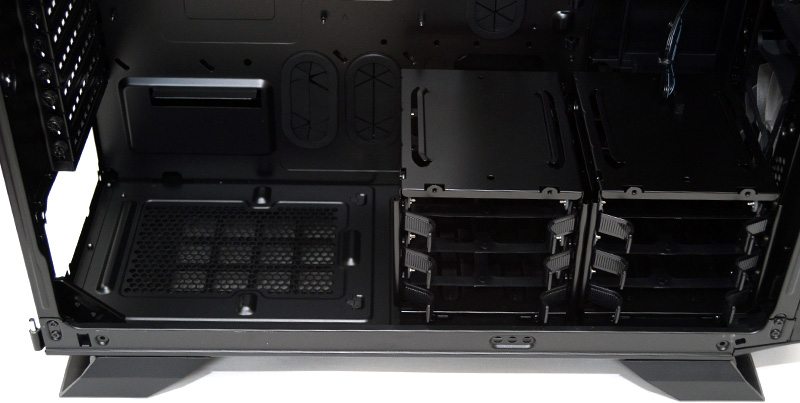
In the base you’ll find an extended ventilation section for the PSU, more than enough room for extra long power supplies without having to remove the hard drive bays. There are 2 hard drive bays, each with support for three 2.5″ (screws) or 3.5″ drives (tool free). Both hard drive bays are completely removable and highly modular thanks to their slide-lock fittings that allows you to stack them on each other.
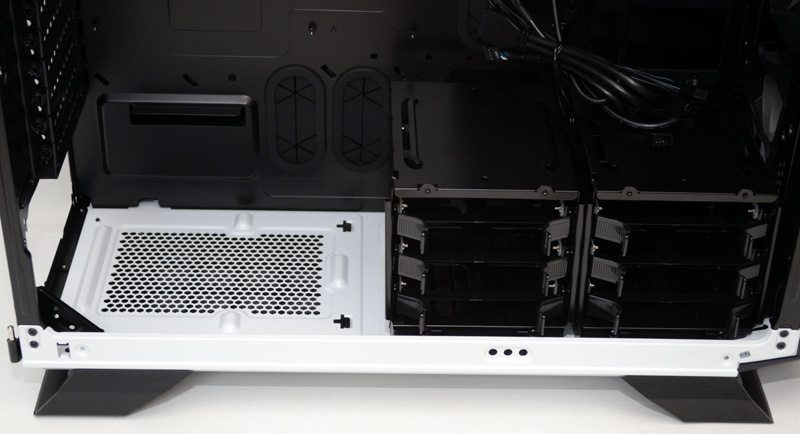
There is loads of room up front, perfect for giving lots of clearance to the front 140mm fans. You can of course strip out the hard drive bays, or move them to one of the various mounting spots within the chassis (more on that shortly) to make way for front panel radiators and fans.
Each of the three 5.25″ drive bays comes fitted with a tool free locking mechanism.
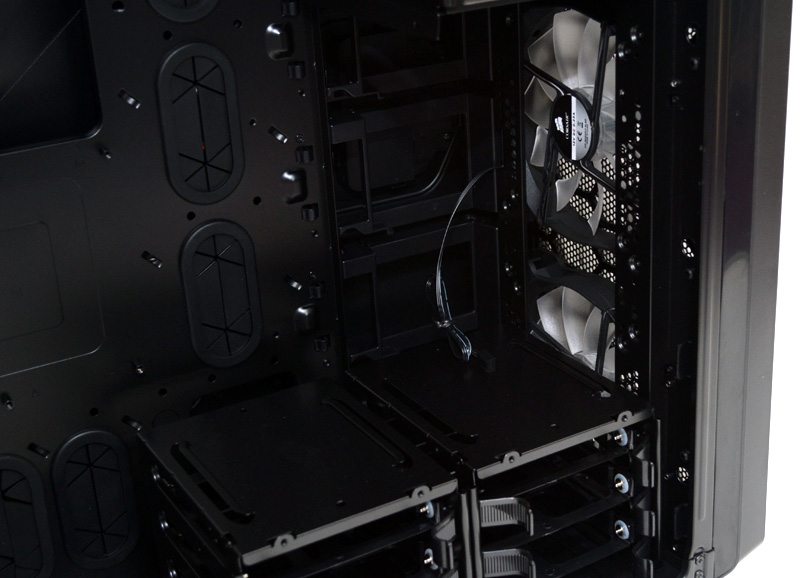
In the back you’ll find a powerful 140mm exhaust fan and more than enough clearance for a good quality 120mm / 140mm water cooling radiator.
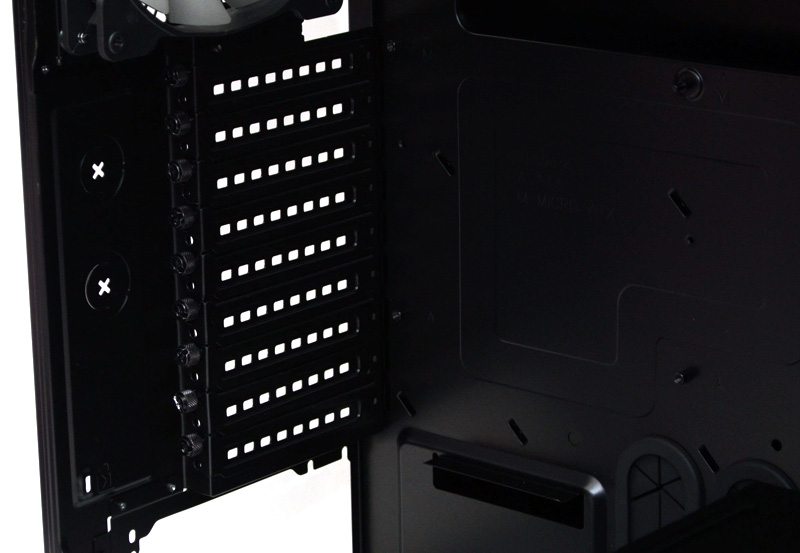
Each of the nine expansion slot covers is ventilated and comes fitted with a thumb screw for easy access.
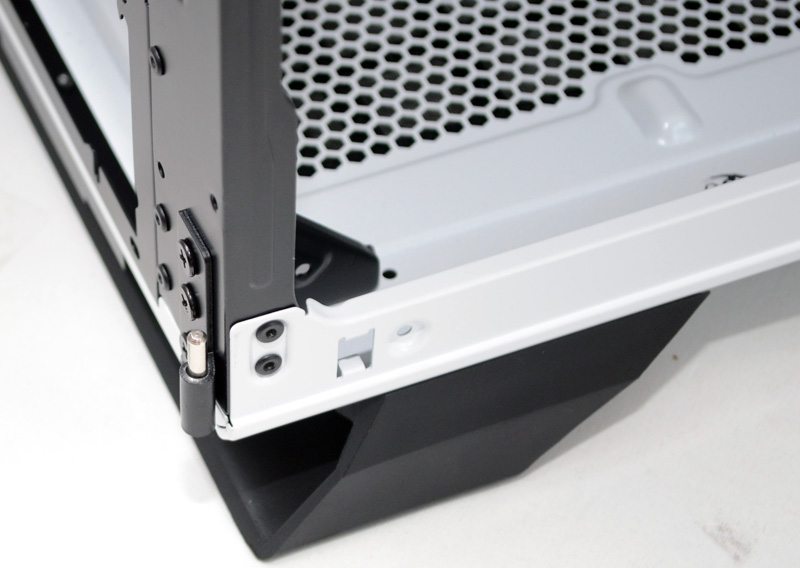
This is the lower peg for mounting the side panel door/window, the top one looks the same. Both are screwed into the back of the chassis and feel incredibly strong.
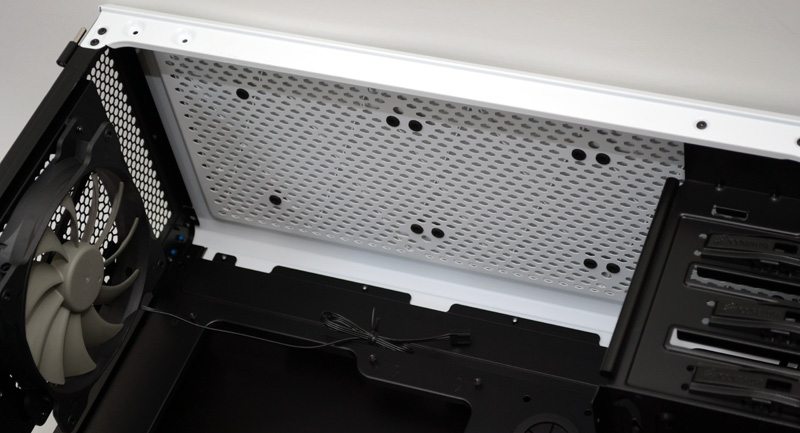
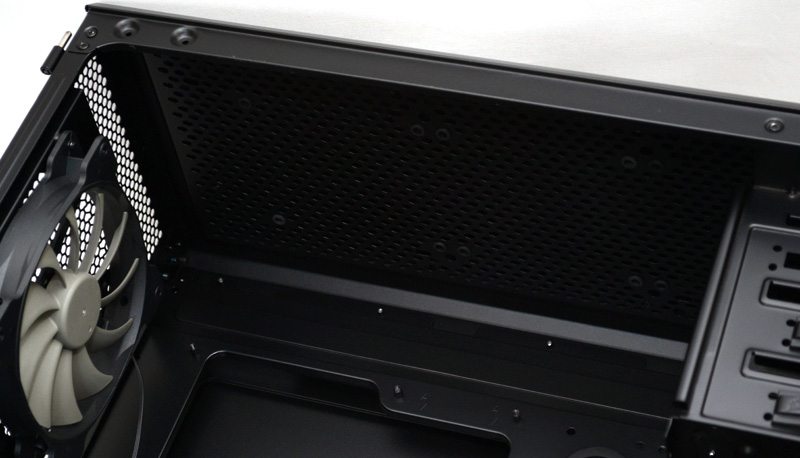
Obviously you can mount radiators in the top of the chassis, but Corsair have us plenty of installation space for thick radiators or push-pull fan configurations on thinner radiators.
The right side panel opens out in the same fashion as the left side panel, handy for when you have to make quick hard drive / cable changes.
There are loads of cable tie loops around the back, a perfect complement for the extensive cable routing holes and this should help keep your build neat and tidy.
There is enough cable routing space to build a house! as much as 30mm in some parts.
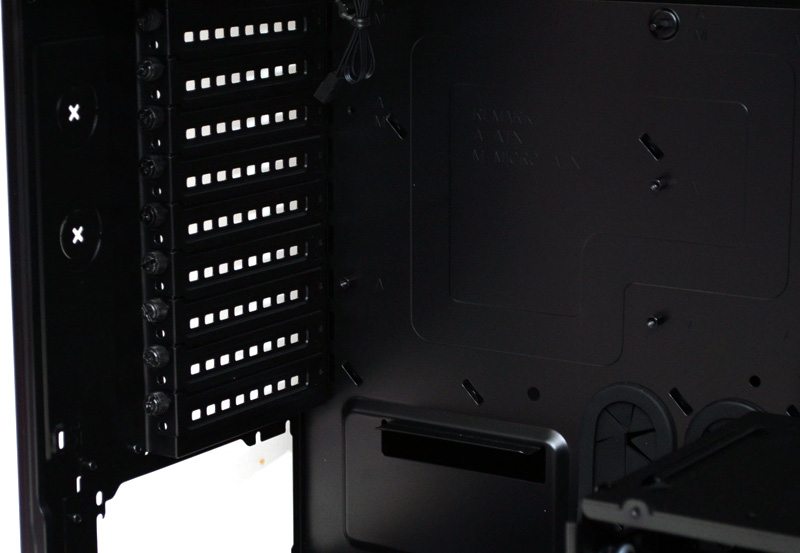
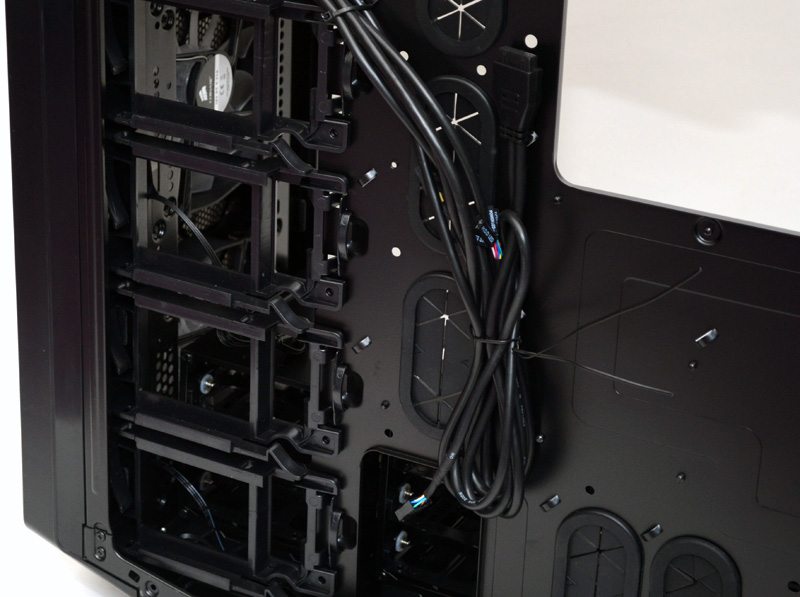
One of the coolest features of this chassis is the wall of 2.5″ drive bays, these plastic mounts can be easily clipped out, or you can just slot in your drive and it locks into place tool free, giving us four extra hard drive bays and also mounting them in a way that they look desirable from the other side of the chassis.

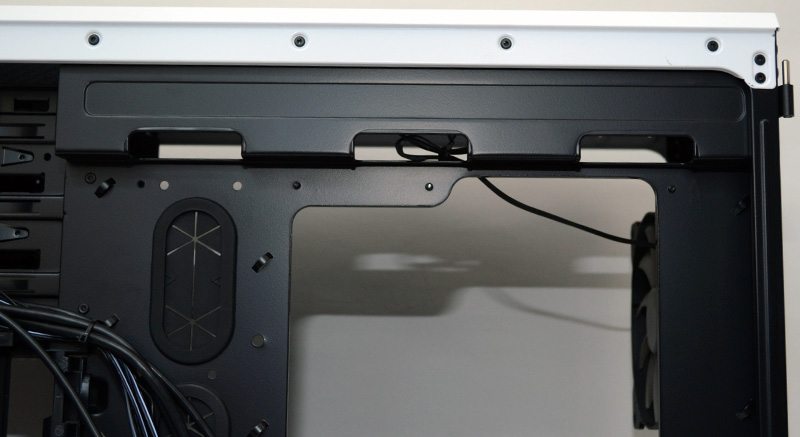
The top fan mounts as well as any I/O on the top end of the motherboard can benefit from three large cable routing cut-outs at the top of the chassis, much better than trailing cables across the motherboard.
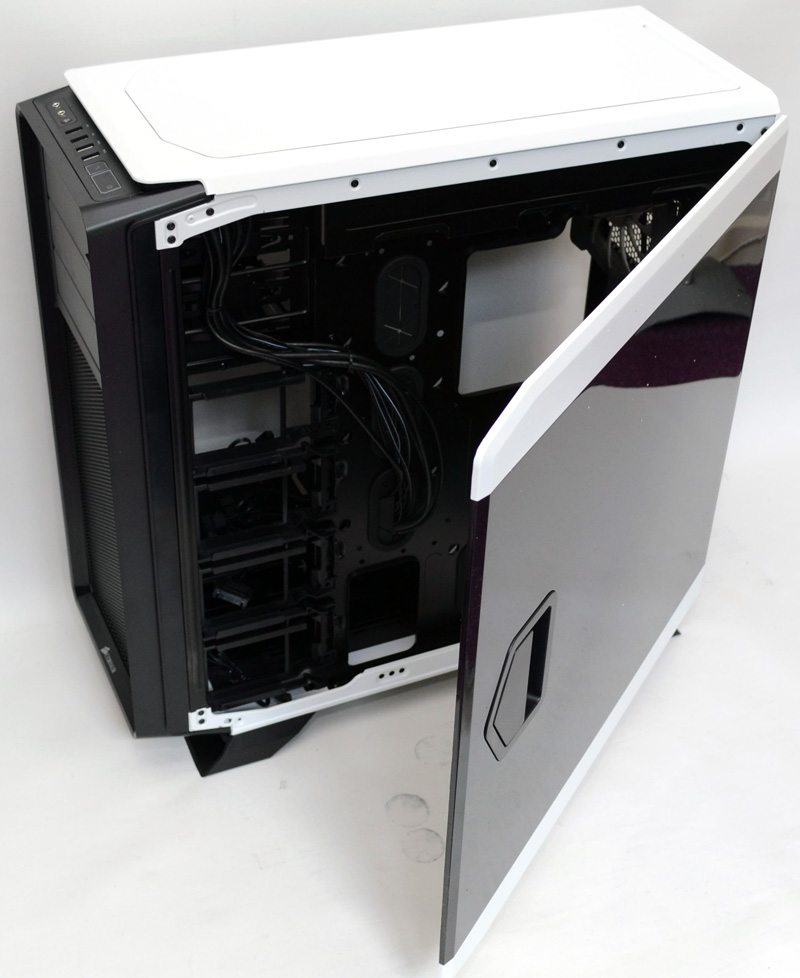
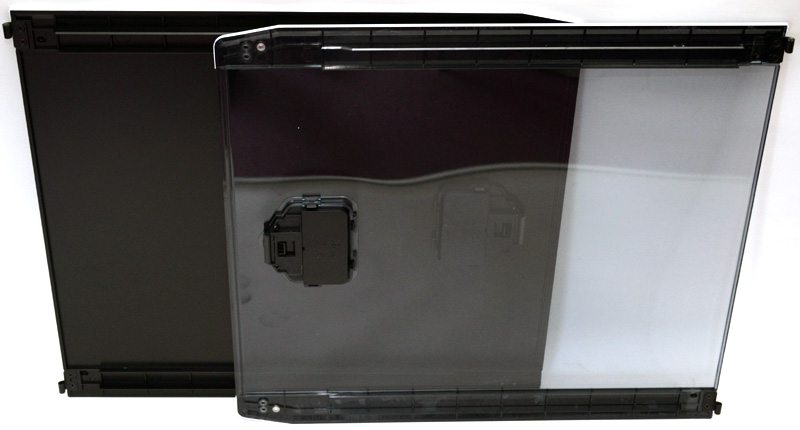
Here we see both side panels, the right panel is at the back and the clear panel at the front. The right panel features thick plastic that keeps it feeling pretty strong, which it needs to be since it has no frame at the left and right sides.
Exterior
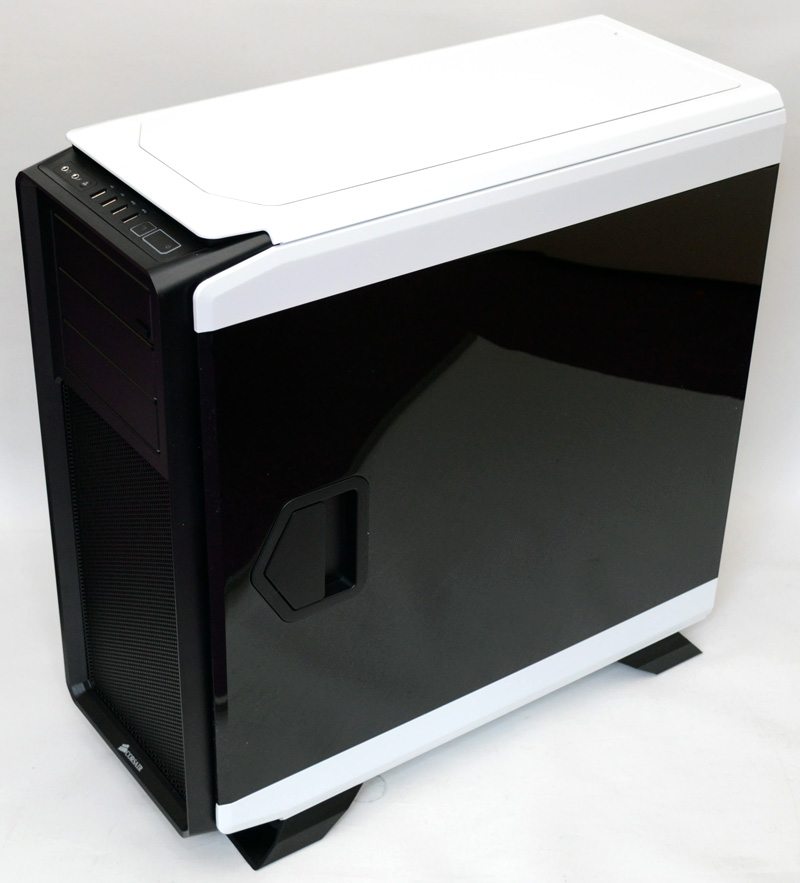
Here we have the slightly cheaper Graphite 730T chassis, this chassis is virtually identical to the 760T for 95% of its construction, so while I’ve been through it with the camera just as extensively as I did with the 760T on the previous pages, I’m only going to stop and comment on any difference between the two models, otherwise I may as well copy and paste most of the text.
The first major and easily the biggest difference is the left side panel, the window is gone in favour of a solid metal panel, this features some cool looking angular shapes towards the back that lead to two extra air vents. Unfortunately these are not filtered, nor do they have space to mount any fans, but extra airflow may bring you benefits dependent on your systems configuration, especially so if you’re air cooling your rig.

The glossy black right side panel is swapped out for another solid metal panel, no extra ventilation this side, but it’s obviously not required behind the motherboard.

The front panel is much the same and still features three 5.25″ drive bays. On the 760T the top bay featured a flip-down optical drive cover, but the 730T does not, these are all just removable covers.

The next big change is that the two channel fan controller is gone, other than that the front IO panel is unchanged.

Ventilation remains the same below that, but you’ll find red LED fans opposed to the blue ones in the white 760T.


Interior
Once again, the interior of the 730T is identical to that of the more expensive 760T, the only real difference between the two models here is obviously the colour of the samples we have at our disposal and the removal of the fan control button on the front panel means that you won’t see the fan connection cables behind the motherboard. Of course I’ve still been around the whole chassis with the camera, so feel free to enjoy the gallery of it below or check out the 760T interior page for full details of the features.


Complete System
Build time on the 760T was a little under 30 minutes, given the overall size of the case this is a good time and the easy build process can be attributed to the extensive work space on the chassis interior.

I’ve chosen to install the Corsair H100i in the top of the chassis and as you can see, it has a huge amount of space on all sides. It was really easy to install in this space and with a little care you should be able to get a push-pull fan configuration with it too.
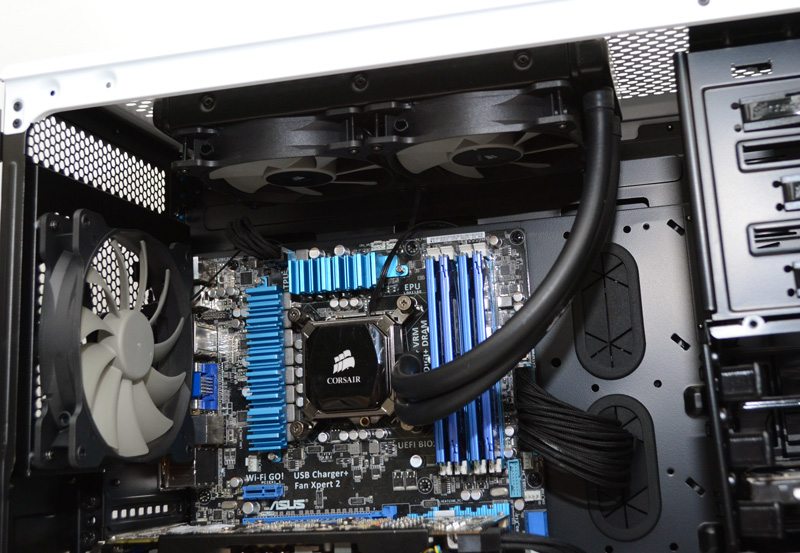
The whole build is very clean-looking and the cable routing options are doing a fantastic job of keeping the airflow unobstructed. Our ATX PSU is obviously quite small in comparison with how big a PSU the chassis can handle, but the dual cable routing holes at the bottom cater to it nicely.
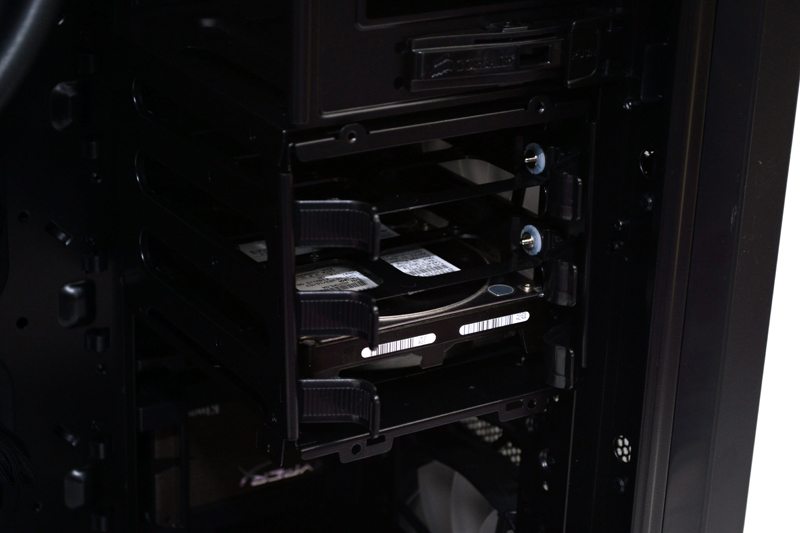
While not needed for our build I thought it would be great to put the modular hard drive bays in a different configuration, so I took the left hard drive bay from the base of the chassis and mounted it below the 5.25″ drive bays, leaving it suspected above the bottom hard drive bays and still allowing plenty of airflow through the middle to the GPU.
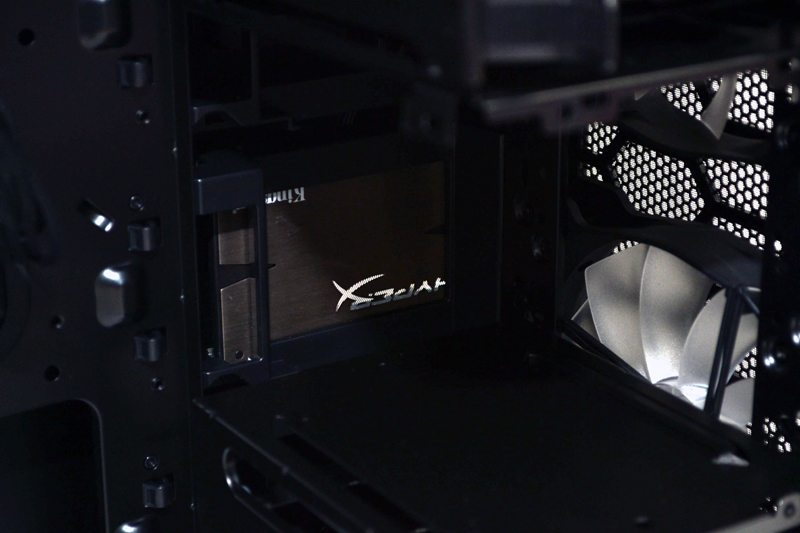
At the back of the chassis and between where I mounted the other two hard drive bays you’ll notice our Kingston SSD sitting nicely in one of the four tool-free 2.5″ drive mounts.
Around the back you can see that the cable management is doing a solid job of keeping things organised. Obviously it could be even better if I took time to strap down each cable individually, but for the purpose of this build I’m very happy with the result, plus the side panel went back on with the first try, that’s usually a good sign of competent cable routing.
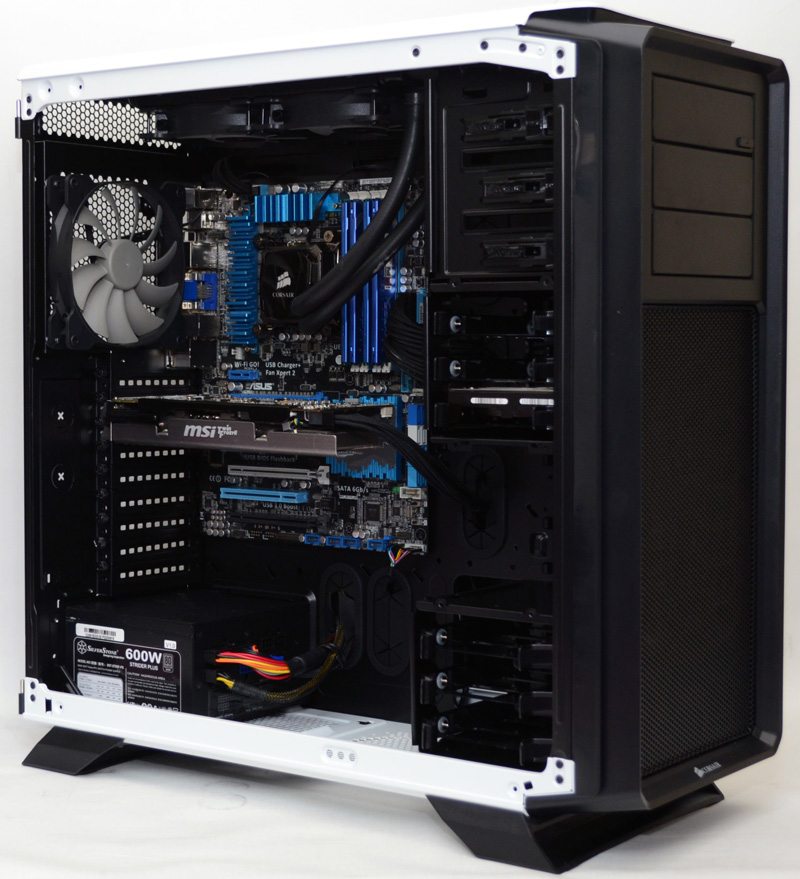
Side panels back in place and we get a nice view oft the chassis interior through that huge tinted side panel window.
The whole build is just stunning, it’s big, bold and certainly makes a statement, not to mention it really does feature one of the coolest side panels I’ve seen. While I haven’t done a build on the 730T I really don’t need to, just imagine this one with the solid metal side panel and ta-da! You’ll get the idea.

Final Thoughts
Price
The Corsair Graphite 760T is available in two colours, black or white for around £144.99 / $179.99 while the Corsair Graphite 730T is £112.99 / $139.99. This obviously means that both the premium 760T and the slightly more wallet friendly 730T are both still rather expensive, but that doesn’t mean they’re not competitive. There are a fair few great choices around this price range and compared to NZXT, Coolermaster and other premium brands, the new Graphite cases are competitive on price and certainly competitive in terms of features.
Overview
Both the 760T and the 730T are some of the best examples of high-end chassis products that are available on the market today, sure enough it is hard to find a “bad” product when you’re spending in excess of £100, but finding the one that is right for you or your system is the tricky part. Both of these new entries to the Graphite series tick a lot of boxes, they’re prime choices for anyone looking to build a high-end system. Both cases are identical in term of the components they can handle and both will easily handle a quad-GPU setup, extensive water cooling loops (both custom and AIO), huge amounts of storage, XL-ATX motherboards, long power supplies and plenty more!
Storage is in no short supply here, with two fully modular hard drive bays that are capable of holding 3 x 2.5″ / 3.5″ drives each, as well as a further four 2.5″ drive bays behind the motherboard bringing the total up to 10 drives! Certainly more than your average user will ever need. Of course if that isn’t enough driver for you then you can purchase a few hard drive cages from the old 600T range (same cage design) and expand it even further. Dependant on your configuration and other components you could get 19 drives in with additional cages, not to mention 3rd part 5.25″ bay converters if you want to go even further.
With air filters on the front panel providing clean airflow via the two high quality 140mm fans, as well as plenty more fan mounts in the base, back and top of the chassis, you should have no trouble getting a lot of airflow through the case. The only issue I saw is that when you move the bottom left hard drive bays like I did in our build section you then gain access to the base fan mount. With the hard drive bays in place this is sealed off, but without the hard drive bays it becomes open. Unfortunately there is no dust filter on the base of the chassis for this fan mount and you would need to buy one separately, but it’s hardly a deal breaker. Next up we have the top panel cover, this is great if you’re not intending on using top mounted cooling as it keep noise in the chassis and dust out. Unfortunately there is no way of stopping dust and debris getting into your chassis should you be using a top mounted radiator, unlike the Obsidian series cases there is no dust filter on the top panel.
The side panel design is nothing short of awesome, it’s really easy to get in and make adjustments to your system and if you ever need to swap out a hard drive, clean out a bit of dust, or install a new component, you’ll be happy that it’s so easy to get inside without having to fumble around with screws at the back of the case.
Cable management is some of the best I’ve seen, there is a huge amount of space behind the motherboard that makes easy work of PSU cables. Those who feel lazy have more than enough room to stuff their cables around the back, while lots of cable tie loops can allow you to create neat cable management like you see on high-end modded products. The cable routing left airflow virtually unobstructed around the motherboard and of course left the whole system looking visually impressive, an important aspect in the 760T as it features such as large side panel window.
Despite a couple of minor dust filtering issues on the new cases there is a lot to love, if you’re looking to build an ultra-high performance gaming (or similar) style system then you’ll have no issues getting any of today’s high end components such as long graphics cards and large CPU coolers / radiators into either the 730T or the 760T. The 760T is certainly the better option of the two, the added fan controller may only offer a low and high setting, but it’s great for toggling between a mode more suitable for watching a movie and cranking up the fans when your running your system harder. The side panel window is a great option for showing off your rig and the flip down cover on the top 5.25″ drive bay is a nice little addition. Of course the 730T is every bit as capable when it comes to installing a powerful system, the only other difference being the solid side panels, if you’re not interested in the window panel or the fan controller, but still want all the other features, then this is a great value for money option that makes the 730T very a very competitive price vs performance option.
Pros
- Extensive options for air and water cooling
- Magnetic top panel cover looks great
- Easy access dust filters on PSU and front panel
- Three high quality 140mm fan pre-installed
- Fully modular and expandable hard drive bays
- Four 2.5″ hard drive mounts behind motherboard
- Impressive cable routing
- Reliable build quality
- Unique and visually stunning side panel window design (760T only)
- Two channel fan controller included (760T only)
- Very competitive price tag (730T only)
Cons
- No dust filter for bottom fan mount, no dust / debris filter for top panel
eTeknix says: “The new entries to the Graphite series are simply stunning, the 760T certainly steals the show with its huge side panel window, but the 730T is still an impressively capable product and ideal for those who are more focused on component compatibility rather than seeing what the interior looks like through their side panel. If you’re looking to build an ultra high end gaming rig, you’ll be very happy with either of these new cases and they’re both solid contenders when compared to similar priced / specification products from rival brands.”

Corsair Graphite 730T Chassis Review

Corsair Graphite 760T Chassis Review
Thank you Corsair for providing us with these samples.