be quiet! Silent Base 802 Case Review
Peter Donnell / 4 years ago
When it comes to high-end PC components, be quiet! are top of their game. For years now, they’ve had many of the finest fans, coolers and power supplies on the market. In more recent years, they’ve been diving into the world of PC cases, and surprise surprise, they’re some of the finest PC cases around. They’ve had a meticulous approach to noise suppression, no shock there then. However, they’ve always maintained their standards for premium build quality and extremely modular designs. With all that in mind, I’m happy to welcome the be quiet! Silent Base 802 into the office, as this may be one of their most impressive cases to date.
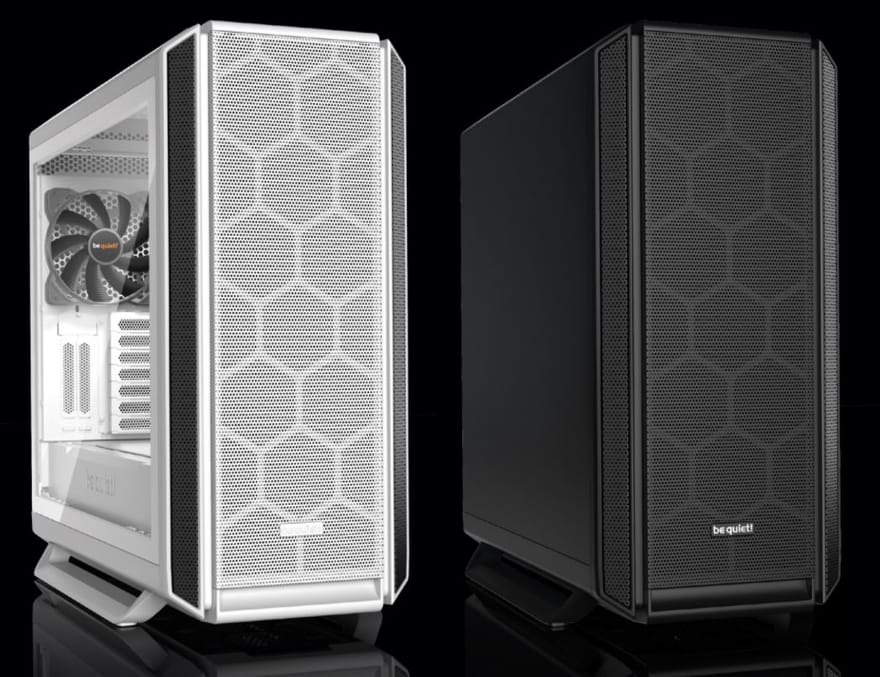
be quiet! Silent Base 802
The Silent Base 802 is extremely well equipped, and as the name would suggest, it’s built with a focus on reducing system noise. That starts with extensively applied 10mm thick sound-dampening foam on the interior panels. There’s also three of their award-winning Pure Wings 2 140mm fans installed, and so much more. While you can get this with a tempered glass panel, I said no, I want the real silent one and got a thick solid left panel with another layer of 10mm padding too. I mean… why not! We see enough tempered glass in the office case reviews.
Features
- Two interchangeable front panels and top covers:
- Closed front panel and two-part top cover for silent operation
- High-airflow intake front panel and top cover for maximum performance
- High-grade, extra thick dampening mats
- Side: 10mm
- Top (closed cover): 3mm
- Front (closed panel): 10mm
- Three pre-installed Pure Wings 2 140mm fans
- Four-step fan controller with PWM hub option (3 manual steps + PWM)
- USB 3.2 Gen. 2 Type C for latest peripheral support
- Invertible motherboard layout
- Detachable fan bracket at the top for easy installation of fans or radiators
- Support for water cooling radiators up to 420mm in length
- PSU shroud for a clean look and easy cable management
- Windowed version comes with HDD slot covers
- Easy installation of PSU with a mounting bracket, installed from the rear side
- Various options to install up to seven SSDs out of the box
- Removable side panels released with the push of a button – no screws needed
- Easily removable dust filters
- Optional tempered glass side window (can be placed on the left or right side of the case)
For in-depth specifications, please check the official be quiet! Silent Base 802 product page here.
What be quiet! Had to Say
“Silent Base is the case series with which it all began for be quiet!, a large mid-tower chassis offering a well-balanced mix of silent cooling and best-in-class usability. With Silent Base 802, we now add a third element to this mix: great airflow. These three qualities have driven be quiet!’s development process, leading to several familiar and unique features. Comparing Silent Base 802 to its predecessor, Silent Base 801, users will recognize its metal frame and panels, decreasing sound-inducing vibrations to an absolute minimum. Users will also recognize its spacious, versatile layout and ample cooling options. Unique is Silent Base 802’s approach to balancing silent cooling and airflow by offering interchangeable panels to maximize sound dampening or cooling performance, making it essentially two cases in one.
Developed and designed in Germany, the Silent Base 802 is a perfect choice for PC enthusiasts who want to build systems that can flexibly adapt to situations where quiet operation, great airflow, or a balanced mix of these two is required. The be quiet! Silent Base 802 will be available with a tempered glass-windowed side panel or a sound-insulated metal side panel, and comes in two colours: black and white.”
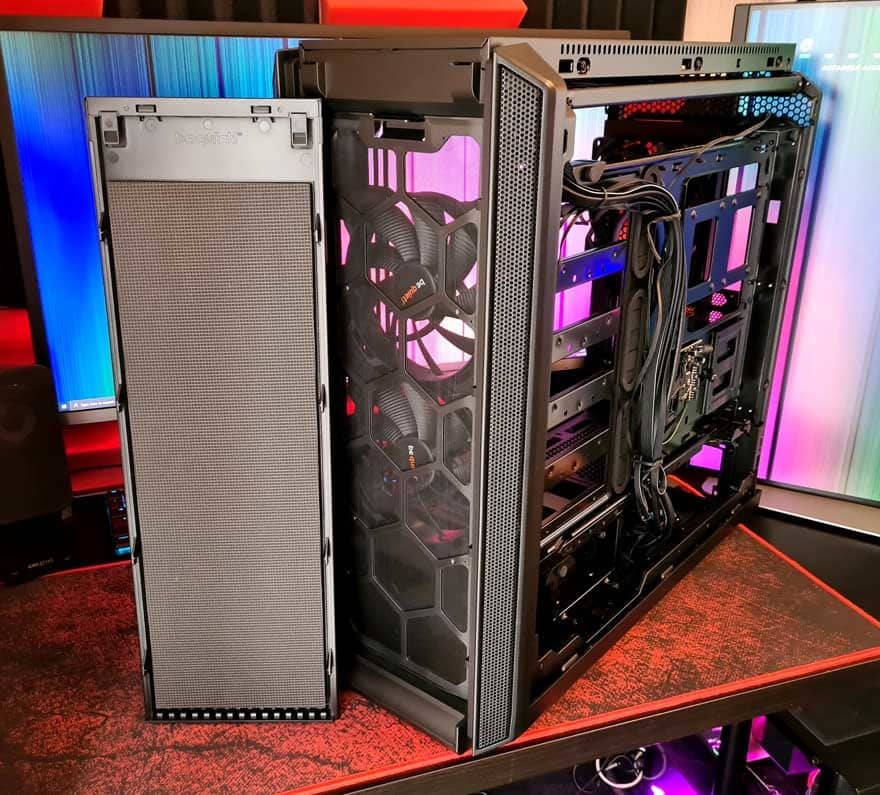
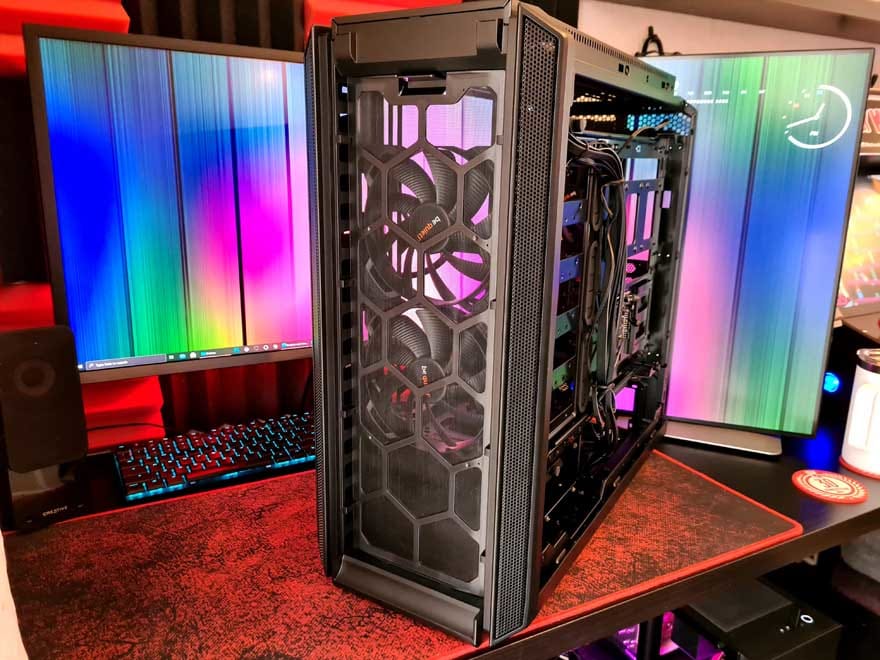
Exterior
Without a doubt, this is a gorgeous looking PC case. Sure, it’s a bit bland and clean looking with that solid panel on it, but that’s what I ordered, and it looks great!

The details are what make this case though, and the fit and finish of all the edges and corners really let you know it’s a quality product. Nothing rattles, everything feels slightly overbuilt and really well-engineered. There are two large air vents as well as airflow gapping around the main front panel surface. It’s a big case too, so overall there’s a lot more airflow here than you might think, and even more along that bottom edge too.

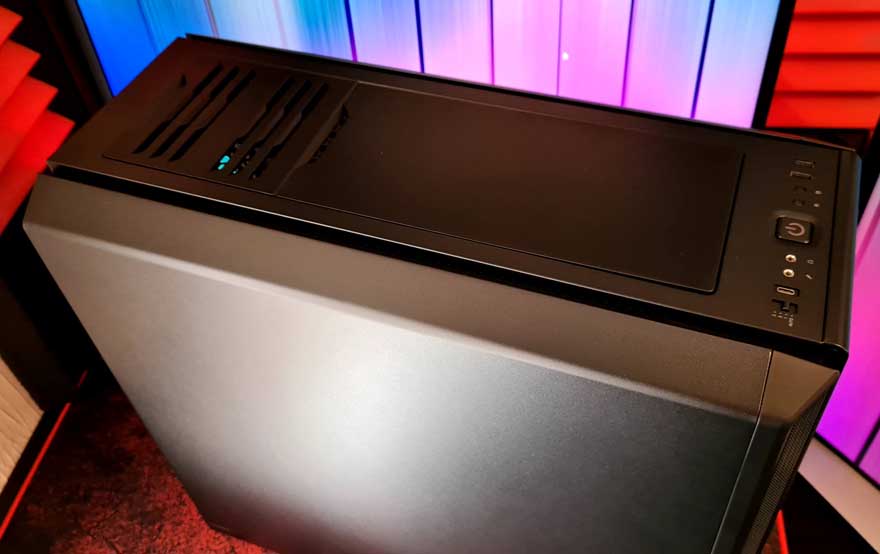
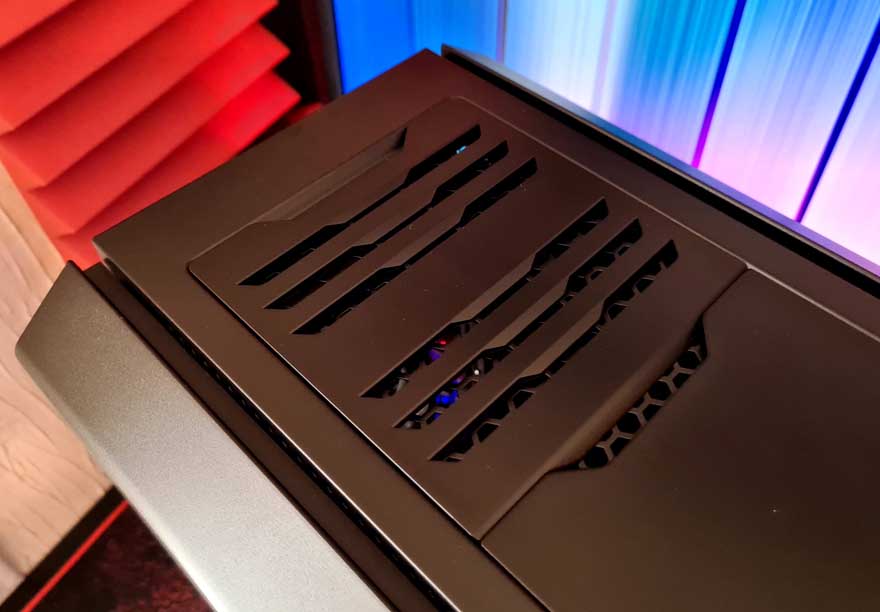
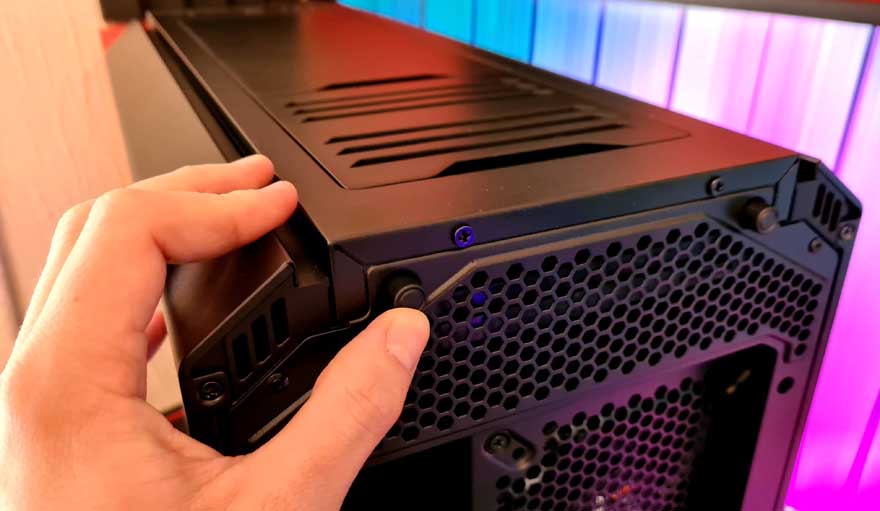
There’s a lot going on up top, with a full length radiator/fan mount. However, it has two covers on it as standard. There’s a ventilated one towards the rear, and a solid one for the rest.
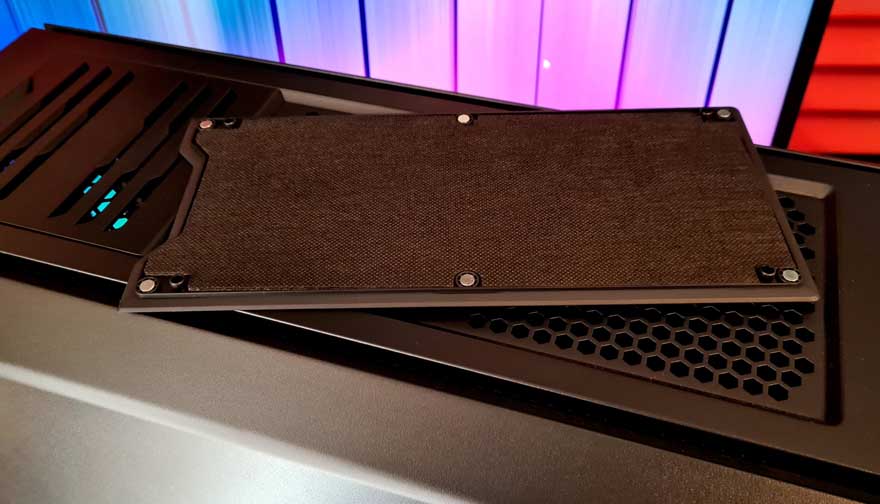
They’re all magnetically removable, and there are ventilated version with filters included in the box, should you wish to actually open this bit up.
Just lift up the panel and drop in a new one, it’s that easy. Of course, they’re really well made, all lined with noise isolation materials, and have the magnetic locks.
As you can see, you could just pop the roof off for passive airflow, handy if it’s a really hot day in the office or something. It also means you can add a big radiator or more fans up here too if you really need to.

The main control panel is well equipped too. There’s a large power button, with a smaller reset button off to the right. You get audio jacks too. There are two USB 3.0 ports and a Type-C, which are all blacked out and stealthy. Finally, there’s a four speed fan control switch, with AUTO, 1, 2, and 3 speed settings.

Down the right-side panel, it’s really just the same as the left. Another thick panel with even more noise isolation materials on the interior.

Around the back, you can see there’s a lot of headroom above the motherboard, and the case has some ventilation here to prevent heat building up in the top or rear of the case.

There are two push-release buttons to remove the side panels; no thumbscrews required!
There’s a 120/140mm fan mount, with a 140mm fan pre-installed.

You get all the usual expansion slots for an ATX motherboard, but there are two additional slots mounted vertically; perfect for using a GPU riser cable!

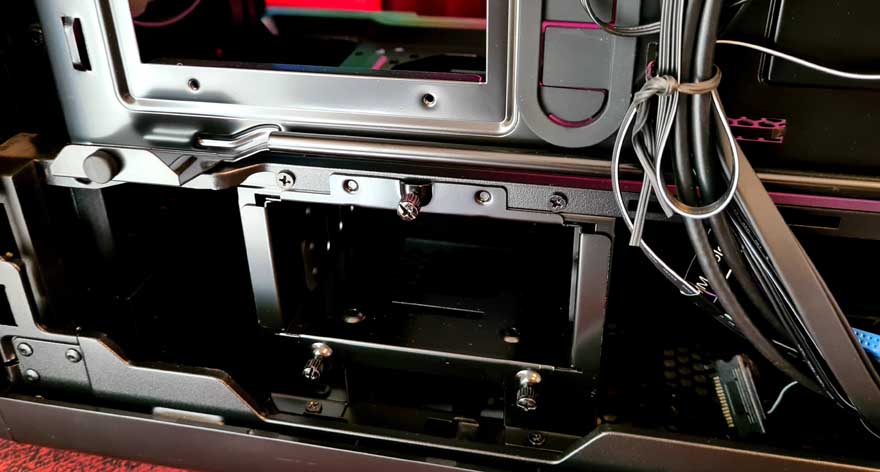
The PSU is installed from the rear of the case, and you’ll need to remove this bracket to fit it into the case.

Interior
To open the side panels, just push the big button on the rear of the case and it’ll pop forwards a little. You them simply lift it up and away from the case.

The side panels each come fitted with a huge panel of noise dampening materials.
It’s not usually this thick though, and at 10mm thick, it’s a hefty chunk of material!

The interior of this case looks fantastic, which is great news for those of you getting the tempered glass model. It’s going to be something worthy of showing off! There’s a lot of space in here too, and a lot of practical features, so it’s not just form over function. There are large cable routing cut-outs all around the motherboard, as well as some cable routing grommets to the right.

There’s a full-length PSU shroud built into the case too. Interesting, this has a similar removable cover design like the top of the case.

In the rear, you’ll find there are internal screws for the expansion slots, but there’s plenty of room here, so getting a screwdriver to them shouldn’t be an issue.

There’s the first of those lovely be quiet! fans that come pre-installed. I know these are whisper quiet, so they’re a perfect fit for this case.

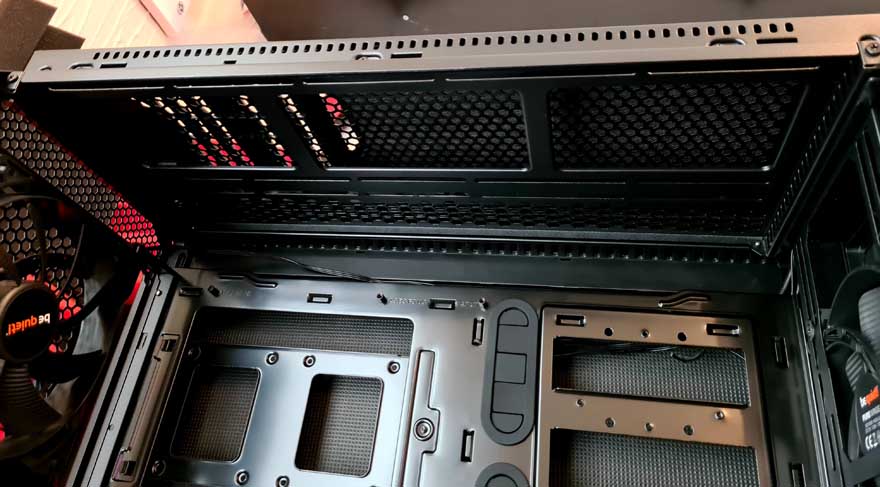
While there are two more in the front, you’ll also find options for 120mm and 140mm fans and radiators here.

With the front cover removed from the shroud, you can even use the full height of the case for radiators.

Plus, there’s just as much room in the top, allowing you to install up to a 420mm radiator in the front, or 360mm in the top should you want to go for a really extreme build.
On the other side, another thick panel with more of that lovely material on the interior.

Behind that, you’ll find a plethora of cable routing options. There are a fair few cables as standard, but they’re all black and vaguely routed to the right places.
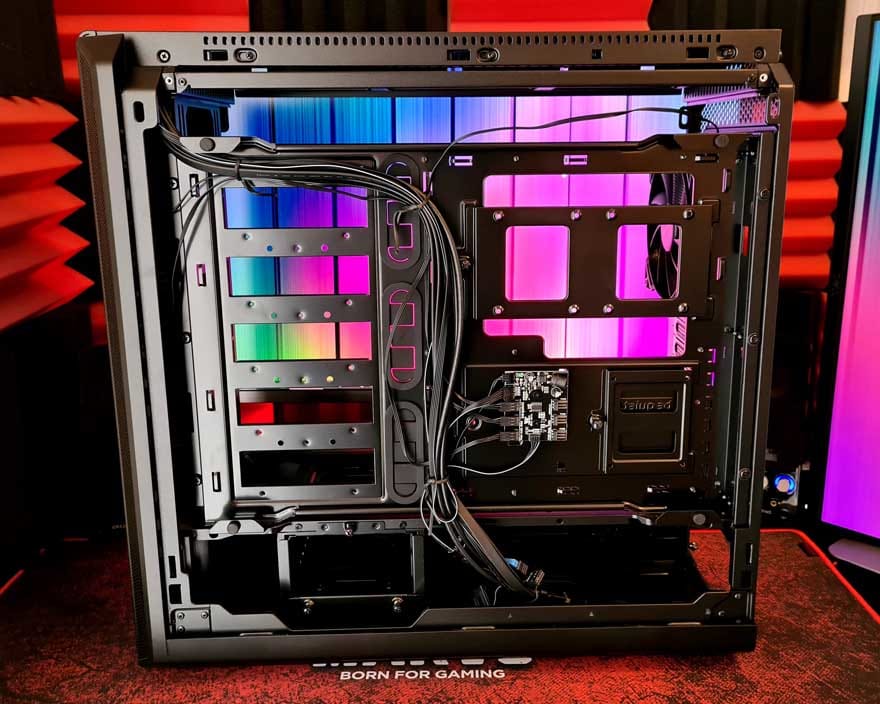
There are two SSD mounts tucked right behind the motherboard.

Plus a third one just below that.

There are chunky rubber stoppers for the side panels, ensuring nothing rattles and vibrates.

There’s a built-in fan control switch on the front panel, which pairs up with this six channel hub behind the motherboard. Just remember to hook it up to your motherboard for PWM control in the AUTO mode.

Tucked below the shroud, you’ll find a movable and removable HDD tray.
Fancy yourself a bit of modding? You’ll be happy to see the cases uses accessible and fairly standard screws and hardware in its assembly. This means a basic tool set is all you’ll ever need to completely disassemble the case; perfect if you plan to cut and paint parts of it.

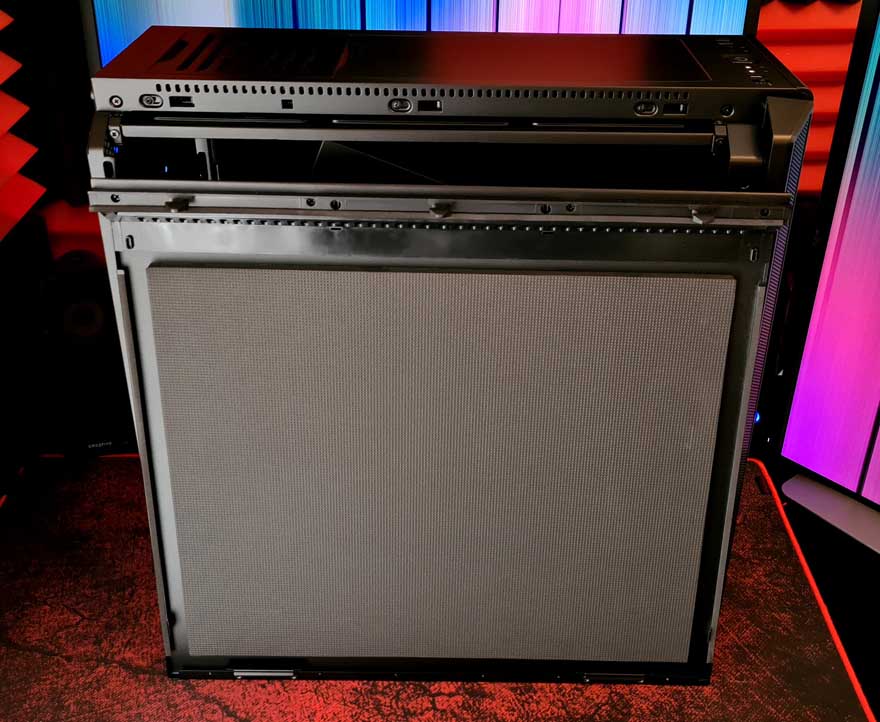
The layers just keep on coming with this case. The heavy duty front panel can be pulled away too, which has even more noise isolation materials behind it.
There a tight fitting dust filter which is recessed back a bit, allowing clean air from all of the side and bottom ventilation…
Of course, behind that, you’ll find those lovely fans too!

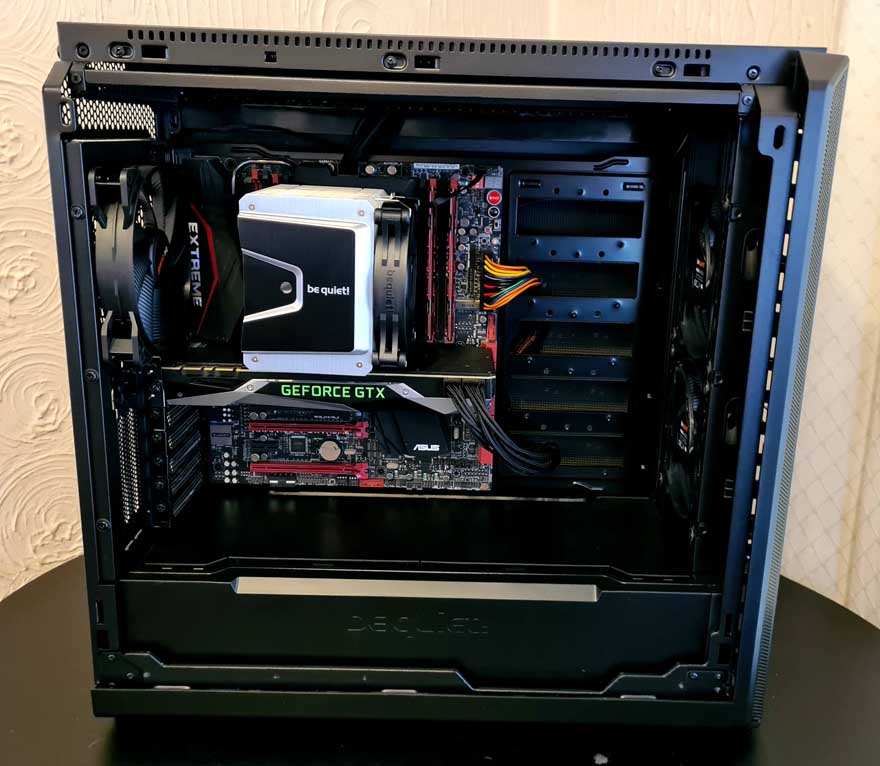
Complete System
Amazingly, I managed to stop taking panels off of this case for long enough that I could build a system inside it. There’s none of your fancy RGB stuff here, no big LED strips, no big and swanky arrays of radiators. Sure, this case can do all of that, but I wanted a clean and quiet professional build and that’s exactly what it delivered.
Cable routing isn’t a big deal when there’s no window to see it. However, it’s always nice to know that the airflow and interior are neat and tidy anyway. It certainly is pretty smart in here!

The lovely be quiet! CPU cooler looks superb in here, and despite being a larger cooler, it looks surprisingly small in this case. That being said, I have every confidence than even the largest CPU coolers will fit with ease.

I also managed to install an E-ATX motherboard in here with no serious issues. Sure, I covered over the cable routing grommets, but with all those holes cut into the sides, I can easily work around that. If it fits, it fits, right!?

The case is well suited to liquid cooling, with support for massive radiators. However, it’s set up really well for quiet air cooling.

However, the two front fans bring in cooler air from lower down ensuring the GPU and CPU get everything they need. The rear fan and the passive exhausts at the top and rear of the case ensure the heat is removed swiftly and quietly.

Overall, it’s just a really clean looking system. The huge amount of space in here meant that everything fit with ease and even though I picked a big GPU and a motherboard… it still looks pretty empty in here.

With all the panels back in place, you’ve got a lovely deprivation tank of a build. Ultra sleek and bold, and I love it.

How Much Does it Cost?
Silent Base 802 will be available from the time this review is published. It’ll be available in black or white finishes, with a recommended retail price of $159.90/£149.99/€159.90. The version with a tempered glass window has a recommended retail price of $169.90/£159.99/€169.90 and is also available in black or white.
Overview
This is one of the best cases be quiet! has done yet. It makes no compromises on features and quality, and it just feels like it’s ready to be whatever you need it to be. Want an ultra-quiet and durable build for your server or workstation? That’s easily done, as was seen in my build. It’s a great looking case, but sometimes you need an understated build that can be left in a corner to get on with its job, never to draw attention to its self.
Want a bitchin’ liquid-cooled extreme gaming PC with tempered glass on the side and high-airflow? Well, just pop off the muting panels, open it up, and go nuts. It can do it, and it’ll look fantastic. We’ll likely have one of our builds like that on YouTube soon enough actually.
Of course, there’s a lot to do beyond that too, but it’s just a very versatile case overall. The fact that it’s all pretty much screwed together means you can move things around, remove them, modify, paint and tinker till your heart is content.
Can I Convert my 801 to the 802?
Yes, but it’s not as simple as you might think. Fortunately, be quiet! forwarded me the following statement on this;
“Unfortunately, it is not as easy as just sliding the mesh front onto the 801. Users will also have to replace the front of their 801, to make it fit. The mesh front will be offered as a spare part through after-sales some time in Q1 2021. Included in the spare part kit will be everything users need to upgrade from the 801 to 802, but they will require a screwdriver and the appropriate skills to replace the front itself.”
Build Quality
Clearly, this is a very well made case. It’s the little details that make it exceptional though, and the engineering of it really stands out. The way the side panels are tool-free, the magnetic flush mounting panel covers, the swappable front panel, the detachable feet, and so much more. Everything just works really well, and it takes just a few moments to completely transform the case to suit your needs. You could buy four of them identical models and still end up with four unique looking builds/cases.
Should I Buy One?
While it may not be cheap, you certainly get a lot for your money. If you upgrade and change your build a lot, it’s nice to see a case that’s as flexible as your requirements. From silent servers to extreme gaming PCs, the be quiet Silent Base 802 ticks every box and beyond! But which would you buy, the black/white version? With a window or without a window? Let us know!