
Interior
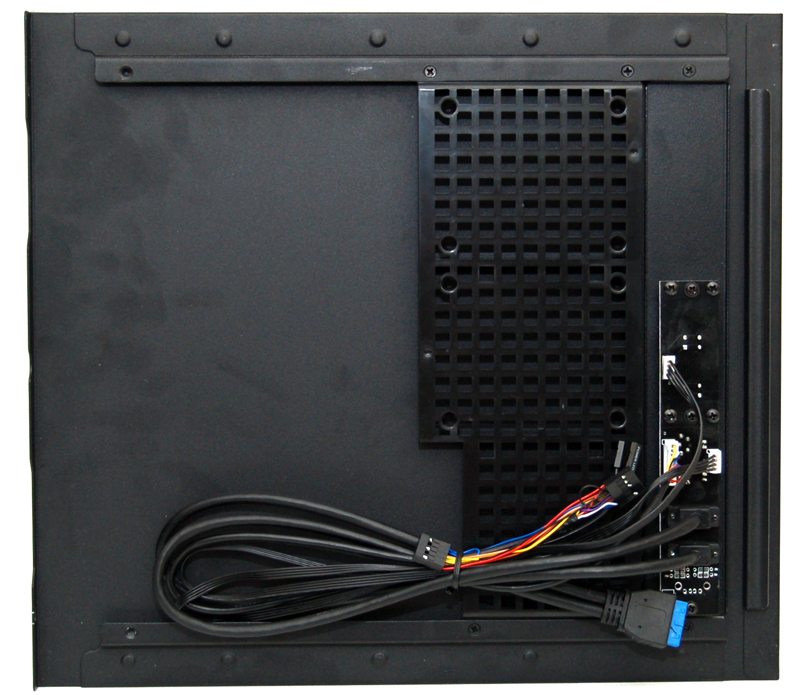
The left side of a chassis is usually where you would install your components, but since the motherboard is inverted inside the Phenom mATX this is the back of the motherboard mounting plate. There is a large CPU cooler mounting cut-out that will make installing / changing CPU coolers easy, as well as a large opening on the right that should help with cable routing. There is a small hole on the bottom left corner for routing the motherboards 12v cable, but it is quite small, so I would suggest routing this cable before installing the motherboard.

The right side of the chassis has a vertical side panel used for mounting 3 x 2.5″ or 2 x 3.5″ hard drives, this panel can be removed using two screws at the top and bottom of the panel.

Hard drive panel removed we see that there is a fan mounted to blow air out of the base of the chassis and another on the back. This chassis uses a somewhat unconventional airflow pattern of top to bottom.

Behind the front panel we can see plenty of fan mounts, in fact this panel looks identical to the Prodigy front panel with the 5.25″ bay, 2 x 120mm / 1 x 140mm / 1 x 230mm fan mounts. The strange thing is that there is really no ventilation on the front panel cover, so all a fan would do in one of these positions is redirect airflow within the chassis. There is also no 5.25″ cover on the front panel, so optical drives are a no go, but you could stealth mount a fan controller, or use the 5.25″ adaptor to mount extra storage if required.

Here we see the bottom of the chassis, the back of the PSU faces downwards and you can mount a pair of 120mm or a large 230mm fan in the base to draw more heat out of the chassis. Should you wish to use the base HDD mounts, you can also use a magnetically attached heat shield that comes with the chassis, this will prevent the PSU heat washing back into the chassis and over heating your components.

The Phenom isn’t lacking in HDD mounting points, but there are even more on the side panel with two slide in 2.5″ bays helping to expand storage.
Here we can better see the side HDD mount, it features some rubber grommets that will help reduce vibration from any mechanical hard drives.


Lol. I’m glad it wasn’t me trying to fit all those components into that matchbox.
There is a reason why Bitfenix Prodigy/ (not the M version) was launched first before the M. It may be big and same size as the Prodigy M/Phenom M discussed here, but that version provides much superior airflow and not as cramped as the M version. If Bitfenix want to make a good Micro-ATX case they must redesign the case, and let the Prodigy and Phenom (non M) be an independent model range of the Bitfenix chassis range.