Cooler Master GeminII SF524 Low Profile CPU Cooler Review
Luke Hill / 13 years ago
The first step of the installation procedure was to attach the GeminII SF524’s Intel retention plates.

After applying some thermal paste to the CPU, the easiest method of attaching the heatsink was to lay it base-up on a flat surface and then align the motherboard mounting holes with the retention plate’s screws. Once the screws had protruded the motherboard mounting holes, attaching the universal backplate and securing the cooler in place was the next step.

The overall installation procedure was completed very quickly. Connecting the cooler to the motherboard required a flat surface, some good alignment skills and the ability to position the backplate while tightening nuts, but it wasn’t too much of a chore. For users who think that they may lack the aforementioned skills, the installation manual was very helpful in breaking down the procedure into simple steps.

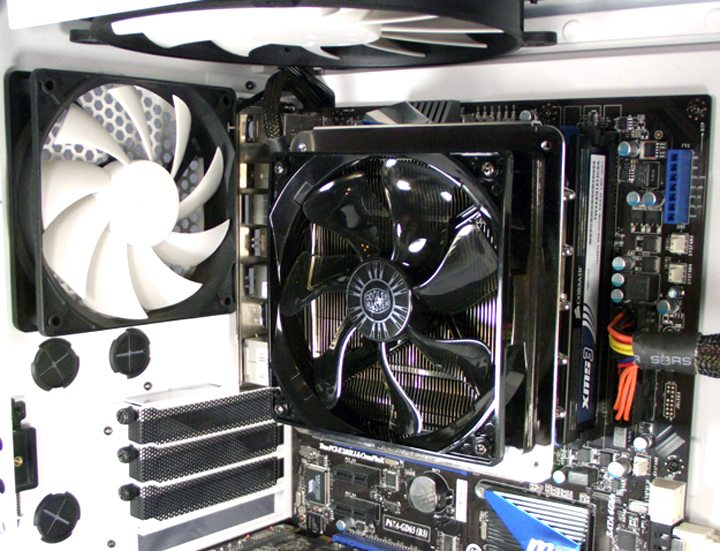
Cooler Master designed the GeminII SF524 to work with multiple orientations. We chose what we would consider to be the ‘standard’ orientation for a cooler of this type. The heatpipes were located near the VRM area while the main body of the fin stack was situated above our RAM, providing it with ample airflow. Using this mounting orientation, clearance with tall VRM heatsinks could become a problem. If this problem occurs, the other 2 recommended mounting orientations should eliminate all issues.

Our Corsair XMS3 memory was able to fit under the GeminII SF524 without any issues. We measured the distance from motherboard PCB to the bottom of the cooler’s fin stack as around 52mm. If you want to use RAM such as Corsair Vengeance or Dominator, clearance may cause an issue but you can always mount the cooler in a more accommodating orientation.

When installed in our NZXT Phantom case it is easy to view the cooler’s low-profile form factor. Provided your case has clearance for the 105.4mm height, you shouldn’t run into many other clearance issues.


