Corsair DIY Review – Upgrading Your PSU, Cables, and More!
Peter Donnell / 6 years ago
A Closer Look – Upgrading the 500D

The rather glorious Corsair 500D, [Troy McClure voice] you might remember it from such review as “Corsair Obsidian 500D Mid-Tower Chassis Review” about 4 weeks ago. We loved the chassis a lot, but is there room for improvement in our build? Of course!
There’s nothing wrong with the build we did, as you can see below. It’s a clean looking build. However, how about we upgrade the PSU, drop the PSU into that vertical mount, and throw in some custom cables? Because why the hell not!

Removing the PSU
Now, this PSU is quite a bit smaller than the new one. Fortunately, this chassis has a removable rear panel on the PSU shroud. I’m taking that out, allowing me to pass through cables here. Of course, that’s more a personal choice than anything else.

The CX750 is pretty beaten up now, we haven’t been kind to it. It’s been in and out of multiple chassis, throw into boxes and likely worse. However, the worse part is the sheer volume of cable coming off of it. It’s hard-wired, and 90% of the time, we use like… four of them per build.

HX750 + Pro PSU Cable Kit
Now, this does look much nicer, a similar wattage PSU but overall a much higher quality unit. Plus, no standard cables, but those lovely black and white pro cables. Already, I can tell this is a great idea. We’ll come back to this in a moment.

Premium PCIe 3.0 x16
Not the smoothest product name in the world, I’ll admit. However, it serves a very specific purpose and should do it well. The multi-part cable contruction makes it very flexible, and at 300mm long, it’ll support rather spacious chassis designs too.

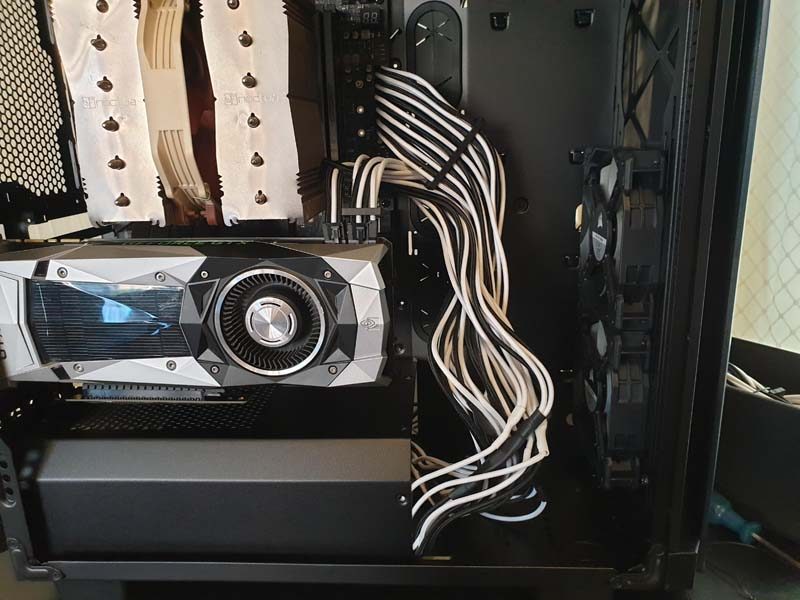
There’s no true mount for the riser in the 500D. However, the GPU mounted on the rear of the chassis easily enough regardless. I hate how GPUs have such great looking coolers and you can rarely see them. This solution, however, lets you show it off in all of its glory.

Cables Again
So what about those custom cables I hear you cry? Well, let’s give them a go.

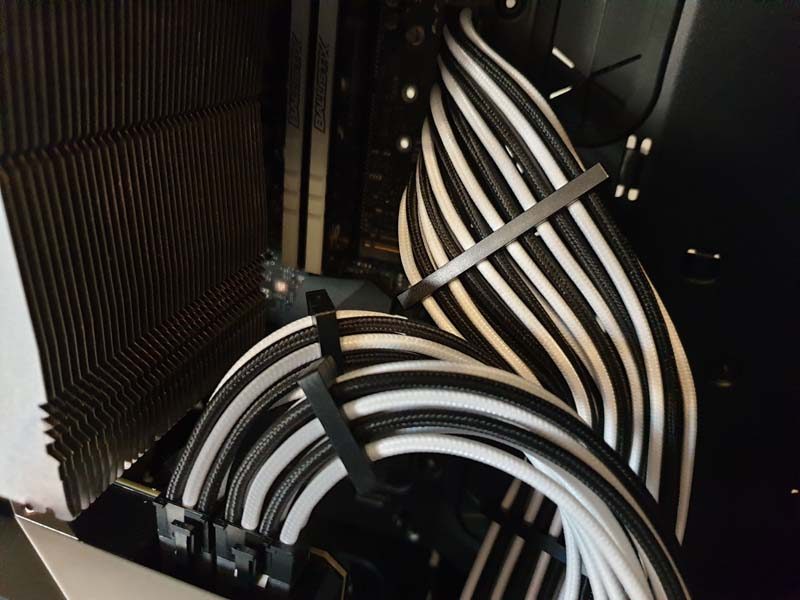
I installed all the required cables for the system. Admittedly, I’ve done a pretty crap job of it too. The 24-pin, plus two 6+2 pin cables for the PSU are going all over the place. I could obviously have routed them out of the way, but that defeats two points. One, I wanted to show you the cables, and two, I need to try these cable combs.

There’s simple enough, with three layers that sandwich together using pre-attached pins.

They certainly help keep things in line. They’re a pain in the butt to install, I must admit, but once you’ve done a couple it does get much easier. The main issue I have is these brand new cables are pretty stiff and take quite a lot of bending to control.

There’s still some cable gore down the bottom end here. However, normally you would route these through various grommets. I’ve got them out to show off the braided finish. Admittedly, the gloss black and white looks fantastic. However, there are other colours available which we’ll list on the last page.

SATA Cables
Around the back, you can see the SATA cables from the PSU kit. However, we also have this lovely braided SATA cable helping keep things looking neat and tidy. Not a huge upgrade from standard cables, but if you’re going premium, the little details add up fast.

It’s certainly different to when we started!


