GuardKey USB Encryption Dongle For Drives and Cloud Review
Test System & Windows Software
The test system doesn’t really matter for a setup like this as there aren’t any benchmarks to be performed. In short, I used two systems running Windows 10 Pro and a mobile phone using Windows 10 too.
Everything you need to get started is located right on the GuardKey when you unpack it, so there is no need to download anything or use other mediums in order to get off the ground with your brand new encryption stick.
Installation
The installation is quick and easy, you’ll be through that with 4-5 clicks.

If you do have an internet connection available, then it will ask you whether it should check for updates and whether you want to download the newest version before you continue with the installation. A nice touch, instead of having to do it once the app is installed and you basically have to start over again with the installation.

Agree to the license agreement and select a folder and you’re done a few seconds later. Reboot your system and you’re good to go.

Setup
There is one thing you have to do more before you can get started, and that is to set a Master Password for the dongle. It can be used to recover your data in the emergency that you have lost your GuardKey USB stick.

And that’s it. We get a little reminder that the mobile app will add more features, but other than that, we can hit the Start-to-Use button and get started.

Software Usage
The GuardKey app isn’t large, neither in the space it on your drive nor in the window size in pixels. The first page is for your data vaults and you can have multiple ones here.

Hitting the Create button and we can create one of two things. A local disk safebox or a cloud safebox.

Creating a local one will give the option to select a drive on which the safebox should be located.

And that’s all. The new and protected file area is ready to be used. You can open and close each file vault individually and at any time.

The file vault can also be opened directly from the app, which then opens in your normal file explorer. Copy, move, and edit files as you’re used to in any other folder.

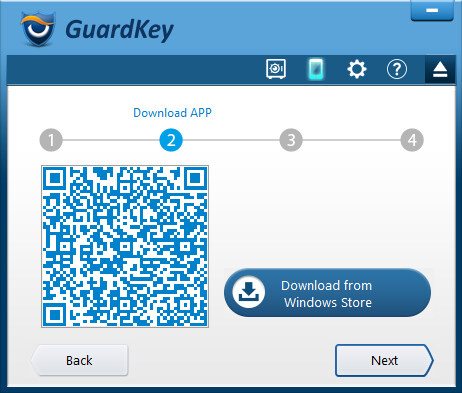
Binding a mobile device to your GuardKey is as easy as it was to create a local locker.

First you need to select either of the three platforms you want to connect, although that’s only really relevant when you still need to install the mobile app.

Depending on your selection, it will provide you with both an QR-code and a link-button to download the mobile app.

Once the mobile app has been installed and launched, it will provide you with the binding code that’s needed to connect the two devices. We can also give the mobile device a name for easy recognition.

Scan the provided code with your phone and the two are paired.

Back in the main app page, we see our new device that we called Windows_001 has appeared.

The basic app display settings are directly accessible, but you’ll need to provide the Master password set earlier to access the advanced settings.

There aren’t that many settings in the advanced menu either, but they vital ones. Choose when the Master password is required or create a backup of your dongle.

Cloud Locker
Creating a cloud locker is done the same way as we saw it with the local one earlier. A lot of providers are supported, including Dropbox, Google Drive, OneDrive, ASUS WebStorage, Box, and SugarSync.

How much setup is required depends on the provide, but the OneDrive setup worked with a single click as I’m already signed into it via Windows itself. Ready to use online encrypted storage.


