NZXT Switch 810 Full Tower Chassis Review
Luke Hill / 13 years ago
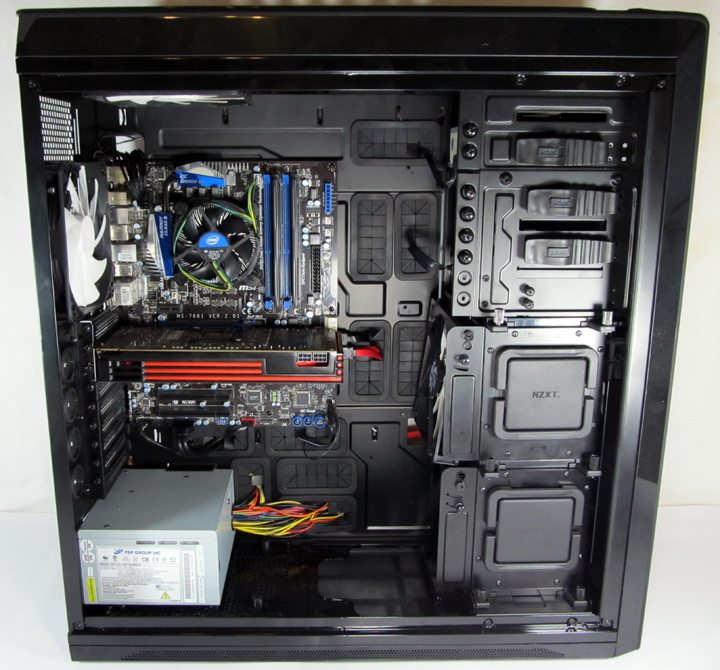
Installing our components into the Switch 810 was incredibly easy for the most part, thanks to the colossal amount of internal space we had to manoeuvre in. NZXT supply a standoff tool which connects to your screwdriver allowing you to easily insert the motherboard standoffs, a simple yet effective accessory. Should you decide to screw down the PCI thumb screws with a screwdriver, be prepared, your patience will be tested as it can be finicky and awkward due to their shape and weight. 55mm of room between the upper edge of our motherboard and the roof-mounted exhaust fan opens the possibility of installing a 55mm thick radiator and 25mm fans internally.

Removing the HDD cages reveals the enormous volume of internal space hidden within the Switch 810. The lower corner provides plenty of room to mount water cooling items such as a pump, tubing, flow meter, reservoir or even each of these components alongside a 140mm radiator, with the top HDD cage still installed. Removal of the metal drive cage rail leaves plenty of room for a bottom mounted 240mm radiator with push-pull fans, while retaining the external dust filter.

Cable management around the power supply area is excellent. It is possible to route every single power cable required for a high-end single VGA card build through just one of the spacious grommets. A pair of large and conveniently placed grommets also provides access to the lower edge of the motherboard, perfect for routing USB and front panel cables.

The 22mm of clearance behind the motherboard tray does a surprisingly good job of harnessing the abundance of cables we threw at it. The side panel was easily replaced even with a short cable management session and limited usage of the effectively positioned tie down points. A particularly large CPU cooler backplate cut-out should ensure an easy CPU cooler installation or removal procedure. A cut-out for routing the 8-pin CPU power cable is located in an ideal location to also serve the rear fans and rear IO LED cables. Every cable attached to the Switch 810 is fully black which personifies the thought put into the Switch 810’s internal aesthetic appeal.

Attaching a 3.5” HDD to the removable HDD trays is tool-less but 2.5” drive installation negates its counterpart’s requirement of no tools. NZXT continue to use their 4 push-pin installation method for attaching 3.5” drives, a method which I have never been a big fan of and can’t say I am after using it for this installation. The method is fairly secure, but requires tremendous force and the bracket to be bent when you want to remove a drive which is seemingly moulded in position. 2.5” drives on the other hand require 4 screws inserted into their underside.

The right-mounted HDD design works a charm, allowing us to install and connect both 3.5” and 2.5” drives without ever having to touch the left side panel. Ease of installation is evident, but the time reduction factor is also another worthy point, one which would have saved this editor heaps of time.

A hot-swappable HDD bay is another excellent time-reducing feature implemented by NZXT in the Switch 810. Once you have attached the internal 4-pin molex power connector and SATA 6 GB/s data connector, to use the hot-swap function you simply remove the bay cover, pull out the hot-swap bay, screw in your 2.5/3.5” drive and you’re good to go. If I were to be very picky, maybe a tool-less method of installing a drive to the hot-swap bay would have been even better.

An illuminated rear IO should act as a welcomed convenience for those of us who constantly root around the rear of our computer in search of that elusive spare USB port. Now, the rooting around is abolished and the guesswork is eliminated because a pair of subtle LEDs makes finding the required port straightforward.


