Orico NVMe M.2 Enclosure Round-Up Review
Bohs Hansen / 5 years ago
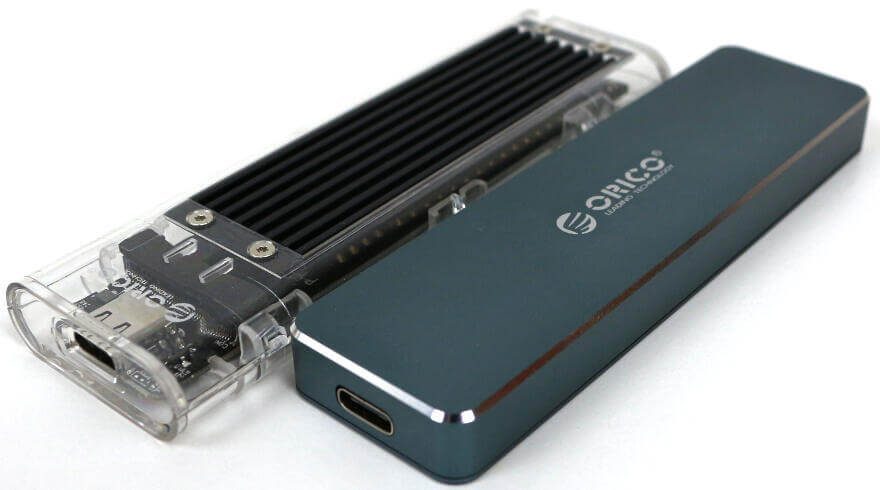
Whether you want to utilise an old drive that’s no longer in use of build a whole new portable storage drive, the latest M.2 SSD housings from Orico might be something for you. Today I have two of the latest ones in the office for a closer look. First, there is the beautiful PCM2-C3 which features a full aluminium alloy chassis while the other is the TCM2-C3 which is a transparent casing with an aluminium heat sink.
Orico NVMe M.2 Enclosures
The two M.2 enclosures are identical in the sense of features, functionality, and performance. The difference is in the design which allows you to pick the one best suited for you. Whether you want a clean style or fancy transparency.
You get an enclosure that delivers up to 10Gbps throughput to the installed drive, supports UASP for the best performance, and comes with the latest USB Type-C connector. But not to worry if you don’t have those ports on your system. The casing is naturally compatible with 5Gbps USB ports too and they come with a cable included for that too. The drive is also compatible with Thunderbolt 3 systems such as the MacBook.
The supported drive capacity is rated at 2TB, but in theory, there shouldn’t be anything hindering you from installing bigger M.2 drives. That is if you can find fitting drives with more capacity. The bridge controller which handles the connection is a JMicron JMS583 USB 3.1 Gen 2 to PCIe Gen3x2.
It’s also worth noting that the PCB features an upgradable ROM, allowing Orico to bring out firmware updates should they be needed.
Aluminium or Transparency?
As I mentioned above, which type you go for is only determined by your taste. The PCM2-C3 Orico NVMe M.2 Enclosure has a smooth finish that makes it feel great to touch. The rounded corners give it a perfect finish which makes it look very premium. You could pull it out at a high-level meeting and everyone would think that it’s a nice looking drive that you got there.
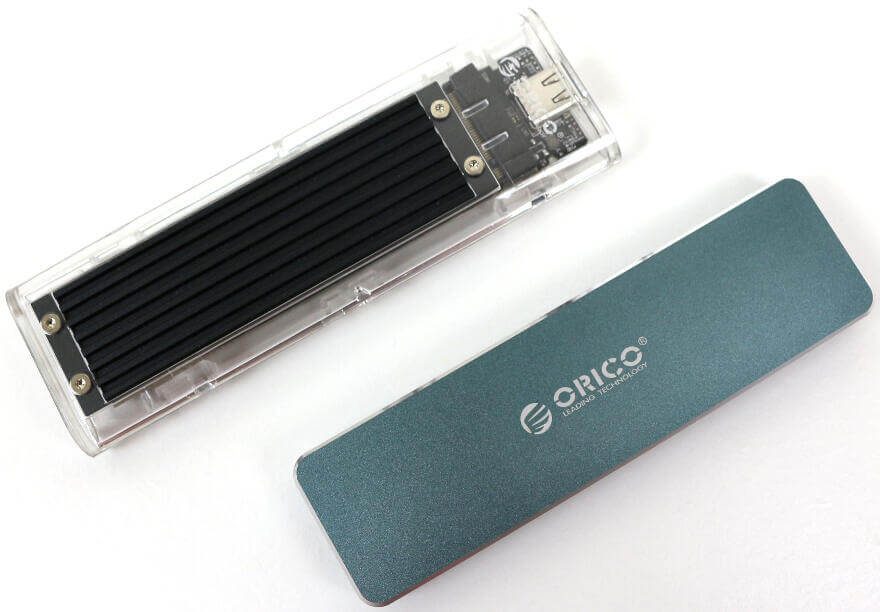
The transparent version is a bit more youthful, maybe. As I was younger, this would have been the one I would have gone for. It shows the internals off, including the drive which is installed. Now, acrylics aren’t the best heat conductor and that’s why Orico added a heatsink to it. It breaks the transparency a little bit, but not a lot. It’s a necessary thing to keep your drives cool.
Which Drives Can Be Installed?
The enclosures are for PCIe NVMe drives, but besides that fact, there’s pretty much free reign. You can install M-key drives from 2230 up to 2280.
Packaging and Accessories

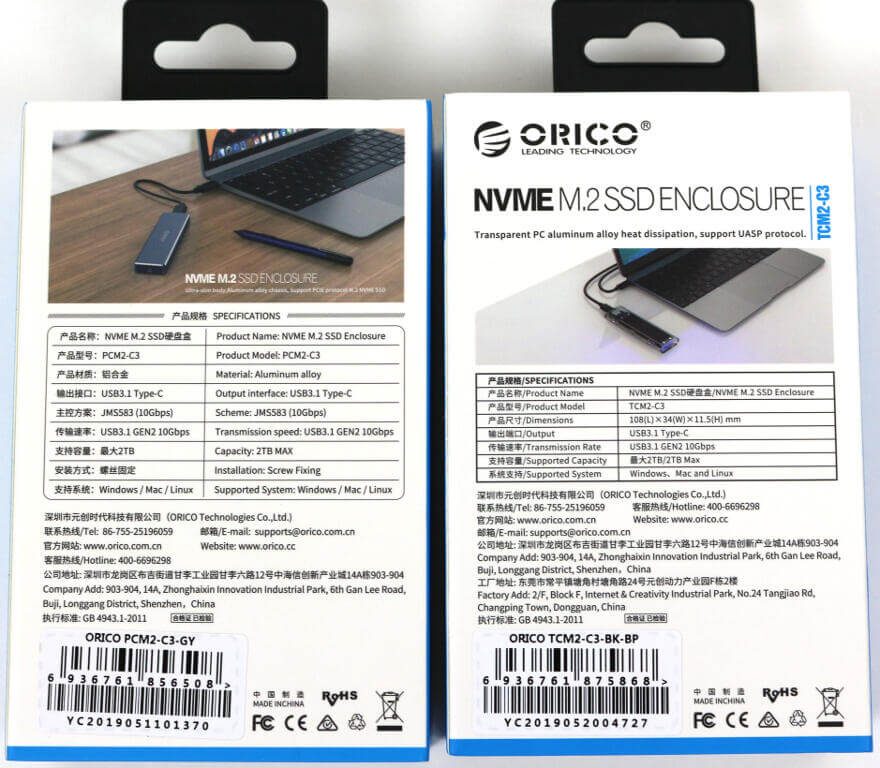
Enough talk about all that the Orico NVMe M.2 enclosures can do, let us take a look at them. The first thing we see when we get them is naturally the packaging. Both of them showcase the included casing on the front along with the most important feature highlights. This includes UASP, Type-C connector, and the material used.
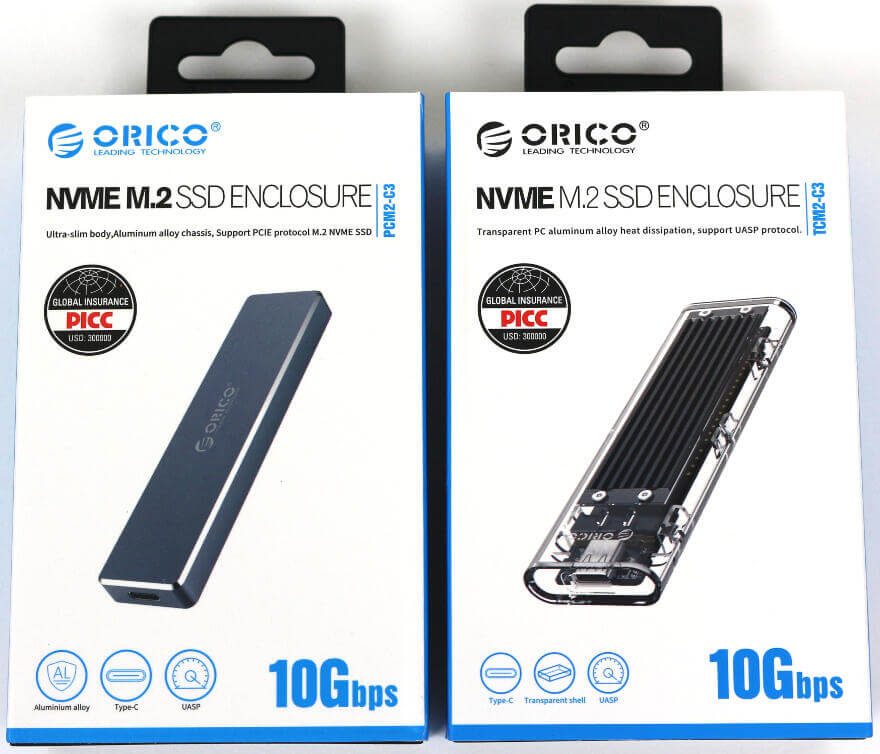
The rear side has a little more information such as the specifications of the enclosure. This includes materials, controller, port, and more.
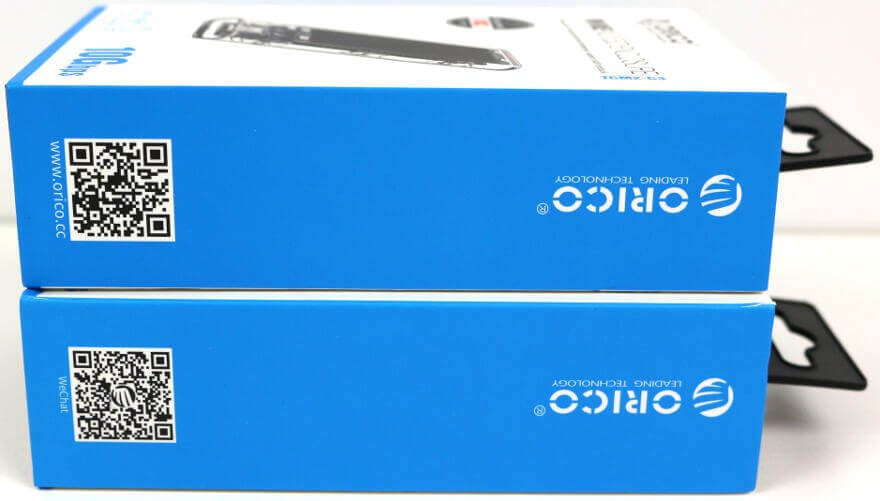
The sides don’t have a whole lot of information, but here are a couple of images of them anyway.

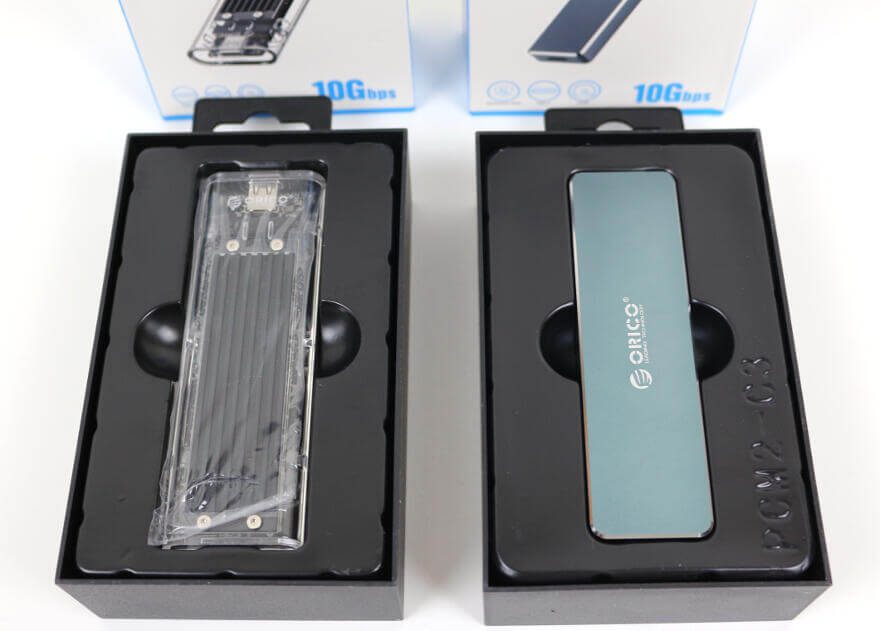
Once we open up the package, we see the enclosures presented. The transparent version is wrapped in an extra piece of thin plastic while the aluminium version comes as it is. All the accessories are located below the top layer.
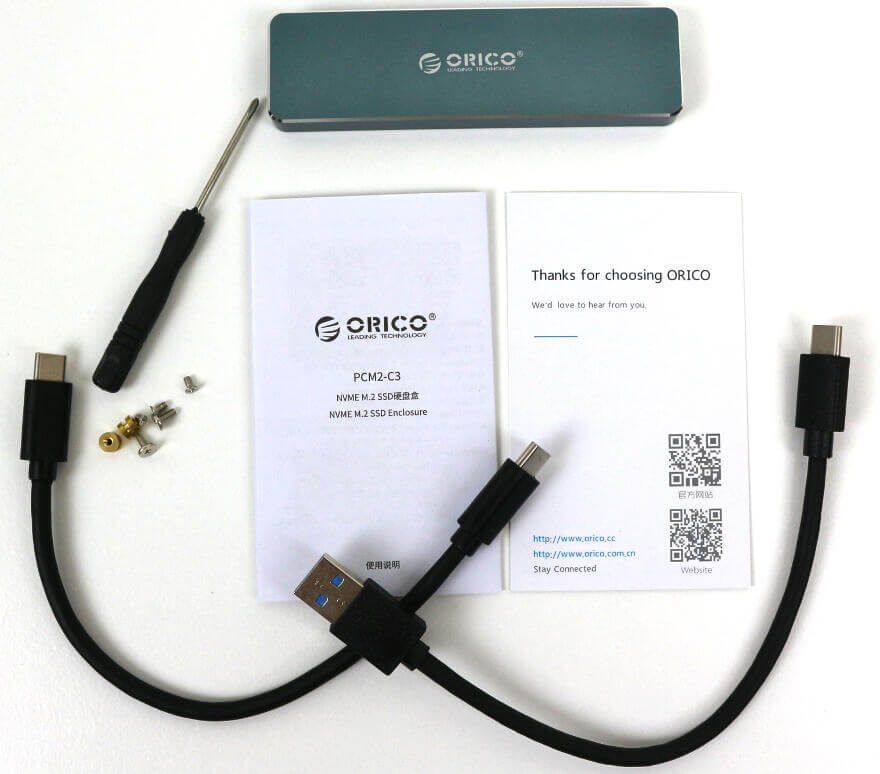
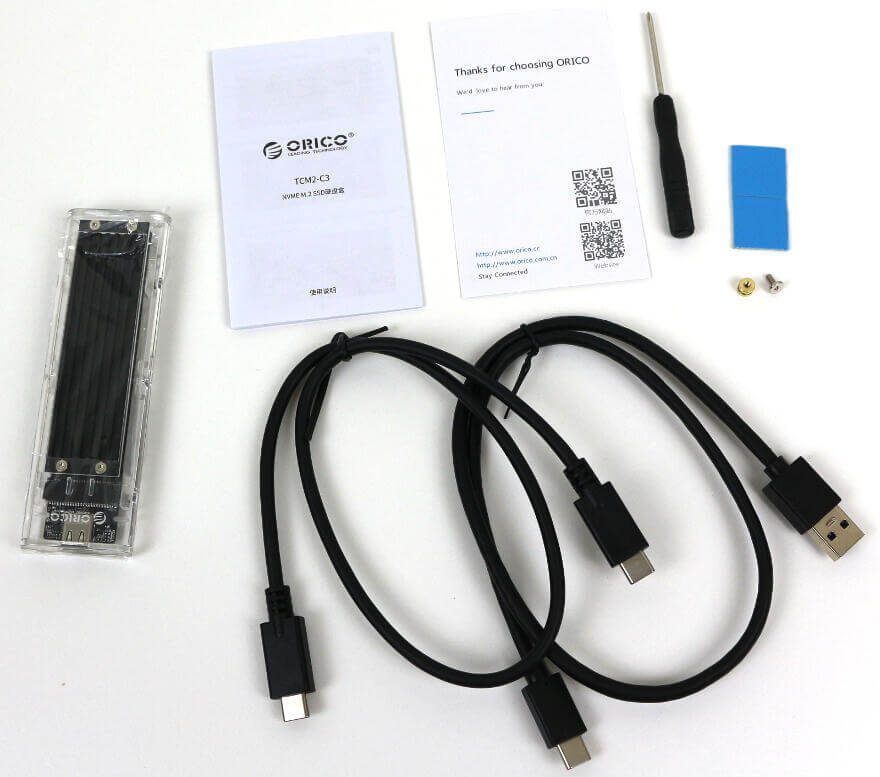
Taking everything out and we see that we get a complete package. We start with the PCM2-C3 here which is the aluminium version. We get two connector cables along with the enclosure, one for the classic Type-A USB ports and one for the modern Type-C ports. There are a couple of small manuals to get you started too. The whole package is rounded off with the necessary screws to mount a drive inside as well as a small screwdriver. All you need yourself is the drive to install.
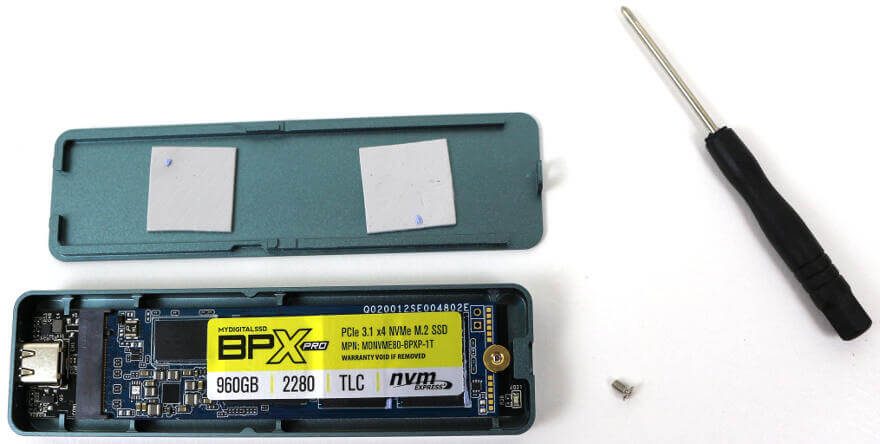
The TCM2-C3 content is very similar. There are fewer screws, but all you need. There are a couple of thermal pads too which you can use to connect the inserted drive to the built-in heatsink.
Orico PCM2-C3 – A Closer Look
Now that we’ve unpacked everything, let us take a closer look at the enclosures. We will once again start with the PCM2-C3. This enclosure isn’t much larger than an M.2 drive. That makes it highly portable and the aluminium should also make it quite sturdy.
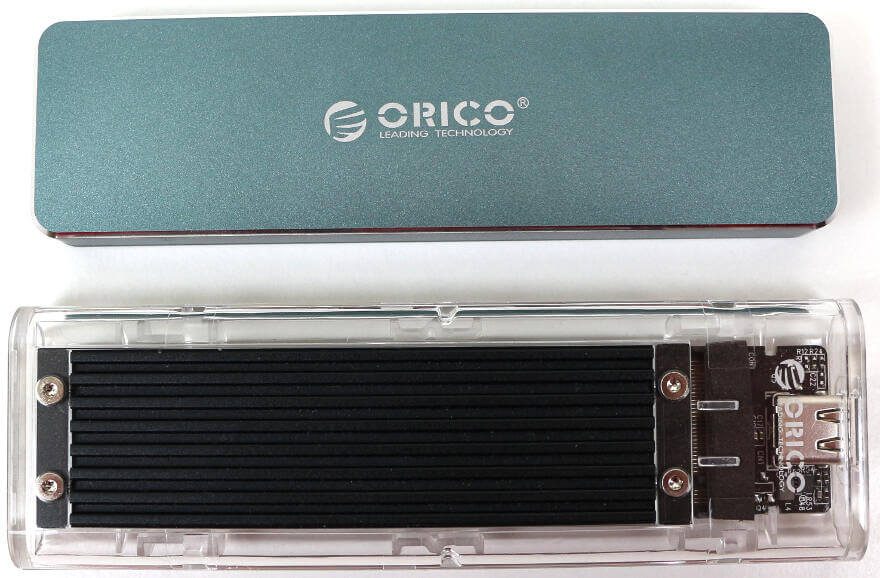
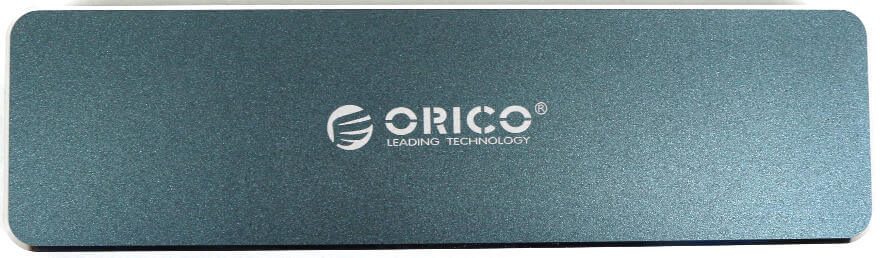
The company logo is printed on the top, but otherwise, it’s clean.
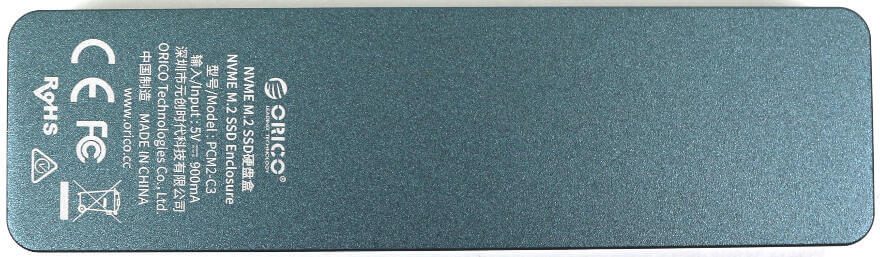
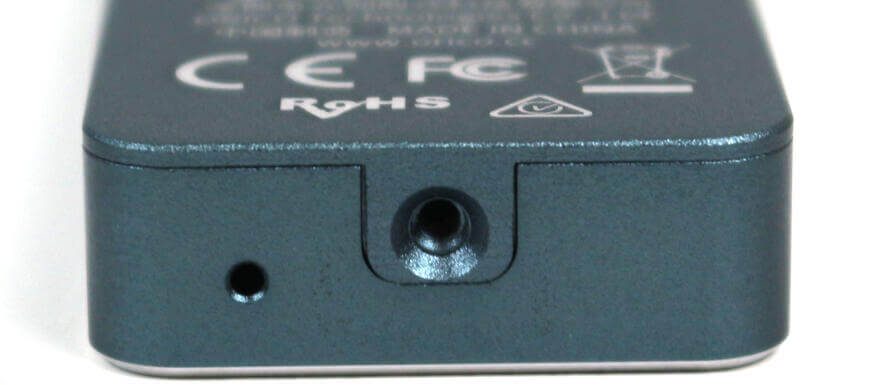
The bottom side has the needed details such as certifications, model number, and power requirements printed.
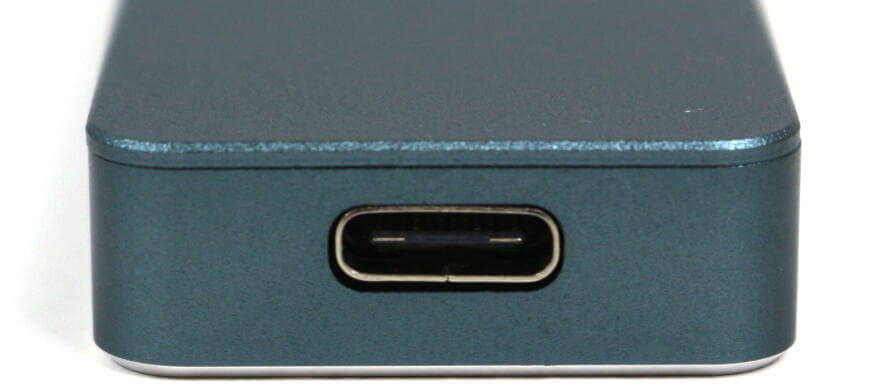
Looking at the top end and we see the USB Type-C connector. This can be connected to either the included Type-C to Type-C cable or the included Type-C to Type-A. Which you pick depends on your host system.
The other end doesn’t have a lot of features, but it’s here where we secure the 2 pieces of the enclosure with a screw. This is also the reason that there are more screws included with this one than with the transparent TCM2-C3 version.
Next to the screw hole, you’ll notice another small hole in the enclosure. This is for the status and activity LED which is blue.
When we slide the two pieces of the enclosure apart, we see the PCB inside which you’ll connect your M.2 drive with. There are 4 holes for the supported M.2 formats and the enclosure already has thermal pads on both sides of the PCB.
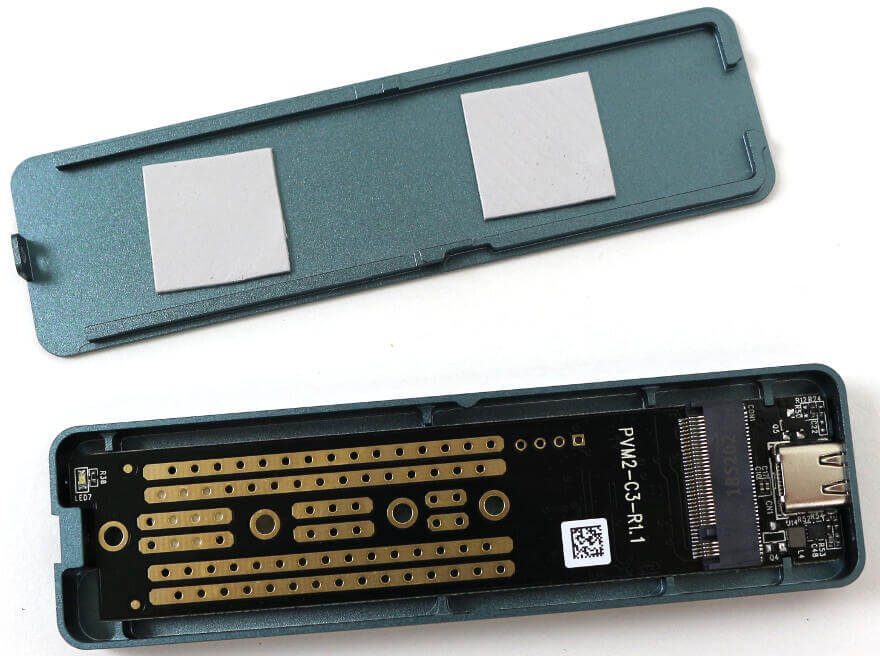
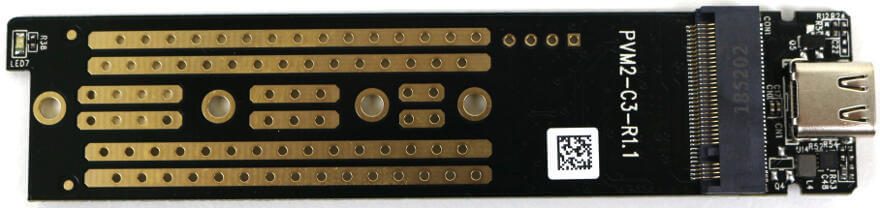
When we remove the PCB, we get a better look at it. On one side, we have the M.2 and Type-C connectors.
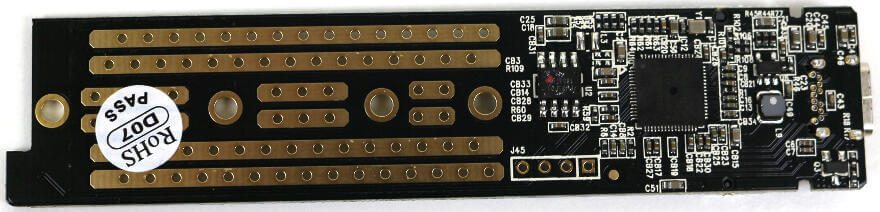
The bridge controller and other hardware parts are on the other side of the PCB. Generally, it is a very well crafted PCB, one that you easily can trust you SSD with.
Enough looking at this one, time to install a drive into it. I’ve opted for my MyDigitalSSD BPX Pro drive as that’s the one I used in my most recent reviews of similar type. It’s a great drive of which you can read the full review here:
Orico TCM2-C3 – A Closer Look
We’ve had a look at the PCM2-C3 and now it is time for the transparent TCM2-C3. If you want an easy way to remember which is which, then think T for transparent and P for pretty and you got it.
Since the TCM2-C3 is transparent, you can’t really “see” it. That makes the inserted heatsink one of the most prominent features which will catch your eyes. While it blocks the view to the installed drive, it is a necessary evil. NVMe drives tend to run hot, even when not taxed to the max. It is also a closed enclosure without any airflow to cool the installed drive.

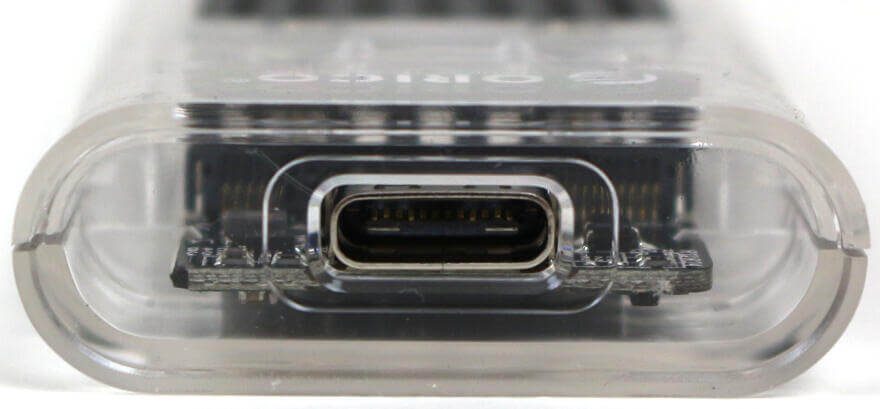
The connector is at one end, just like the on the other enclosure.
Since the TCM2-C3 uses a slide-lock feature, there’s no need for a screw to close it up here.
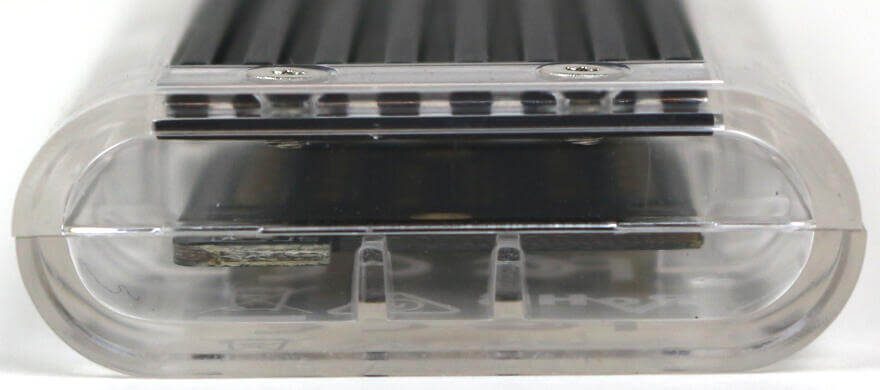
You can spot the 3 ledges on each side of the enclosure in this side view. Those are the ones that keep the two pieces together.

Once you take it apart, you have three pieces just like with the other one. A top, a bottom, and the PCB.

The PCB is exactly the same in both enclosures as we can see on the print. PVM2-C3-R1.1.
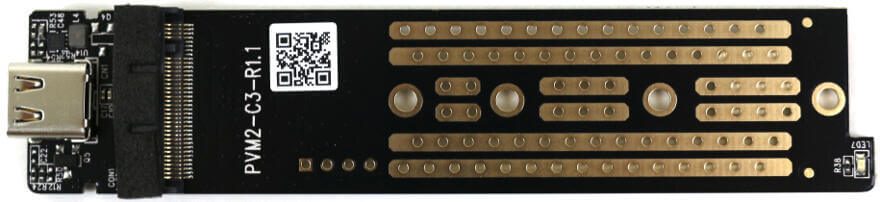
Why change or develop something that already is on hand?

Besides this black heatsink version, there’s also a blue, a red, and a silver one.
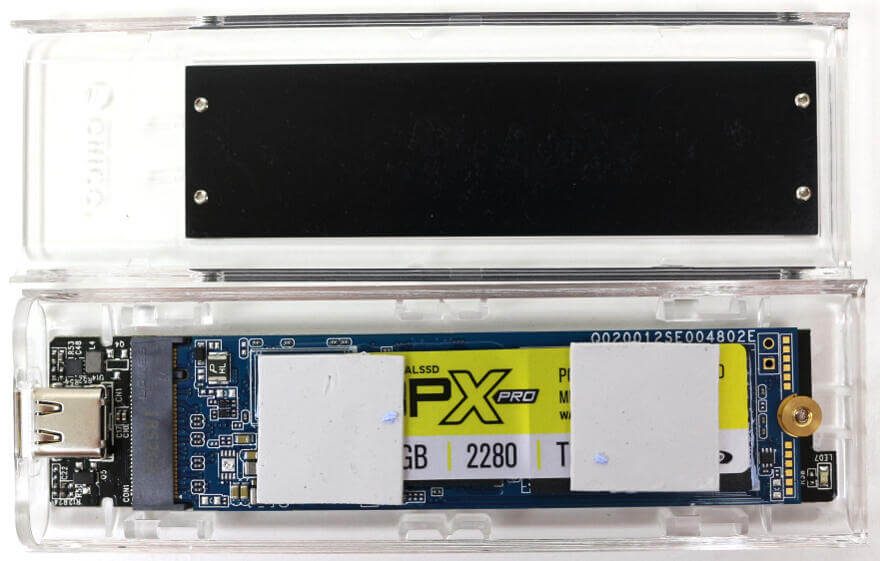
Again, I’m using the same drive and this is how it looks installed in the enclosure.
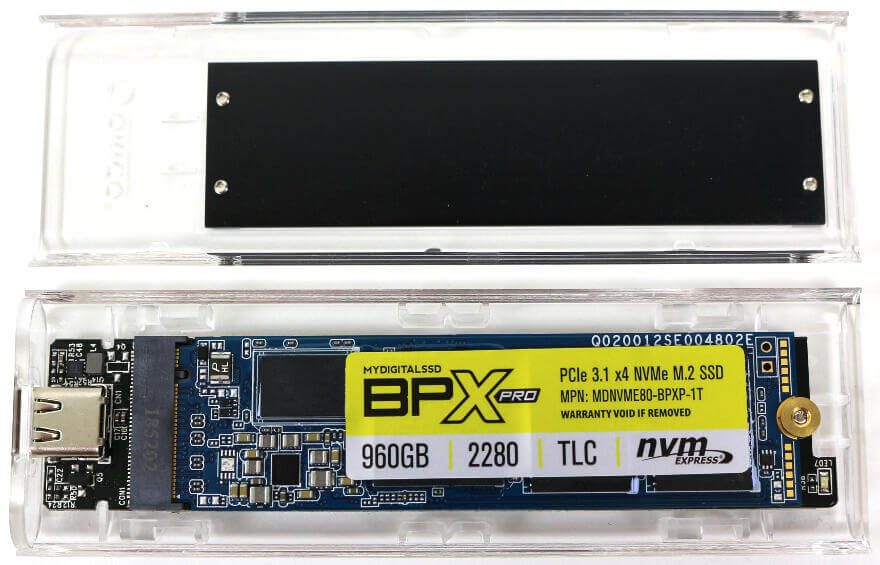
You should also remember to use the included thermal pads, or some you already have. As long as they have the right thickness to fit and connect.
Lastly, an image from the side. We can see the inserted drive well from this angle while it’s blocked from the top and bottom.

Performance
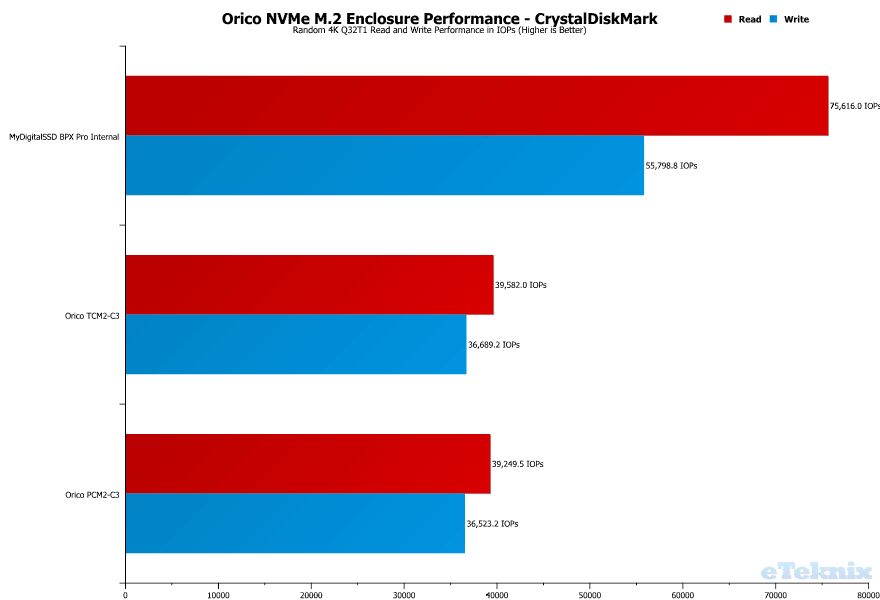
Since both of these enclosures feature the same PCB, there should be no difference in the performance. Still, I’ve tested them both just to made sure. Below you’ll find a comparison between the drive utilised in the Orico PCM2-C3 and TCM2-C enclosures.
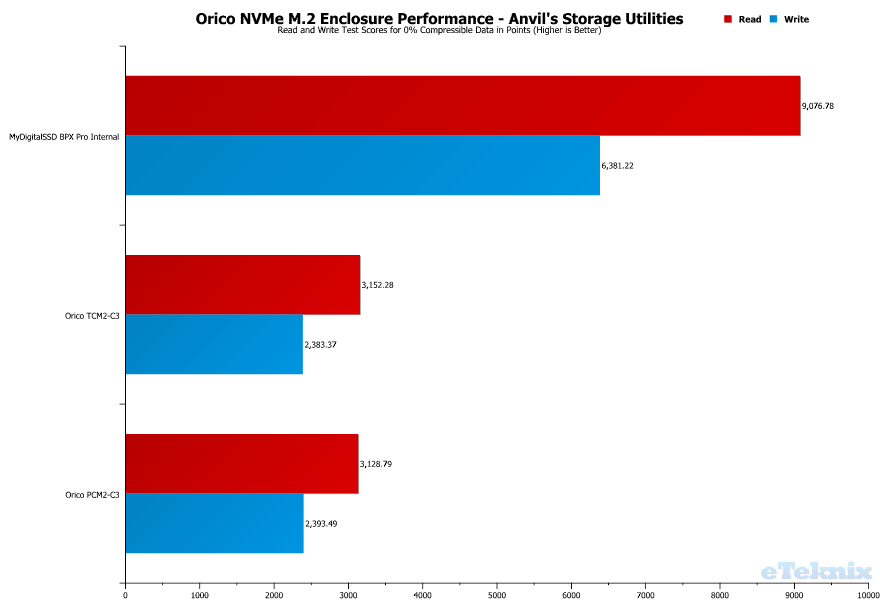
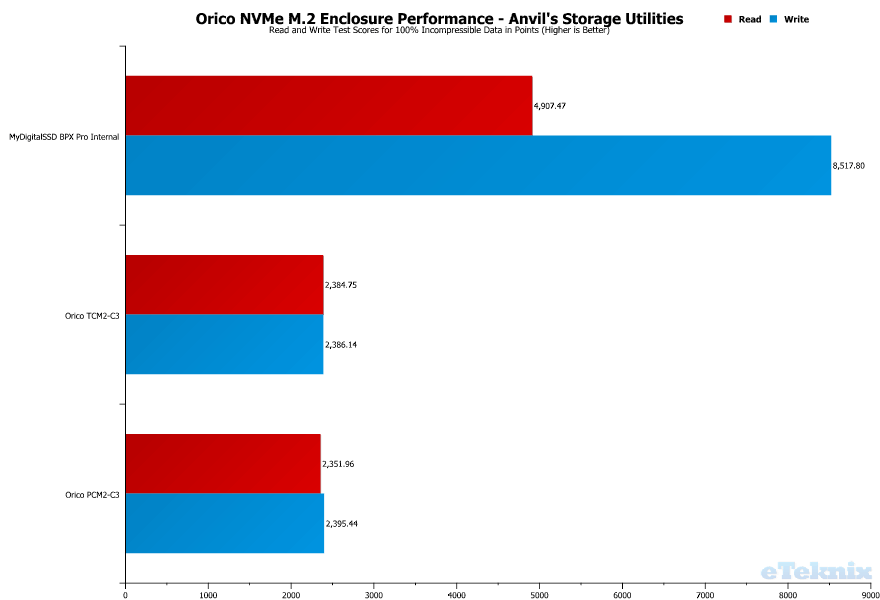
Anvil’s Storage Utilities
Anvil’s Storage Utilities is a complete benchmark solution used to test any writeable storage drive. It also has a drive endurance test that consistently reads and writes data to the selected medium to deliver days, months, and potentially even years of use in a shorter period.
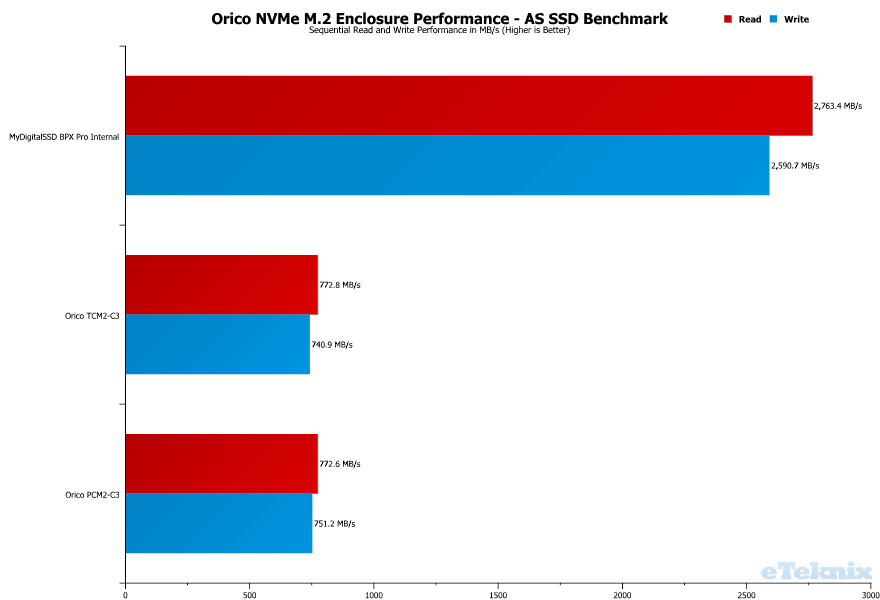
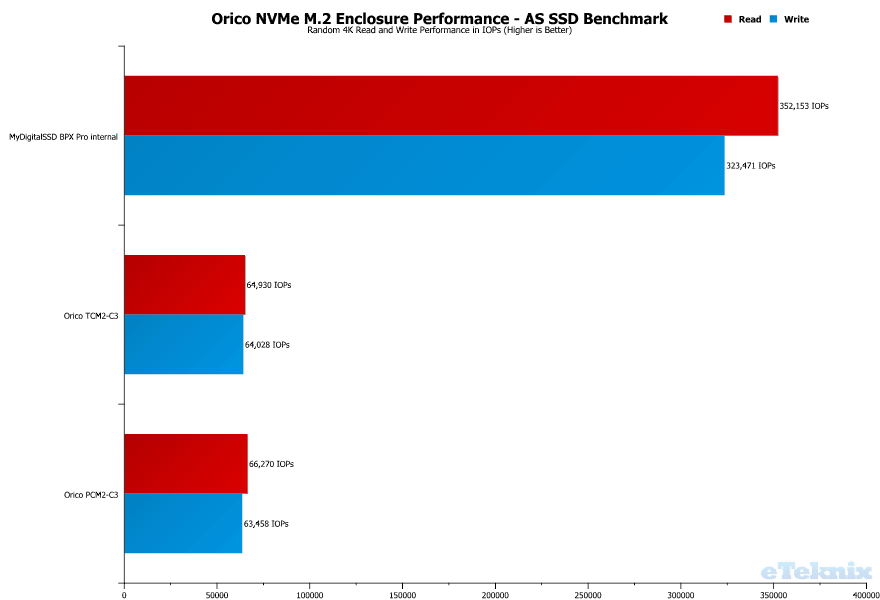
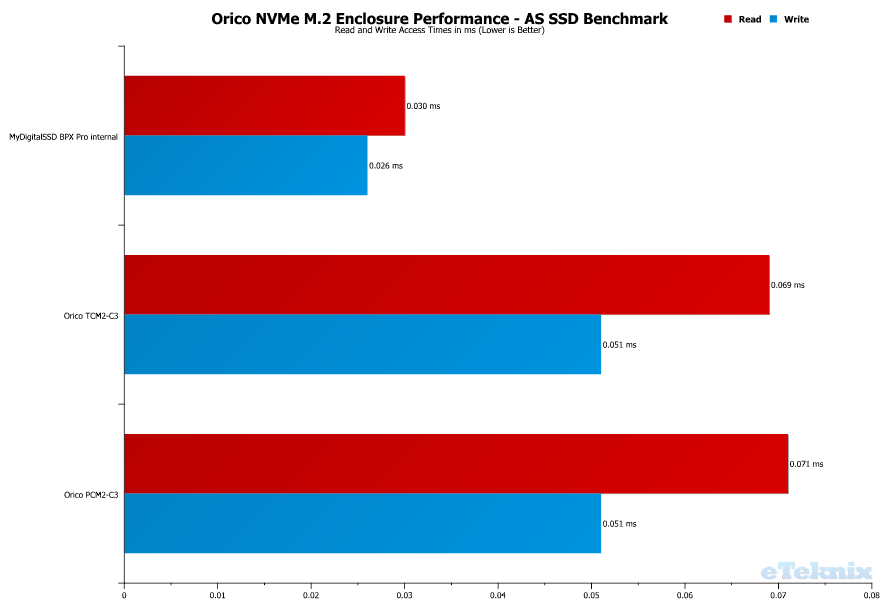
AS SSD Storage Benchmark
The AS SSD software determines the performance of Solid State Drives or other physical drives. The tool contains five synthetic and three practice tests. The synthetic tests determine the sequential and random read and write performance of the SSD, and they aren’t using the operating system cache. The copy tests are cached and as such not viable results at this time.
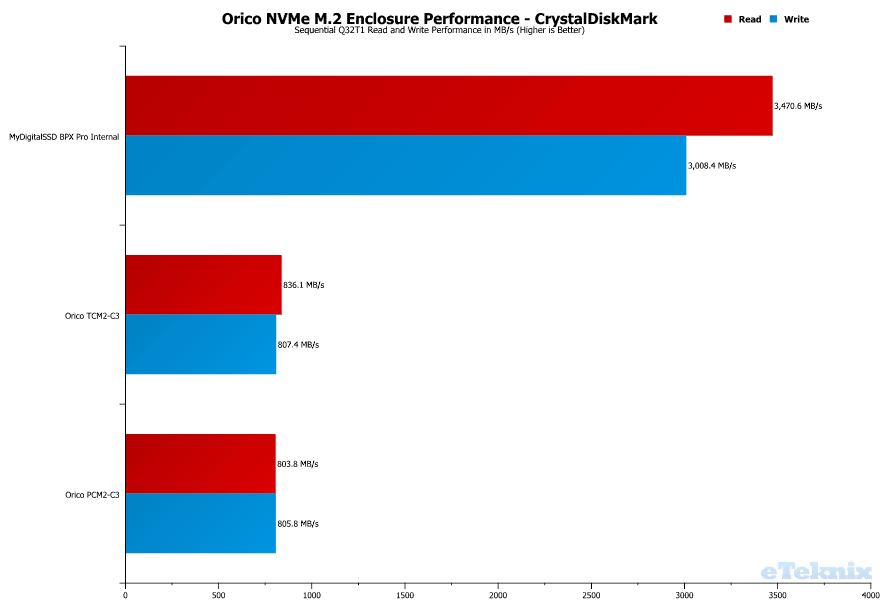
CrystalDiskMark
CrystalDiskMark is a small HDD and SSD benchmark utility that allows you to measure a drive’s sequential and random performance.
Pricing and Final Thoughts
Both of the Orico NVMe M.2 enclosures are widely available at the time of this review. The aluminium PCM2-C3 is available for £44.12 to £48.95 in the UK and $99.82 in the US.
The transparent TCM2-C3 is available in all four colours for $39.99 in the US and £23.90 in the UK.
Final Thoughts
Overall, I really like the two Orico NVMe M.2 enclosures. Personally, I like the aluminium PCM2-C3 over the transparent TCM2-C3, but you can’t fault the enclosure for personal taste. Since they both use the same PCB internally, they’re equal on all fronts. Well, the aluminium version will dissipate heat better. The transparent version still features a heatsink, so the installed drive is well taken care of.
The overall build quality is great. You don’t have the feeling of a cheap product in your hand and I would easily have expected the aluminium version to cost more – at least in the UK. The transparent version is also well crafted and the two pieces have a great fit despite being assembled without any screws.
The installation was a breeze. Slide the encloser apart, insert and secure the M.2 drive, and put it back together. Everyone can do that.
Compatibility is no issue at all with the PCM2-C3 and TCM2-C3. Any M-Key PCIe drive should work great in the enclosure. Whether it’s a small 2230 or a more standard 2280 module. The connection is also secured as it comes with cables for USB-C/Thunderbolt 3 as well as USB-A.
Should I Purchase One?
Got an old NVMe drive collecting dust on the shelves somewhere? Why not utilise it as a speedy and compact portable solution. Or maybe you just want to build something new with it and a brand new drive? Either way, the Orico NVMe M.2 enclosures should serve you well.
Pros
- Good build quality
- Compatibility with USB-C/Thunderbolt3 and USB-A
- Compatible with 2230, 2242, 2260 and 2280 drive modules
- Up to 10Gbps bandwidth
- Easy assembly
Cons
- The included cables might be too short for some people’s taste. Depends where you’re going to use it.
“Quality enclosures for your speedy NVMe drives, that’s the Orico PCM2-C3 and TCM2-C3. One both types of taste, sleek aluminium or differently transparent.”

Thank you, Orico, for providing us with this sample.