QNAP TS-251 High-Performance 2-Bay Prosumer NAS Review
Bohs Hansen / 9 years ago
Setup – Users, Services & Backup
We’ve done our basic initialization and the system is running, what we need now are some users, user groups, and network shares.
Users
Creating new users is a breeze with the QNAP TS-251 and QTS 4.2, a few clicks and details and we will be done with this step, whether it’s one or a lot.

QTS offers the ability to create a single user at a time or create multiple users at the same time. The latter is useful when you need a lot of accounts with a similar name, for example if you’re holding a seminar where every attendee needs access to files.

We’re sticking to single user creation for now, as that is the most likely scenario for home users. You can set a lot of optional information about each user, such as a description, profile photo, phone number, and email. But the only ones you need to set are the actual username and password.

You can assign the user directly to a user group if you already created any, administrators are created by default. You can also set app and folder permissions right away for each single user.

User Groups
User groups is an easy way to keep track of settings and users. By grouping them, you only need to set access rights for the group and not every individual. For the most part, you’ll grant a lot of the same access to the same type of users, might as well do it the easy way.

Creating a user group is very similar to creating a user, just without the personal details and password. You can assign who you want to be in the group from already created users and set access rights to folders.

Shared Folders
Shared folders are basically what we want the NAS for. After all, NAS stands for network attached storage. We can create folders directly onto our disk volumes or create shares from ISO files too. There are a couple of default folders for the apps and standard features, but there is a good chance that you’ll need more.

Good thing that it is just as easy to create them as it was for the users. Provide a folder name and optional comment, select the volume and you’re good to go.

You can also change who has access to the new folder and some of the settings before you create it. Nothing to worry about if you change your mind later, you can always edit the settings.

Services
There are a few services that run by default, but other than that it is up to you and your needs what you want to turn on and what not. There is no need to have anything running and consuming energy if you don’t need it.

Microsoft Networking is turned on by default and it is the most likely one you’re going to use. You can change the NAS description and workgroup right here and this is also where you can set the servers Windows settings.

The advanced options button hides a few more features that you might be looking for, among them WINS and SMB version.

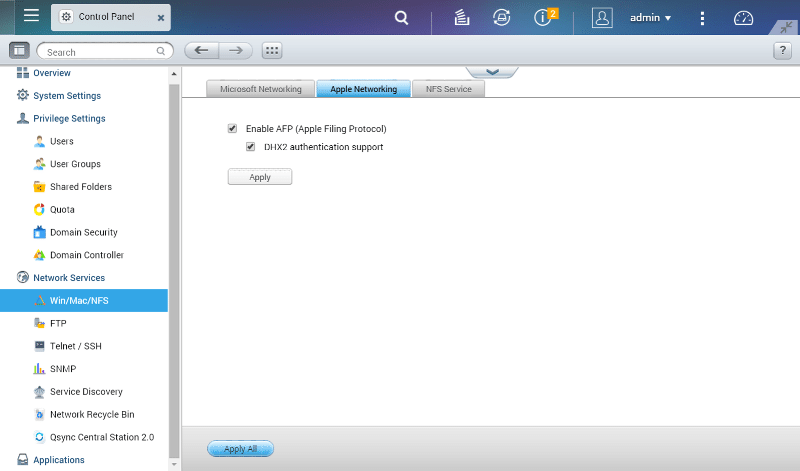
Apple and NFS networking are turned off by default, but it’s just a checkbox away from being turned on and ready. Enable if you need it, leave it out if you don’t.


The FTP protocol has always been one of my favorite ways to transfer files and control servers. It’s simple and does what it needs to do; it is also one of the services that are turned on by default.

UPnP is also supported and it is one of those things that makes network setup a lot easier. With UPnP, networking becomes as easy as plug and play. If your router has UPnP running, the NAS can tell it itself what ports to open and redirect without you having to manually configure it.

Basic Settings
The last few basic settings you might want to take a look at right away are located within the System Settings.

The General Settings allow you to change everything from the servers name to time settings and the login screen. While all of it is important, the server name is probably what you want to change first, to make it easy recognizable in your network environments.

The QNAP TS-251 supports port trunking and link aggregation thanks to the two Gigabit Ethernet ports, so this is another place you might want to stop by right away. Which of the many modes you pick and whether you want to bundle the connections at all, that’s up to you and your network.

The Hardware settings allow you to change a few useful aspects of the NAS, such as enable or disable the physical reset switch and when to enter standby mode. The TS-251 also features the ability to dim the LEDs, either permanent or based on a schedule; turn those lights down at night and up during the day.

If you didn’t update the firmware when prompted, you’ll find the option to do so under System Settings. You can check online for new versions or upload a file manually for offline updating.

The System Logs aren’t really a setting, but they are a great place to go when troubleshooting or when you’re just curious on what is happening on and with your NAS.


